
Blooming
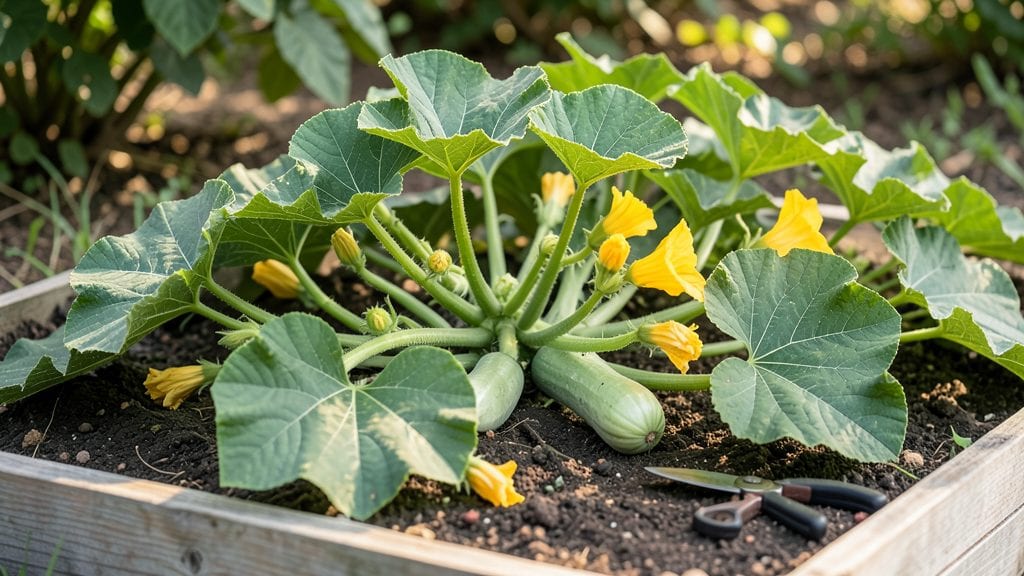
Transform your garden into a buzzing haven by nurturing a thriving squash blossom plant—where every vibrant flower draws bees and butterflies with ease. I’ve learned that even small spaces can produce stunning, pollinator-friendly blooms when you focus on compact varieties like ‘Eight Ball’ zucchini or ‘Jack Be Little’ pumpkin.
The key isn’t just planting—it’s creating an environment where flowers thrive and pollinators can’t resist.
These plants need full sun—at least six hours daily—and soil that drains well but stays consistently moist. I’ve seen blossoms wilt when watered inconsistently, so a drip irrigation setup or deep watering every other day makes all the difference.
The right balance turns fragile-looking flowers into robust blooms that keep coming back all season.
What you’ll end up with is a garden teeming with life: bees darting between blossoms, hummingbirds hovering for nectar, and—if you’re lucky—plump squash forming on the vines. The flowers themselves are edible, too, adding a delicate, floral note to salads or garnishes.
With a little attention, your compact patch becomes a magnet for pollinators and productivity.
Whether you’re growing for food, beauty, or both, the same principles apply. Start small, observe what works, and let the plants guide you. The best part? Every blossom you nurture today could turn into tomorrow’s harvest—or a breathtaking centerpiece in your garden.
📚 In This Guide
- What you need
- Instructions
- Tips and common mistakes
- Wrapping up and next steps
What you need
- ● Squash seeds or seedlings: Choose Cucurbita pepo (zucchini, pattypan) or Cucurbita moschata (butternut) varieties for edible blossoms. Quantity: 1–3 seeds per plant (or 1–2 seedlings).
- ● Well-draining potting mix: A blend of 60% compost, 30% coconut coir, and 10% perlite (or use a pre-mixed vegetable garden soil). Quantity: 2–3 gallons per plant.
- ● Container or garden bed: Containers: 5-gallon pots with drainage holes (minimum 12–18 inches deep). Quantity: 1 per plant.
- ● Garden beds: Full sun (6+ hours/day) and space for vines to spread (3–5 feet diameter).
- ● Fertilizer: Balanced organic fertilizer (e.g., 5-5-5) or compost tea. Quantity: 1 tbsp per plant at planting + monthly feedings.
- ● Hand trowel or small shovel (for transplanting).
- ● Watering can or hose with gentle spray nozzle (squash hates soggy roots!).
- ○ Trellis or cage (optional, for bush varieties like ‘Eight Ball’ zucchini).
- ● Pruning shears (to harvest blossoms and encourage more growth).
- ● Pollinator-friendly companion plants: Marigolds, nasturtiums, or borage (plant nearby to attract bees!).
Step-by-step instructions for cultivating squash blossoms in small gardens
Here's how I coax vibrant, pollinator-friendly squash blossoms from compact spaces—no sprawling vines required.
Select Compact Varieties and Prepare Containers
Choose bush-type squash varieties like 'Eight Ball' or 'Patio Star' to maximize bloom production in limited space. These determinate types grow 3-4 feet tall and produce flowers without sprawling vines. Fill 12-inch diameter containers with 3 gallons of well-draining potting mix—I always amend with 1 cup of compost to ensure nutrient-rich soil. The key is drainage: add a 2-inch layer of perlite at the bottom of each pot to prevent root rot.
Plant one seedling per container, burying the stem up to the first set of true leaves. This encourages stronger root development. Water thoroughly until moisture runs from the drainage holes—this ensures the root ball settles and eliminates air pockets. Place containers where they’ll receive 6-8 hours of direct sunlight daily, as squash blossoms demand full sun to thrive.
Fertilize and Prune for Optimal Bloom Production
After the first true leaves appear, apply ½ teaspoon of balanced 10-10-10 fertilizer mixed into the top inch of soil. This gives seedlings a gentle nutrient boost without overwhelming them. I repeat this every 2-3 weeks during the growing season, but I halve the amount in containers to avoid salt buildup. Over-fertilizing leads to lush foliage at the expense of blossoms—your goal is flower-to-leaf ratio, not just leafy growth.
When plants reach 12 inches tall, pinch off the first few blossoms. This might sound counterintuitive, but it redirects the plant’s energy into developing stronger stems and more productive blooms later. Watch for yellowing leaves—this signals overwatering or nutrient imbalance. Adjust watering immediately to keep soil evenly moist but not soggy, as squash roots rot easily in waterlogged conditions.
Hand-Pollinate for Reliable Fruit Set
Squash blossoms often need a helping hand, especially in containers where wind and bees are limited. On mild, dry mornings, use a small paintbrush to transfer pollen from male (long-stemmed) to female (small squash at the base) flowers. I do this between 8-10 AM when blossoms are fully open. Female flowers will develop into fruit within 7-10 days if pollination succeeds.
Remove any male blossoms that don’t get pollinated to prevent energy waste. You’ll know a flower is female if it has a tiny squash at its base—these are your priority for hand-pollination. Prune any yellow or wilted blossoms immediately to redirect the plant’s resources toward healthy growth. This step is critical for container-grown squash, where natural pollinators are less active.
Maintain Soil and Support Growth
Every 2 weeks, top-dress containers with ½ cup of compost to replenish nutrients. Squash blossoms are heavy feeders, and containers deplete soil faster than in-ground beds. Water at the base of the plant in the morning to encourage deep root growth and prevent fungal diseases. Avoid wetting leaves, as this invites powdery mildew—a common issue with squash in humid conditions.
Use small tomato cages or stakes to support vines as they grow. This keeps blossoms accessible for pollination and prevents them from sprawling onto the ground, where they risk rotting. If you notice blossoms dropping without setting fruit, check for aphids or spider mites on the undersides of leaves. A neem oil spray applied every 7 days keeps pests at bay without harming pollinators.
Tips & tricks for cultivating vibrant squash blossoms in containers
These proven strategies will help you maximize bloom production and ensure your compact squash plants thrive in limited spaces.
Container Selection Matters: While the instructions specify 12-inch containers, I've found that 14-inch diameter pots provide even more stability for taller varieties like 'Patio Star'. The extra space allows for better root development and prevents the plant from becoming root-bound as it grows toward its 3-4 foot height. For urban balconies, consider using lightweight fabric grow bags—they're breathable and help prevent waterlogging better than traditional plastic pots.
Soil Science for Blooms: The 1 cup of compost recommendation is excellent, but I take it a step further by mixing in ¼ cup of worm castings into the 3 gallons of potting mix. This boosts microbial activity which directly supports root health and nutrient uptake—the foundation for prolific blooming. The 2-inch perlite layer should be coarse perlite, not fine, to prevent compaction and maintain optimal drainage throughout the plant's growth cycle.
Fertilizer Timing Strategy: The instructions recommend halving the fertilizer amount in containers, but I've refined this approach. Instead of applying the full ½ teaspoon every 2-3 weeks, I use ¼ teaspoon every 2 weeks during the active blooming period (when you see flowers developing). This prevents salt buildup while maintaining consistent nutrient availability. I also switch to a low-phosphorus fertilizer (like 5-5-5) once flowers appear to encourage more blooms rather than leafy growth.
Pollination Hack: For those early morning hand-pollination sessions between 8-10 AM, I've found that using a soft makeup brush works better than a paintbrush. The softer bristles are gentler on delicate blossoms and transfer pollen more effectively. After pollinating, I like to place a small beeswax wrapper over female flowers overnight—this creates a microclimate that helps set fruit more reliably, especially in cooler container environments.
Pro Tips for Squash Blossom Plant
- These proven strategies will help you maximize bloom production and ensure your compact squash plants thrive in limited spaces.
- Container Selection Matters: While the instructions specify 12-inch containers, I've found that 14-inch diameter pots provide even more stability for taller varieties like 'Patio Star'.
- Soil Science for Blooms: The 1 cup of compost recommendation is excellent, but I take it a step further by mixing in ¼ cup of worm castings into the 3 gallons of potting mix.
Frequently asked questions
Got questions about growing squash blossom plants?
You’re not alone! Here are answers to the most common queries—from pollination tips to troubleshooting—so you can enjoy these vibrant blooms with ease.
How do I encourage more squash blossoms to appear?
Squash blossoms thrive with consistent care! Ensure your plant gets 6–8 hours of sunlight daily, well-draining soil, and regular watering (keep soil moist but not soggy). Prune excess leaves to boost airflow, and fertilize lightly with a balanced 10-10-10 mix every 2–3 weeks. Pro tip: Hand-pollinate stubborn flowers by transferring pollen with a paintbrush!
When is the best time to harvest squash blossoms?
Pick blossoms in the morning when they’re fully open but still fresh—typically 3–5 days after blooming. Use clean scissors to snip the stem just above a leaf node. Harvesting early ensures tender petals and encourages more blooms. Bonus: Wear gloves if you’re sensitive to squash plant sap!
Why aren’t my squash blossoms turning into fruit?
Lack of pollination is the #1 culprit! Squash rely on bees or wind. If blooms drop without fruiting, try hand-pollinating (see above) or check for pests like squash vine borers. Male flowers (with long stems) won’t produce fruit—focus on female flowers (tiny squash at the base). Over-fertilizing with nitrogen can also reduce fruiting.
Can I grow squash blossoms in containers or small spaces?
Compact varieties like ‘Eight Ball’ zucchini or ‘Patio Star’ pumpkin thrive in 5-gallon containers with trellises to save space. Use lightweight potting mix and ensure containers have drainage holes. Tip: Place pots near pollinator-friendly flowers (like marigolds) to attract bees naturally!
What should I do if my squash blossoms wilt or turn yellow?
Wilting often signals underwatering or overwatering—check soil moisture. Yellowing leaves may indicate nutrient deficiency (add compost or a balanced fertilizer) or fungal issues (like powdery mildew). Improve airflow, avoid wetting foliage, and remove affected leaves. Preventative tip: Space plants 2–3 feet apart for better circulation!
Are squash blossoms edible? How do I use them?
Yes! They’re a delicate, floral treat in cooking. Dip in batter and fry (like tempura) or toss into salads. Harvest early for the best flavor—petals should be fully open but not wilted. Note: Avoid pesticides 24 hours before harvesting for edible blooms.
Wrapping up and next steps
Growing a squash blossom plant is a rewarding way to attract pollinators, boost your garden’s beauty, and even enjoy delicious harvests—all in a compact space! 🌿 Whether you’re a beginner or a seasoned gardener, these vibrant blooms prove that big rewards come in small packages. Ready to dive in?
Your next step? Pick your favorite squash variety, gather your supplies, and start planting—your garden (and the bees!) will thank you. Happy growing! 🌱