
Pruning
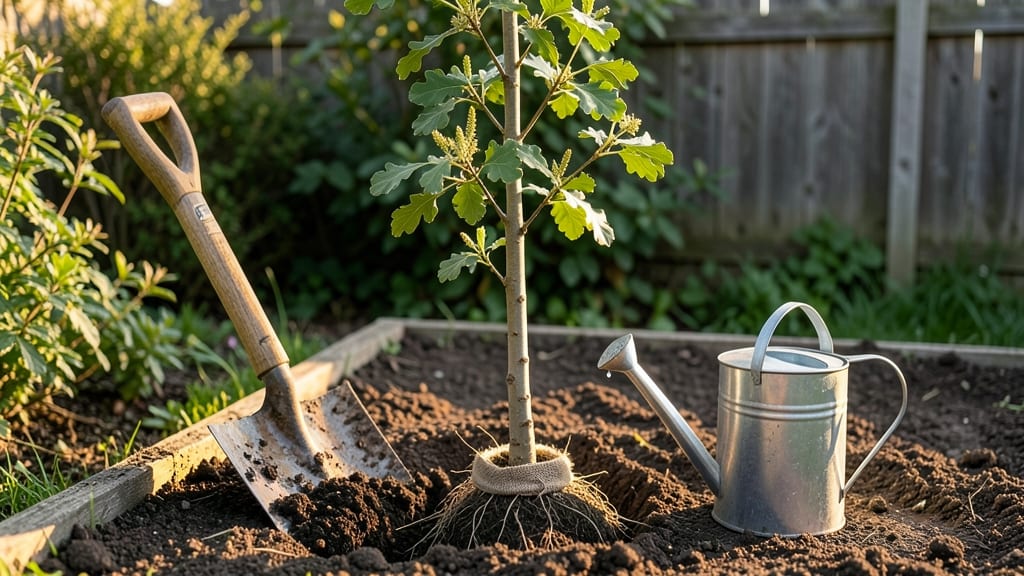
The right tree planting process turns a bare hole into a decades-long anchor for your landscape. I’ve planted over 50 trees, and the difference between a thriving specimen and a struggling one often comes down to those first few hours in the ground.
The soil, the depth, even the time of year can make or break root development—so let’s get this right from the start.
You’ll need basic tools—a shovel, gloves, and a watering can—but the real secret is patience. Dig a hole twice as wide as the root ball but no deeper, loosen the roots if they’re circling, and backfill with native soil mixed with compost.
Water deeply right after planting to eliminate air pockets, then mulch to protect the roots and keep moisture in. Evergreens and deciduous trees both need this care, though evergreens benefit from extra winter protection.
Within a year, you’ll see strong new growth signaling healthy roots taking hold. The first few weeks are critical—consistent watering and avoiding heavy foot traffic around the base set the stage for long-term success.
I’ve seen trees planted this way grow into sturdy shade providers or fruit-bearing giants, while others planted carelessly struggle for years to catch up.
Season matters too: spring and fall are ideal, but container-grown trees can go in almost any time. For container trees, remove the pot and inspect roots before planting—this is your chance to fix any issues before they become permanent.
Let’s walk through each step so your tree starts its life with the best possible foundation.
📚 In This Guide
- What you need
- Instructions
- Tips and common mistakes
- Wrapping up and next steps
What you need
- ● Tree seedlings or saplings: Choose healthy, disease-free specimens with strong root systems. Quantity depends on your project (e.g., 1-10+ for small gardens, 50+ for reforestation).
- ● Shovel or spade: A round-point shovel (18-24 inches wide) for digging holes efficiently.
- ● Garden gloves: Heavy-duty, water-resistant gloves to protect your hands.
- ● Watering can or hose: With a gentle spray nozzle for post-planting hydration.
- ● Mulch: Organic mulch (e.g., wood chips, straw) or inorganic (e.g., gravel) to retain moisture and suppress weeds. Aim for 2-4 inches of coverage.
- ○ Soil amendments (optional but helpful): Compost (1-2 gallons per tree) to improve soil fertility.
- ● Mycorrhizal fungi powder (follow package instructions) to boost root growth.
- ● Staking kit (if needed): For young or tall trees: 2-3 stakes, tension straps or soft ties, and a mallet for securing.
- ● Measuring tape or ruler: To ensure proper hole depth (typically 2-3 times the root ball’s diameter).
- ● Pruners or shears: For trimming damaged branches or roots.
- ● Site preparation: Clear debris, rocks, or invasive plants from the planting area. Test soil pH (ideal range: 5.5-7.0 for most trees).
- ● Weather check: Plant on a cloudy day or early morning to reduce transplant shock. Avoid extreme heat or frost.
- ● Permits (if applicable): Check local regulations for large-scale planting or native species.
- ● Safety gear: Closed-toe shoes, long sleeves, and sunscreen for outdoor work.
Step-by-Step guide for planting trees with healthy root systems
Here’s how to plant trees that thrive from the first season—strong roots and all.
Choose the Right Location and Prepare the Hole
Select a spot with 6+ hours of sunlight daily unless planting shade-tolerant species. Dig a hole twice as wide as the root ball but no deeper—this prevents water pooling at the roots. I always check the hole’s depth by placing the tree in it; the top of the root ball should sit 1-2 inches above ground level to allow for settling.
Loosen the soil at the bottom of the hole with a shovel or hands to encourage root spread. If your soil is heavy clay, mix in 2-3 inches of compost from the ingredients list to improve drainage. Avoid amending the entire hole—just focus on the bottom where roots will first grow.
Remove the Tree from Its Container and Inspect Roots
Gently squeeze the sides of the container to loosen the root ball before lifting the tree out. If roots are circling tightly around the edges, use a knife to score the root ball every 2-3 inches—this encourages outward growth instead of strangling the tree. Shake off excess soil but leave the root ball intact; disturbing roots too much stresses the tree.
Check for any damaged or mushy roots—trim these with clean pruners. Healthy roots should be white or light tan and firm to the touch. If the root ball feels dry, soak it in a bucket of water for 10-15 minutes before planting. You’ll know it’s ready when water runs freely from the bottom.
Position the Tree and Backfill the Hole
Place the tree in the hole so the root flare (where the roots spread from the trunk) sits level with the surrounding soil. Fill the hole with the removed soil, tamping it down gently every 2-3 inches to remove air pockets. Avoid compacting the soil too firmly—roots need space to expand.
Create a watering basin by mounding soil slightly higher around the edges of the hole. This ensures water pools at the roots instead of running off. Water deeply right after planting to settle the soil and eliminate air gaps. You’ll see the soil sink slightly as it absorbs moisture—this is normal and indicates proper settling.
Mulch and Water for Long-Term Stability
Spread 2-3 inches of mulch over the soil surface, keeping it 6 inches away from the trunk to prevent rot. Use the 4 bags of wood chips evenly, ensuring the layer isn’t too thick—this can suffocate roots. Mulch helps retain moisture and regulates soil temperature, but it’s not a substitute for watering.
Water the tree once a week for the first month, providing 10-15 gallons total to encourage deep root growth. After that, water every 2-3 weeks unless there’s no rain for a month. Overwatering is just as harmful as underwatering—check soil moisture by sticking your finger 2 inches deep; if it’s dry, it’s time to water.
Stake Only If Necessary and Prune for Health
Skip staking unless the tree is taller than 6 feet or in a windy area. If you do stake, use two stakes positioned diagonally from the tree, tied loosely with soft material to avoid girdling the trunk. Remove stakes after 6-12 months to prevent the tree from becoming dependent on them.
Prune any broken, crossing, or diseased branches with clean pruners. Focus on removing no more than 25% of the foliage—this ensures the tree can photosynthesize enough to support root growth. Avoid heavy pruning in the first year; let the tree focus its energy on establishing roots.
Tips & tricks for planting trees with strong roots
These practical insights will help you avoid common pitfalls and give your newly planted trees the best chance to thrive from day one.
Root Ball Preparation: In Step 2, when scoring the root ball every 2-3 inches, be gentle but thorough. I’ve seen roots circle so tightly they actually strangle the tree as it grows. Use a sharp knife to make clean cuts, and don’t worry about disturbing the root ball too much—it’s already stressed from being in a container. The goal is to encourage outward growth rather than maintaining the container’s circular shape.
Soil Depth Matters: The 1-2 inches above ground level for the root ball isn’t just a suggestion—it’s critical. In Step 1, when you place the tree, imagine the root flare sitting level with the surrounding soil. Planting too deep can suffocate the roots, while planting too shallow exposes them to temperature extremes. Use a level or even a small board to check that the root flare sits perfectly at ground level.
Watering Wisdom: That first deep watering after planting in Step 3 isn’t just about settling the soil—it’s about eliminating air pockets that would otherwise prevent roots from making contact with moist soil. I’ve seen trees planted in holes that were only 80% filled with soil because people didn’t water enough to compact it properly. After watering, you should see the soil settle about an inch—this confirms proper contact between roots and soil.
Mulch Application: When spreading that 2-3 inches of mulch in Step 4, remember that less is often more. I’ve seen people pile mulch up against tree trunks, creating the perfect environment for rot. Keep it 6 inches away from the trunk and spread it evenly—think of it as a protective blanket that regulates temperature and retains moisture without smothering the tree.
Pro Tips for Tree Planting Process
- These practical insights will help you avoid common pitfalls and give your newly planted trees the best chance to thrive from day one.
- Root Ball Preparation: In Step 2, when scoring the root ball every 2-3 inches, be gentle but thorough.
- Soil Depth Matters: The 1-2 inches above ground level for the root ball isn’t just a suggestion—it’s critical.
Frequently asked questions
Got questions about the tree planting process?
You’re not alone! Here are some of the most common concerns—plus clear, actionable answers to help you plant with confidence.
What’s the best time of year to plant a tree?
The ideal window is late fall to early spring (before buds swell or leaves appear). This gives roots time to establish before summer heat or winter stress. Avoid planting in extreme temperatures—spring is the safest bet for most climates. Pro tip: If you must plant in summer, water deeply every 2–3 days to mimic rainy conditions.
How long does it take for a tree to fully establish?
Most trees take 1–3 years to fully establish, depending on species, soil quality, and care. Young trees (under 3 years) are most vulnerable—focus on consistent watering and mulching. Signs of success? New growth in spring and stable roots (test by gently tugging the trunk—it shouldn’t wobble after Year 2).
How often should I water a newly planted tree?
Water deeply 2–3 times per week for the first year, soaking the root ball (1–1.5 feet down). After that, taper to once a week (or more in drought). Overwatering is worse than underwatering— check soil moisture: Stick your finger 2 inches deep; if dry, water again. Mulch helps retain moisture (keep it 3–4 inches thick, 6 inches from the trunk).
Can I plant a tree in clay or rocky soil?
Yes! Amend clay soil with compost or organic matter to improve drainage. For rocky soil, choose drought-tolerant species (like oaks or pines) and dig a hole twice as wide as the root ball to encourage root spread. If roots hit rock, gently prune them (with sterilized shears) and redirect growth downward—never force a tree into a hole that’s too small.
My tree’s leaves are yellowing—what went wrong?
Yellow leaves often signal overwatering, underwatering, or poor drainage. Check the soil:
Mushy roots? You’re overwatering—reduce frequency and improve drainage.
Crusty soil? Underwatering—water deeply and mulch.
Wilting + yellow? Possible root rot—trim affected roots and replant with amended soil.
Pro tip: Fertilize only if needed—new trees thrive on natural soil microbes. Wait until Year 2 unless leaves are pale (then use a balanced, slow-release fertilizer).Wrapping up and next steps
Planting a tree isn’t just about digging a hole—it’s about nurturing the future of our planet, one root at a time! 🌱 From choosing the right soil to watering with care, every step matters for strong, thriving growth.
Whether you’re a gardening pro or a curious beginner, you now have the tools to plant with confidence.
Ready to take action? Pick your spot, grab your shovel, and start planting today! Your trees—and the environment—will thank you for years to come. 🌳💚