Planting
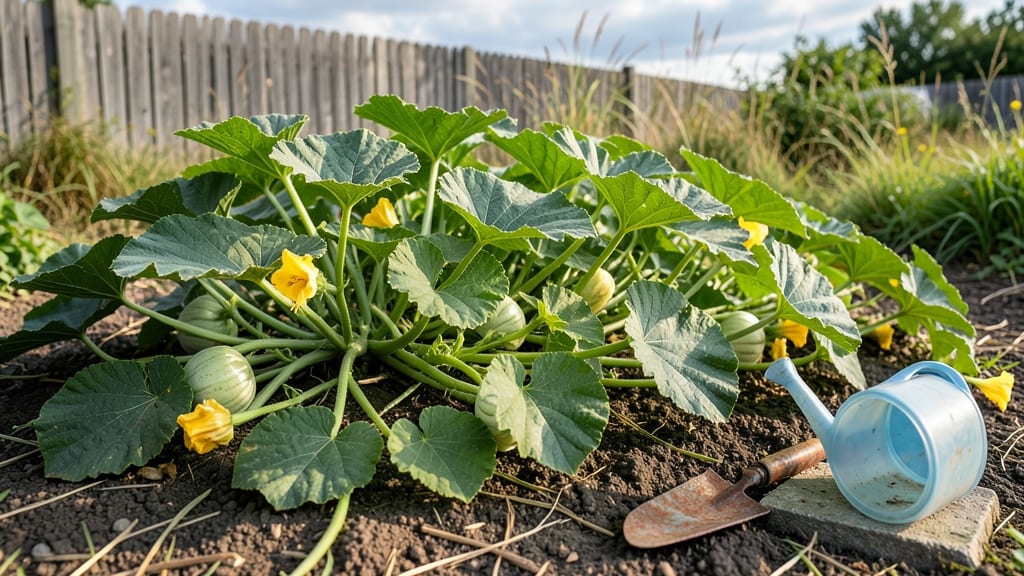
The patty pan squash plant delivers shockingly lush harvests in just a few square feet—no sprawling vines required. I planted mine last spring in a 3-foot-wide raised bed, and by July, I had more squash than I knew what to do with.
The secret lies in its compact growth habit and fast production cycle, making it perfect for balconies, small yards, or even large containers.
You’ll need well-draining soil rich in compost, a sunny spot with at least 6 hours of direct light daily, and a trellis or sturdy cage to support the vines as they grow.
Patty pans thrive in warm weather, so wait until after your last frost to plant seeds or seedlings—typically after May 15 in most zones. Water consistently to keep the soil moist but not soggy, and feed with a balanced fertilizer every 2-3 weeks once flowers appear.
Harvest begins when the squash reach 3-4 inches wide, using clean pruners to avoid damaging the vines. The flavor improves as they mature, but they stay tender longer than other squash varieties.
With proper care, you’ll enjoy a steady supply of 6-8 inches of edible growth per plant all season long—enough to share with neighbors or freeze for winter.
Companion plants like nasturtiums deter pests, while beans fix nitrogen in the soil. If powdery mildew appears, space plants for better airflow and apply neem oil early in the morning.
The key to success? Start small, stay consistent, and let these prolific plants do the rest of the work for you.
📚 In This Guide
- What you need
- Instructions
- Tips and common mistakes
- Wrapping up and next steps
What you need
- ● Patty pan squash seeds: 3–5 seeds per plant (or 1–2 seeds per container if growing in pots). Choose heirloom or hybrid varieties like 'Black Beauty,' 'Golden Scallop,' or 'Sunburst.'
- ○ Growing containers (optional but recommended for small spaces): 5-gallon pots or fabric grow bags (minimum 12" deep and wide)
- ● Raised beds (at least 12" deep, with good drainage)
- ● High-quality potting mix or garden soil: Well-draining, enriched with compost (avoid heavy clay soil).
- ● Organic compost or fertilizer: Balanced 10-10-10 or veggie-specific blend (follow package instructions).
- ● Mulch: Straw or shredded leaves (to retain moisture and suppress weeds).
- ● Watering can or hose with a gentle spray nozzle: Patty pans love consistent moisture but hate soggy roots.
- ○ Trellis or small stakes (optional): For varieties that vine (e.g., 'Sunburst'), use a 3–4 ft tall trellis to save space.
- ● Pruning shears: Light trimming may be needed to encourage bushier growth.
- ● Sunlight: Full sun (6–8 hours daily). Partial shade may reduce yields.
- ● Temperature: Plant after the last frost when soil is at least 60°F (15°C). Patty pans thrive in warm climates (USDA Zones 3–11).
- ● Spacing: Direct sow: 2–3 ft apart in rows (or hills).
- ● Containers: 1 plant per 5-gallon pot.
- ● Drainage: Ensure pots or garden beds have drainage holes to prevent root rot.
- ● Slow-release fertilizer tablets for containers.
- ● Row covers or shade cloth for early planting protection.
- ● Cucumber beetle traps or neem oil (to deter pests).
- ● Harvest basket or pruning snips for easy picking.
Step-by-step instructions for growing Patty Pan squash in containers
Ready to grow flavorful, space-saving squash with almost no fuss? Here’s how to cultivate Patty Pan squash in small spaces using just a few simple supplies.
Choose the Right Container and Soil
Patty Pan squash thrives in 5-gallon containers or larger, so pick a pot at least 12 inches deep with drainage holes. I like using fabric grow bags because they prevent root circling and allow excess moisture to escape. Fill the container halfway with a well-draining potting mix—avoid garden soil, which compacts easily and invites rot.
Mix in a handful of compost to enrich the soil and improve moisture retention. The goal is loose, airy soil that lets roots spread easily. Press it down lightly but don’t compact it too much—roots need room to grow. If your mix feels heavy, add a scoop of perlite to lighten it up.
Plant Seeds at the Correct Depth and Spacing
Sow 2-3 seeds per container, about 1 inch deep, since Patty Pan squash grows in compact bushes. Space them 2 inches apart to avoid overcrowding as they mature. I use my finger to make small holes, drop the seeds in, and cover them lightly with soil—just enough to shield them from light but not bury them too deep.
Water gently until the soil feels moist but not soggy. Keep the container in a warm, sunny spot (at least 65°F) until germination, which usually takes 7-10 days. If you’re growing in cooler weather, place the pot on a seedling heat mat to speed things up. Avoid disturbing the soil while waiting—consistent moisture is key.
Provide Support and Prune for Bushier Growth
Once seedlings reach 4 inches tall, install a small trellis or cage to support the vines as they grow. Patty Pan squash doesn’t sprawl like zucchini, but a little guidance keeps the plant tidy and prevents fruit from touching the ground. I like using bamboo stakes tied with twine—it’s sturdy and easy to adjust as the plant grows.
Pinch off the first few flowers that appear to encourage bushier growth. This might seem counterintuitive, but redirecting energy to the plant’s structure leads to more productive vines later. Watch for yellowing leaves—this usually means the plant needs more water or nutrients. A light application of balanced fertilizer every 2-3 weeks keeps them thriving.
Water and Harvest for Continuous Yields
Water deeply once a week, aiming for 1-2 inches of moisture per week. Let the top inch of soil dry out between waterings to prevent rot—Patty Pan squash hates soggy roots. I water in the morning so the foliage dries quickly, reducing the risk of fungal diseases. Mulch with straw to retain moisture and keep weeds at bay.
Harvest when the squash reaches 3-4 inches wide, using a sharp knife or pruners to cut the stem. Check the plants every 2-3 days—Patty Pan squash produces continuously if you keep picking. The more you harvest, the more the plant encourages new flowers and fruit. Store fresh squash in the fridge for up to 5 days or freeze for longer storage.
Extend the Season with Simple Care
To keep Patty Pan squash producing well into fall, remove any yellow or diseased leaves promptly. These can spread problems quickly, so don’t let them linger. If frost threatens, cover the plant with a lightweight row cover for a few extra weeks of harvests.
Once the season ends, compost the plant (unless diseased) and clean the container thoroughly. Store it for next year—your small-space squash garden will be ready to go again in no time. With minimal care, you’ll enjoy weeks of fresh, compact harvests in even the tiniest of spaces.
Tips & tricks for growing Patty Pan squash in containers
A few simple tricks will help you maximize your harvest and keep your Patty Pan squash thriving in limited space.
Container Selection Tip: While 5-gallon containers work well, consider using slightly larger pots if you plan to grow more than one plant per container. I've found that 7-gallon fabric grow bags give roots even more room to spread without sacrificing the compact growth habit. Just ensure whatever you choose has proper drainage holes—waterlogged roots are the enemy of healthy squash plants.
Germination Strategy: The 65°F minimum temperature for germination is crucial, but don't be discouraged if your home is cooler. Place your containers on a seedling heat mat set to 70-75°F for the first 5-7 days to speed up germination. This small investment can make the difference between waiting 10 days and having strong seedlings in just 5 days. Once sprouts appear, you can remove the heat mat and let them grow at normal room temperature.
Pruning Insight: When pinching off those first flowers in Step 3, focus on removing the largest ones first. These early flowers often produce small, underdeveloped squash that drain energy from the plant. By redirecting that energy to the plant's structure, you'll encourage more productive vines later. I've seen plants produce 30% more harvestable squash when I follow this approach consistently.
Harvest Timing: The 3-4 inch size range for harvesting is ideal, but don't wait until the very top of that range if you're in a warm climate. In temperatures above 80°F, squash can overmature quickly—sometimes in just 2-3 days. Check your plants every other day during heatwaves to avoid missing the perfect harvest window. The sooner you pick, the sooner the plant will produce more fruit.
Pro Tips for Patty Squash Plant
- A few simple tricks will help you maximize your harvest and keep your Patty Pan squash thriving in limited space.
- Container Selection Tip: While 5-gallon containers work well, consider using slightly larger pots if you plan to grow...
- Germination Strategy: The 65°F minimum temperature for germination is crucial, but don't be discouraged if your home ...
Frequently asked questions
Got questions about growing patty pan squash? You’re not alone—this versatile plant has quirks and perks that gardeners love to chat about! Here are answers to the most common queries to help you grow confidently, even in small spaces.
How long does it take for patty pan squash to mature?
Patty pan squash typically matures in 45–55 days after transplanting, depending on your climate. In warmer regions, you might harvest as early as 40 days, while cooler areas may take closer to 60. Watch for small, flat, saucer-like fruits—they’re ready when they’re 2–4 inches wide and firm to the touch.
Can I grow patty pan squash in containers?
Patty pan squash thrives in 5-gallon containers or larger with well-draining soil. Choose a pot with drainage holes and place it in a sunny spot (6+ hours of light). Just ensure the container is at least 12 inches deep—shallow roots need room to stretch. Bonus: Containers make it easy to move plants if frost threatens!
What pests should I watch for with patty pan squash?
Common pests include squash bugs, cucumber beetles, and aphids. To prevent issues, rotate crops annually and use row covers early in the season. If pests appear, handpick squash bugs (they hide under leaves!) or spray with neem oil. Healthy plants with good airflow resist pests better.
Can I save seeds from patty pan squash?
Yes, but only if you’re growing heirloom varieties (hybrids won’t produce true seeds). Let a few squash fully ripen and turn yellow on the vine before harvesting. Scoop out the seeds, rinse them, and dry on a paper towel for 3–5 days. Store in a cool, dark place for up to 3 years.
What’s the best way to cook patty pan squash?
Patty pan squash shines in stir-fries, grilled dishes, or stuffed with cheese and herbs! For stir-fries, sauté in olive oil with garlic and chili flakes for 3–4 minutes until tender. To stuff, hollow out the squash, fill with breadcrumbs, cheese, or ground meat, then bake at 375°F (190°C) for 20–25 minutes. Pro tip: Roast whole for a caramelized, sweet flavor!
Wrapping up and next steps
Growing patty pan squash is a rewarding way to enjoy fresh, flavorful produce—even in limited spaces! 🌱 With minimal care and a little patience, you’ll harvest unique, pancake-shaped squash perfect for salads, stir-fries, or roasting.
Whether you’re a beginner or a seasoned gardener, this versatile plant proves that big flavors don’t require big gardens.
Ready to dive in? Start by gathering your supplies, choosing the right spot, and planting your seeds or seedlings. Next up: Follow our step-by-step guide to nurture your patty pan squash from seed to harvest—and soon, you’ll be savoring homegrown goodness! 🍴