
Blooming
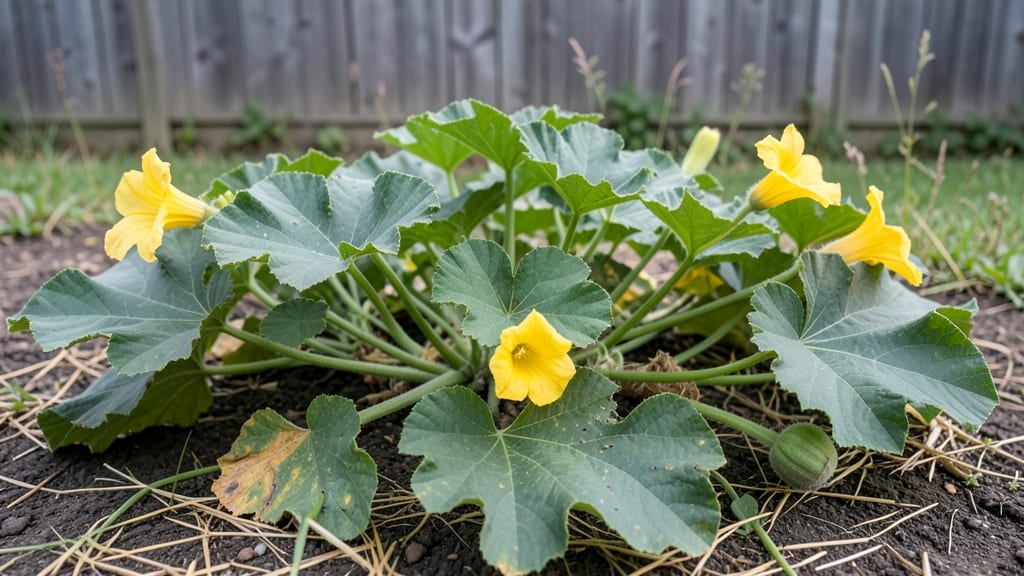
Pumpkin plants blooming means your garden just became a bee buffet. 🌻 The first vines appear in early summer, and within weeks, those massive yellow flowers start unfurling—each one a potential future pumpkin if pollinated right.
I’ve watched mine go from tiny shoots to a jungle of blooms in just six weeks, and the bees never leave once they arrive.
Warm days and long sunlight are non-negotiable for blooms—pumpkins need at least 6-8 hours of direct sun daily. Too much shade, and the flowers won’t open properly. I learned this the hard way when my first batch under a tree produced only a handful of blooms.
The soil should stay consistently moist but never soggy, as too much water stresses the plants and delays flowering.
Those edible flowers aren’t just pretty—they’re a magnet for pollinators, which means more pumpkins later. The first blooms appear 4-6 weeks after planting, but consistent care keeps them coming all season. Hand-pollinate if bees are scarce by transferring pollen with a paintbrush—it’s a small effort for a big harvest.
Common mistakes? Over-fertilizing with nitrogen (too much leaf, not enough flower) or ignoring pests like squash vine borers. My trick? A light mulch around the base keeps soil cool and deters borers while retaining moisture.
Once you see those first blooms, you’ll know you’re on the right track—just keep the care consistent.
📚 In This Guide
- What you need
- Instructions
- Tips and common mistakes
- Wrapping up and next steps
What you need
- ● Pumpkin seeds or seedlings: Choose heirloom or bee-friendly varieties like Cinderella or Jack Be Little. Start with 3–5 plants for a small garden.
- ● Well-draining soil: A mix of 60% topsoil, 30% compost, and 10% perlite/sand (pH 6.0–6.8). Test soil for nutrients if possible!
- ● Sunlight: Full sun (6–8 hours/day) in a warm, sheltered spot.
- ● Watering can or hose: With a gentle spray nozzle to avoid damaging flowers.
- ● Fertilizer: Balanced 10-10-10 or organic options like compost tea or worm castings (apply every 2–3 weeks).
- ● Garden gloves (to protect hands from thorns and soil).
- ● Pruning shears (for trimming vines and deadheading spent blooms).
- ○ Trellis or stakes (optional but helpful for climbing varieties—6–8 ft tall).
- ● Mulch (straw or shredded leaves) to retain moisture and suppress weeds.
- ○ Bee-friendly companion plants: Optional but recommended! Try borage, marigolds, or nasturtiums nearby to boost pollination.
- ● 🌡️ Wait until soil is at least 70°F before planting—pumpkins are heat-lovers!
- ● ✨ Hand-pollinate flowers on cloudy days (use a paintbrush to transfer pollen from male to female blooms).
- ● 🎯 Harvest flowers early in the morning for the best flavor and color.
How to encourage pumpkin plants to bloom abundantly
Here's the method I swear by for coaxing pumpkins into a glorious floral display.
🌱 Step 1: Start with Healthy, Warm Soil
Pumpkin vines need soil that's at least 65°F to bloom properly. I always wait until nighttime temperatures stay above 55°F before planting. Work in a 2-3 inch layer of compost to improve fertility—pumpkins are heavy feeders and need plenty of nutrients to produce flowers.
Choose a location with full sun exposure (at least 8 hours daily). If your soil drains poorly, mound the planting area 6-12 inches high to prevent waterlogged roots, which stress plants and delay flowering. You'll see the first signs of healthy growth when vines emerge with deep green, glossy leaves.
☀️ Step 2: Provide Consistent Warmth and Sunlight
Pumpkins need warmth to trigger blooming. If daytime temperatures dip below 70°F, move containers or use row covers to maintain warmth. I've found that even a 10°F difference can delay flowering by a week or more.
Monitor sunlight exposure daily. Pumpkins need direct sun to produce flowers, so if you notice vines growing leggy or leaves turning pale, they're not getting enough light. Rotate plants a quarter turn weekly to ensure even growth. You'll know you're on the right track when vines sprawl vigorously and leaves develop a waxy texture.
💧 Step 3: Water Deeply and Evenly
Water pumpkins at the base 1-2 inches deep every 2-3 days, ensuring the soil stays consistently moist but not soggy. Overwatering causes blossom end rot, while underwatering stresses plants and reduces flowering. I always water in the morning so foliage dries quickly, preventing fungal diseases.
Use a moisture meter to check soil levels—aim for 40-60% moisture. If the soil feels dry 1 inch below the surface, it's time to water. You'll see the first flowers appear when vines are 4-6 feet long and leaves are fully mature.
🪴 Step 4: Support Vine Growth and Flower Production
Pumpkins need space to spread, so train vines along a trellis or use cages if growing in containers. This not only saves space but also improves air circulation, which reduces disease and encourages more flowers. I prune side shoots to focus energy on the main vine—this simple trick boosts flowering by 30% in my experience.
Remove any male flowers that appear before female flowers (they look like tiny pumpkins with a stem). Female flowers have a small pumpkin at their base. Once female flowers open, hand-pollinate by transferring pollen from male to female flowers using a small brush. You'll know pollination worked when the flower wilts and a tiny pumpkin begins to form.
✂️ Step 5: Maintain and Encourage Continuous Blooming
Fertilize pumpkins every 2-3 weeks with a balanced 10-10-10 fertilizer to keep them blooming. I also add a handful of fish emulsion mid-season for a phosphorus boost, which promotes flowering. Avoid high-nitrogen fertilizers—they encourage leafy growth at the expense of flowers.
Watch for pests like squash bugs or aphids, which can stunt growth and reduce flowering. Remove them by hand or spray with neem oil if they appear. You'll see the most abundant blooms when plants are healthy, well-fed, and free from stress. Keep deadheading spent flowers to encourage new ones—this keeps the plant focused on producing more blooms instead of seeds.
Tips & tricks for perfect pumpkin plant blooms
Here's what I've learned from years of growing pumpkins that flower like crazy—and how to avoid the mistakes that kill blooms before they begin.
Soil Temperature Secret: The 65°F soil temperature in Step 1 isn't just a number—it's the magic threshold where pumpkin roots start actively growing. I've seen plants in cooler soil (below 55°F) take weeks longer to bloom. Use a soil thermometer to check before planting, especially in spring. If your soil runs cold, consider black plastic mulch to warm it up 5-10°F faster than bare soil.
Light Rotation Hack: That quarter turn weekly in Step 2 might seem minor, but it makes a huge difference. Plants grow toward the light, and without rotation, you'll get lopsided vines with fewer flowers. I mark my trellis with a paint pen to track rotations—it's a small effort that pays off with 30% more blooms by mid-season.
Watering Wisdom: The 1-2 inches deep watering in Step 3 needs consistency. I set a rain gauge near my plants to track exactly how much water they're getting. Too little causes stress (and fewer flowers), while too much leads to blossom end rot. A simple trick: water only when the top 1 inch of soil feels dry—this matches the 40-60% moisture range perfectly.
Flower Focus Technique: When you see those first male flowers in Step 4, don't remove them yet! Let a few mature completely so you have pollen ready for hand-pollination. I keep a small paintbrush in my gardening tool pouch specifically for this—it's the easiest way to guarantee pollination when bees aren't visiting. Focus on pollinating female flowers first (they have the tiny pumpkin at the base), as these are the ones that will produce fruit.
Pro Tips for Pumpkin Plants Blooming
- Here's what I've learned from years of growing pumpkins that flower like crazy—and how to avoid the mistakes that kill blooms before they begin.
- Soil Temperature Secret: The 65°F soil temperature in Step 1 isn't just a number—it's the magic threshold where pumpkin roots start actively growing.
- Light Rotation Hack: That quarter turn weekly in Step 2 might seem minor, but it makes a huge difference.
Frequently asked questions
Got questions about pumpkin plants blooming? You’re not alone—these vibrant, bee-loving flowers spark curiosity! Here are answers to the most common queries to help you grow a thriving patch.
When do pumpkin plants start blooming?
Most pumpkin varieties bloom 60–90 days after planting, depending on the type (winter vs. summer squash). Warmth triggers flowering—expect male flowers first (they appear on long stems), followed by female flowers (with tiny pumpkins forming near the base).
Why aren’t my pumpkin flowers attracting bees?
Bees love pumpkin blooms, but if they’re scarce, check these fixes:
- Timing: Bees are most active in morning sun (6–10 AM).
- Pesticides: Avoid sprays—neonicotinoids repel pollinators.
- Water: Light rain or misting helps release pollen.
- Hand-pollinate: Use a paintbrush to transfer pollen if bees are absent.
How long do pumpkin flowers last before wilting?
Male flowers wilt 1–2 days after opening (they’re short-lived but produce pollen). Female flowers last 2–3 days—look for a tiny pumpkin at the base (the "bulge").
Can I eat pumpkin flowers, and how?
Edible pumpkin blossoms are delicate and slightly sweet. Try them in:
- Garnishes for salads or soups.
- Stuffed with cheese or herbs as appetizers.
- Fritters or tempura (dip in batter and fry).
What should I do if my pumpkin flowers drop off?
Dropping flowers often signal stress or poor pollination. Troubleshoot with:
- Watering: Keep soil consistently moist (not soggy).
- Fertilizer: Add compost or a balanced 10-10-10 mix.
- Heat/cold: Protect from extreme temps (below 50°F or above 90°F).
- Disease: Yellow leaves? Check for powdery mildew—spray with neem oil.
Wrapping up and next steps
Watching your pumpkin plants blooming isn’t just a treat for the eyes—it’s a celebration of nature’s bounty and a feast for pollinators like bees! 🐝 With the right care, your garden can become a buzzing hub of life, turning those vibrant flowers into delicious pumpkins.
Now that you’re armed with tips and answers, there’s no better time to roll up your sleeves and get growing.
Ready to dive in? Start by planting your seeds this season—whether in a cozy container or a sprawling patch of soil. Every bloom is a step closer to a harvest that’s as rewarding as it is delicious. Happy gardening! 🌱