
Succulent
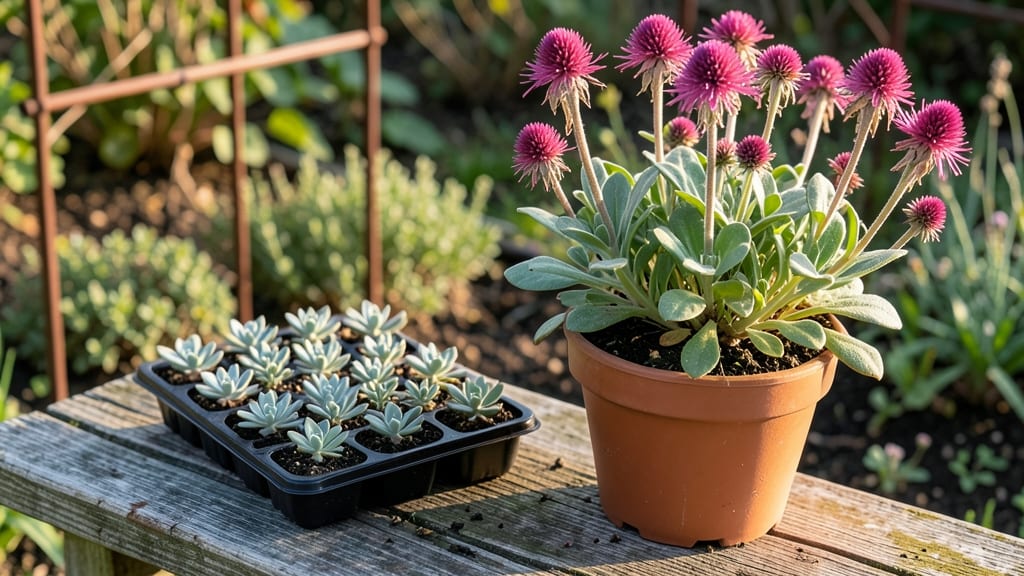
Planting sedum seeds is the fastest way to get drought-proof blooms that thrive on neglect. 🌱 I’ve grown sedum from seed for years, and the secret isn’t complicated—it’s all about the right soil, timing, and a little patience.
Most people assume sedum is impossible to start from seed, but with the right approach, you’ll see those first tiny leaves in just three weeks.
The key is using a well-draining mix—equal parts potting soil and perlite or coarse sand. Sedum seeds are tiny, so don’t bury them; just press them lightly into the surface. Keep the soil barely damp (not soggy) and place the tray in bright, indirect light until germination.
Varieties like Sedum spurium and Sedum telephium are great starters—they’re hardy and bloom reliably once established.
Once those first leaves appear, you’ll notice how quickly they fill out. Within six weeks, you’ll have sturdy seedlings ready to transplant, and by midsummer, they’ll be covered in clusters of star-shaped flowers.
The best part? These plants practically take care of themselves—drought, heat, and even poor soil won’t phase them.
Works for containers, rock gardens, or sunny borders—just give them full sun and occasional water. Here’s how to avoid the most common pitfalls and keep your sedum thriving from the very start.
📚 In This Guide
- What you need
- Instructions
- Tips and common mistakes
- Wrapping up and next steps
What you need
- ● Sedum seeds: 1 packet (check for organic or heirloom varieties like Sedum spectabile or Sedum ‘Autumn Joy’ for vibrant blooms).
- ● Seed-starting mix: 1 bag (5-10 lbs) of cactus/succulent soil or a lightweight potting mix with perlite.
- ● Containers: 1-2 shallow trays (10x20 inches) or
- ● Individual pots (3-4 inches deep) with drainage holes.
- ● Drainage layer: Small pebbles, perlite, or coarse sand (½ inch layer at the bottom of containers).
- ● Spray bottle: For gentle watering (avoid over-saturating seeds!).
- ● Grow lights or sunny windowsill: 6+ hours of indirect light daily (south-facing window or LED grow lights work best).
- ● Humidity dome or plastic wrap: To retain moisture while seeds germinate.
- ● Seedling heat mat: Speeds up germination (70–75°F is ideal).
- ● Fertilizer: Diluted succulent fertilizer (½ strength) after 3–4 weeks.
- ● Tweezers: For delicate seed placement.
- ● Labels & markers: To track seed varieties (trust us, they’ll look different as they grow!).
- ● Outdoor hardening tray: For gradual acclimation before transplanting.
Step-by-Step guide to planting sedum seeds
Here's how to turn those tiny seeds into hardy, drought-resistant plants in just weeks.
🌱 Step 1: Prepare Your Containers and Soil Mix
Fill your containers with a well-draining mix—sedum hates soggy roots. I use a blend of 50% potting soil and 50% perlite or coarse sand to keep moisture in check. Tap the container gently to settle the mix, then moisten it lightly with water until it feels like a damp sponge. Don't oversaturate; sedum seeds need air to germinate.
Sprinkle the seeds evenly across the surface—don't bury them. Sedum seeds need light to sprout, so pressing them just barely into the soil is enough. I like to space them about ¼ inch apart to avoid overcrowding later. A light mist with a spray bottle keeps them in place without washing them away.
💧 Step 2: Create the Ideal Germination Environment
Cover the containers with clear plastic wrap or a humidity dome to trap warmth and moisture. Sedum seeds germinate best at 65-75°F, so place them in a warm spot—like on top of your fridge or near a sunny window. Mist the soil every 2-3 days to keep it consistently moist but never soggy.
You'll see tiny green sprouts in about 10-14 days. Once they appear, remove the plastic immediately—too much humidity invites mold, and sedum seedlings are delicate at first. Watch for the first true leaves (not the initial seed leaves) to appear; that's your cue to start thinning if needed.
☀️ Step 3: Introduce Light Gradually
Move the seedlings to a bright spot with 4-6 hours of indirect light daily. A south-facing window works well, but avoid harsh midday sun at first—it can scorch tender new growth. If your seedlings stretch toward the light (a sign they're hungry for more), they need to be closer to the window or under a grow light.
After 2-3 weeks, when the seedlings have 2-3 sets of true leaves, you can start hardening them off. Place them outside in a sheltered spot for 1-2 hours the first day, gradually increasing their time outdoors over 7-10 days. This slow transition prevents shock and helps them adjust to outdoor conditions.
🪴 Step 4: Transplant to Their Forever Home
Once seedlings are 2-3 inches tall and have developed a sturdy stem, it's time to transplant them into individual pots or garden beds. Sedum thrives in well-draining soil, so mix in a little more perlite or sand if your garden soil is heavy. Dig a hole just deep enough to cover the roots but leave the top of the stem visible.
Space them 6-12 inches apart, depending on the variety—taller sedums need more room. Water deeply after planting to help the roots settle, but avoid overwatering. Sedum is drought-tolerant once established, but young plants need consistent moisture to take root. You'll know they're happy when new growth appears within 2-3 weeks.
Tips & tricks for perfect sedum seedlings
A few simple tricks will help you grow thriving sedum plants from those tiny seeds—without the guesswork.
Soil Mix Secret: The 50/50 blend of potting soil and perlite is non-negotiable for sedum. I've tried heavier mixes before, and they always led to moldy seedlings. If you're short on perlite, coarse sand works just as well—but avoid fine sand, which compacts too easily. After mixing, tap the container gently to eliminate air pockets, then moisten until water runs out the bottom. This ensures even moisture distribution without waterlogging.
Lighting Strategy: Those 4-6 hours of indirect light in Step 3 are crucial—direct sun at this stage can fry delicate seedlings. I place mine on a north-facing windowsill or under fluorescent shop lights (no grow lights needed). Watch for leggy growth as your cue to move them closer to the light source. A simple trick: if seedlings stretch toward the light like little sun-worshippers, they're telling you they need more intensity.
Germination Timing: The 10-14 day window for sprouts is just a guideline—some varieties germinate faster, others slower. I've seen sedum pop up in 7 days with perfect conditions, or take 21 days in cooler environments. The key is consistency: maintain that 65-75°F range and mist every 2-3 days. If you're impatient, place containers on a seedling heat mat (set to 70°F) to speed things along.
Transplanting Hack: When your seedlings hit that 2-3 inch mark, harden them off gradually over 7-10 days. I start with just 1-2 hours outside on day one, then increase by 1 hour each subsequent day. Pro tip: transplant on a cloudy day or in late afternoon to reduce stress. After planting, give them a good drink of water—but don't drown them. Sedum roots need air almost as much as water.
Pro Tips for Planting Sedum Seeds
- A few simple tricks will help you grow thriving sedum plants from those tiny seeds—without the guesswork.
- Soil Mix Secret: The 50/50 blend of potting soil and perlite is non-negotiable for sedum.
- Lighting Strategy: Those 4-6 hours of indirect light in Step 3 are crucial—direct sun at this stage can fry delicate seedlings.
Frequently asked questions
Got questions about growing sedum from seeds? You’re not alone! Here are answers to the most common queries to help you succeed with your drought-resistant garden stars.
How long does it take for sedum seeds to germinate?
Sedum seeds typically germinate in 7–21 days, depending on warmth and moisture. Keep soil consistently damp (not soggy) and maintain temperatures between 60–75°F (15–24°C). Patience is key—some varieties, like Sedum spectabile, may take longer. If nothing sprouts after 3 weeks, try gently pressing seeds into the soil or using a heat mat to speed things up.
Can I plant sedum seeds directly outside or should I start indoors?
For most sedum varieties, direct sowing outdoors works best after the last frost when soil is at least 50°F (10°C). However, if your growing season is short or you’re in a cooler climate, start seeds indoors 4–6 weeks before the last frost for a head start. Use biodegradable pots to avoid transplant shock when moving seedlings outside.
Why aren’t my sedum seeds sprouting? Troubleshooting tips.
No sprouts? Check these common issues:
- Cold soil: Sedum needs warmth to germinate—wait until soil is at least 50°F (10°C).
- Dry soil: Keep seeds moist (use a spray bottle) but avoid waterlogging.
- Old seeds: Sedum seeds lose viability quickly—use fresh seeds (less than 1 year old).
- Light needs: Most sedum seeds need light to germinate—don’t bury them deeper than ¼ inch (0.6 cm).
What’s the best soil mix for sedum seeds?
Sedum thrives in well-draining, gritty soil. Mix equal parts potting soil, perlite, and sand (or coconut coir) to prevent rot. Avoid heavy clay soil—it holds too much moisture and can drown delicate seedlings. A 50/50 blend of regular potting mix and coarse sand works wonders for most varieties.
Can I grow sedum from cuttings instead of seeds?
Many sedum varieties (like Sedum morganianum or Sedum album) root easily from stem cuttings. Snip a 3–4 inch (7–10 cm) healthy stem, let it callus for 1–2 hours, then place it in moist perlite or water. Roots form in 2–4 weeks. This method is faster and often more reliable than seeds for some types.
Will sedum attract pests or wildlife?
Sedum is generally pest-resistant and attracts beneficial pollinators like bees and butterflies! However, overwatered plants may invite aphids or snails. To prevent issues, ensure proper drainage and remove debris. Deer and rabbits usually avoid sedum, making it a great low-maintenance choice for wildlife-friendly gardens.
Wrapping up and next steps
Planting sedum seeds is a rewarding way to grow hardy, drought-resistant plants that add vibrant color to your garden in just three weeks! With the right soil, sunlight, and care, you’ll soon enjoy lush foliage and cheerful blooms—perfect for beginners or experienced gardeners alike. 🌱
Now that you’re equipped with the knowledge, roll up your sleeves and start planting! For even faster results, consider layering seeds or experimenting with different varieties. Happy gardening—your future sedum patch is waiting! 🌸