Companion Plants
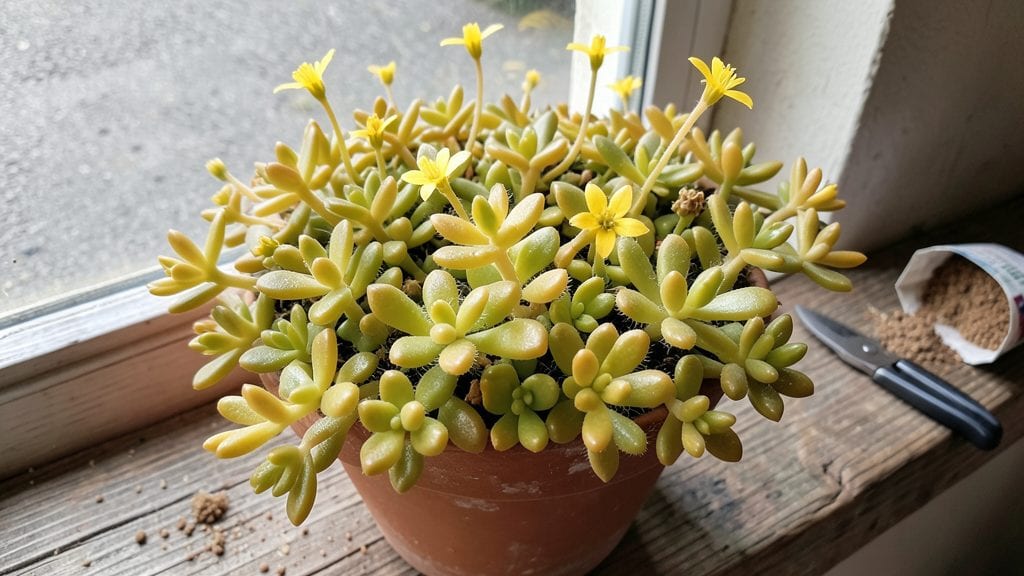
Growing small sedum plants transformed my sunniest corner from bare ground to a thriving, nearly maintenance-free display. These succulent ground covers spread effortlessly while demanding almost no water once established—perfect for hot, dry spots where most plants struggle.
I’ve had my first batch multiply so aggressively that I now give away cuttings to neighbors who want the same low-stress greenery.
Start with well-draining soil mixed with coarse sand or gravel to prevent rot—sedum hates soggy roots. Plant in full sun (at least 6 hours daily) and space them 8-12 inches apart for a dense carpet effect.
Water deeply after planting, then let the soil dry completely between waterings. Overwatering is the fastest way to kill these tough plants, so resist the urge to pamper them.
By midsummer, you’ll see thick mats of jewel-toned foliage with star-shaped blooms in late summer, attracting pollinators without any extra effort. Prune back leggy stems in early spring to encourage bushier growth, and divide crowded clumps every few years to keep them vigorous.
The best part? They bounce back from neglect like nothing else in the garden.
Works equally well in rock gardens, between pavers, or as a spillover in containers—just ensure good drainage. Even my blackest thumb can’t seem to kill these, making them the ultimate beginner-friendly yet sophisticated choice. Ready to add some carefree color to your yard?
📚 In This Guide
- What you need
- Instructions
- Tips and common mistakes
- Wrapping up and next steps
What you need
- ● Small sedum plants: 3–5 young sedum cuttings or nursery-grown plants (e.g., Sedum spurium, Sedum acre, or Sedum album).
- ● Well-draining potting mix: 1–2 gallons of a blend like cactus/succulent soil (or regular potting mix + perlite/pumice, 60/40 ratio).
- ● Containers: Small pots (4–6 inches wide) with drainage holes, or a shallow tray for ground cover (12+ inches wide).
- ○ Gravel or pebbles: 1–2 cups for top-dressing (optional but helps with drainage).
- ● Garden trowel or small shovel (for transplanting).
- ● Watering can or spray bottle (with a fine rose nozzle for gentle watering).
- ● Pruning shears (for trimming leggy growth).
- ○ Slow-release fertilizer (optional, 1 tbsp per pot, like 10-10-10 or succulent-specific).
- ○ Mulch (optional): Coarse sand or bark chips to retain moisture without suffocating roots.
- ● A sunny spot (6+ hours of direct light daily; partial shade works for some varieties like Sedum morganianum).
- ● Patience! Sedums grow slowly but reward you with hardy, low-maintenance beauty.
Step-by-Step guide to cultivating thriving small sedum plants
Here’s how to nurture these hardy succulents into lush, drought-resistant ground covers that transform sun-drenched areas.
Select the Perfect Planting Site and Prepare the Soil
Sedum thrives in full sun—choose a location receiving at least 6 hours of direct sunlight daily. These plants despise soggy roots, so avoid low-lying spots where water pools. If your soil drains poorly, amend it with 1-2 inches of coarse sand or gravel mixed into the top 6 inches of soil to improve aeration.
Loosen the soil to a depth of 12 inches using a garden fork or tiller. Sedum’s shallow roots need loose, well-draining soil to prevent rot. If your soil is heavy clay, mix in composted organic matter to enhance drainage without suffocating the roots. The goal is a texture that crumbles easily between your fingers when moist.
Space and Plant Sedum for Optimal Growth
For small sedum varieties, space plants 8-12 inches apart in rows 12-18 inches apart to allow airflow and prevent disease. Dig holes just deep enough to accommodate the root ball—sedum dislikes being buried too deeply, which can cause stem rot. Gently remove the plant from its container and place it in the hole, ensuring the top of the root ball sits level with the surrounding soil. Press the soil lightly around the roots to eliminate air pockets.
Water deeply immediately after planting to settle the soil and encourage root contact. Use 1 gallon of water per plant to ensure moisture reaches the entire root zone. Avoid overhead watering, which can dislodge plants or create fungal conditions. Mulch around the base with 1-2 inches of gravel or coarse sand to further improve drainage and suppress weeds.
Establish a Watering Routine for Drought Resistance
Sedum’s drought tolerance kicks in after the first 4-6 weeks of establishment. Until then, water deeply once a week during dry spells, providing ½ gallon per plant to encourage deep root growth. You’ll know it’s time to water when the top 1-2 inches of soil feel completely dry to the touch. Overwatering at this stage is the fastest way to kill sedum—its thick leaves store moisture, not waste it.
Once established, sedum can go weeks without water in most climates. In extreme heat (above 90°F), you may need to water every 2-3 weeks to maintain vigor. Always water at the base, avoiding the foliage to prevent fungal issues. The plants will wilt slightly in dry conditions but bounce back within 24 hours of a drink—this is normal and healthy.
Prune and Maintain for Year-Round Beauty
In early spring, trim back any dead or leggy stems to encourage bushier growth. Use clean, sharp pruners to make cuts just above a leaf node. Sedum rarely needs heavy pruning, but removing spent blooms in late summer promotes a second flush of flowers and keeps the plant tidy. The key is to prune before new growth begins—this prevents stressing the plant during its active growing season.
Fertilize lightly in early spring with a balanced, slow-release fertilizer (10-10-10) applied at ½ the recommended rate. Sedum doesn’t need much—too much fertilizer leads to soft, floppy growth that’s prone to rot. After the first year, skip fertilizer entirely unless the plants look pale or stunted, which signals nutrient deficiency. These plants are self-sufficient once established.
Overwinter Care for Cold-Hardy Sedum
Most small sedum varieties are hardy to USDA Zone 3, but young plants or tender varieties may need winter protection. In regions with prolonged sub-zero temperatures (below 10°F), mound 2-3 inches of mulch (gravel or bark) around the base to insulate roots. Avoid organic mulches like straw, which can retain too much moisture and cause rot.
In spring, remove any remaining mulch and inspect for winter dieback. Sedum often looks dormant or brown in cold months but regrows vigorously once temperatures rise above 50°F. Trim back any dead foliage in early spring to make room for new growth. The plants will reward your patience with vibrant color and resilience year after year.
Tips & tricks for perfectly thriving small sedum plants
These game-changing insights will help you cultivate sedum that's not just surviving, but absolutely thriving in your sunniest spaces.
The Sunlight Secret: While sedum loves full sun, the first 6 hours of direct sunlight daily is non-negotiable for optimal growth. I've found that morning sun combined with afternoon shade in extreme heat (above 90°F) actually prevents leaf scorch while maintaining vibrant color. If you notice leaves turning yellow or crispy, it's a sign they're getting too much direct midday sun—consider a light shade cloth during peak hours.
Soil Texture Matters: The key to preventing rot in Step 1 is achieving that perfect crumbly texture in your amended soil. I recommend mixing your 1-2 inches of coarse sand or gravel into the top 6 inches of soil, then testing by squeezing a handful—it should break apart easily when dry. For heavy clay soils, add composted organic matter gradually, as too much can suffocate those shallow roots. Remember, sedum's roots need both aeration and drainage to thrive.
Watering Wisdom: During the critical 4-6 week establishment period, I've discovered that using a moisture meter is worth the investment. The top 1-2 inches of soil should feel completely dry before watering—don't rely on memory. Once established, sedum's ability to go weeks without water is truly remarkable, but in extreme heat, I've found that watering every 2-3 weeks at the base (never the leaves) keeps them looking their absolute best without risking fungal issues.
Winter Protection Strategy: For those sub-zero nights below 10°F, I've perfected my winter mulching technique using 2-3 inches of gravel or bark around the base. The secret is to mound it gently against the stems rather than piling it high—this creates an insulating air pocket while preventing moisture buildup. In spring, I always wait until temperatures rise above 50°F before removing mulch, as sudden temperature swings can shock the plants.
Pro Tips for Small Sedum Plants
- These game-changing insights will help you cultivate sedum that's not just surviving, but absolutely thriving in your sunniest spaces.
- The Sunlight Secret: While sedum loves full sun, the first 6 hours of direct sunlight daily is non-negotiable for optimal growth.
- Soil Texture Matters: The key to preventing rot in Step 1 is achieving that perfect crumbly texture in your amended soil.
Frequently asked questions
Got questions about nurturing your small sedum plants? You're not alone! Here are some of the most common queries—and their straightforward answers—to help you keep your succulent companions thriving.
How often should I water small sedum plants?
Sedum is famously drought-tolerant, so overwatering is the real risk! Water only when the top 1-2 inches of soil feel completely dry—usually every 2-3 weeks in warm weather. Reduce to once a month in winter. Pro tip: Let excess water drain away to avoid root rot.
Can I grow small sedum plants in containers?
Containers are perfect for sedum, especially if they have drainage holes. Use a fast-draining mix (like cactus/succulent soil) and a pot with room to grow—6+ inches deep for mature plants. Just ensure they get at least 6 hours of sunlight daily to stay compact and vibrant.
Do small sedum plants need winter care?
Most sedum varieties are hardy, but young plants or tender types may need protection in freezing temps (<30°F). Move potted sedum to a sheltered spot or wrap containers in burlap. Mulch garden beds lightly with gravel or straw to insulate roots. No need to water unless soil is bone-dry.
Why are my small sedum leaves turning yellow or mushy?
Yellow/mushy leaves usually signal overwatering or poor drainage. Let the soil dry out completely between waterings, and check for root rot (black, smelly roots). Repot in fresh, gritty soil if needed. Pests like mealybugs can also cause wilting—spray with neem oil if you spot them.
What are some low-maintenance alternatives to sedum?
If sedum isn’t your style, try these drought-resistant darlings:
- Echeveria: Rosette-shaped succulents with bold colors.
- Hen & Chicks (Sempervivum): Clumping, cold-hardy, and adorable.
- Ice Plant (Delosperma): Bright flowers and trailing habit.
- Lamb’s Ear (Stachys byzantina): Fuzzy foliage for texture.
Wrapping up and next steps
Small sedum plants are the ultimate low-maintenance superstars for sunny spots—whether you're filling gaps in your garden, brightening up containers, or creating a drought-tolerant ground cover. Their vibrant colors, resilience, and ease of care make them a must-have for any gardener looking to add effortless beauty without the fuss. 🌞
Ready to transform your space? Start by picking your favorite variety, gathering your supplies, and planting with confidence. Your sun-drenched garden (or balcony!) will thank you. Happy gardening!