
Trees
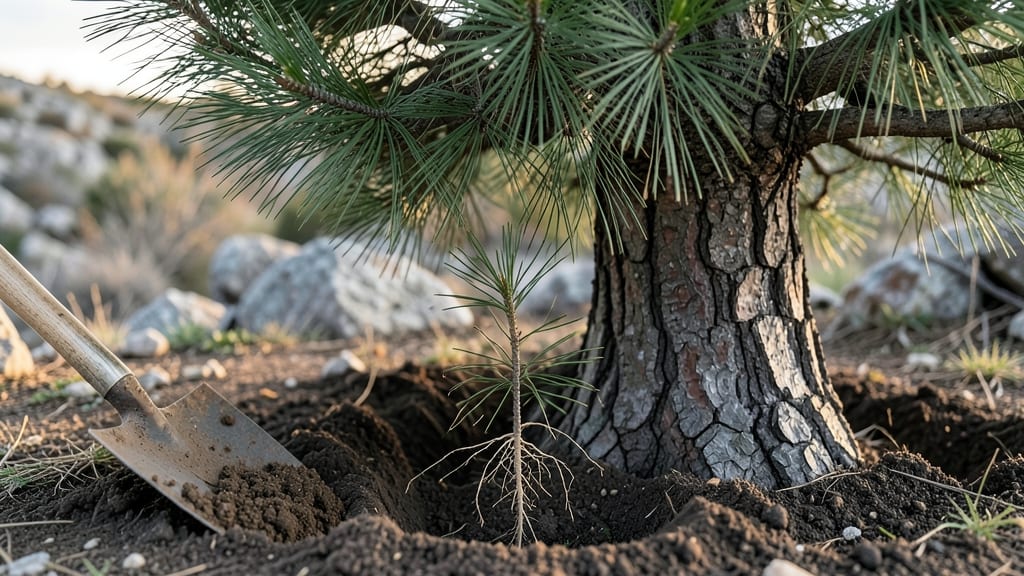
Planting evergreen trees isn't just about sticking a sapling in the ground—it's about giving it the perfect start for decades of shade and beauty. ✨ I've learned the hard way that skipping soil prep or ignoring root systems leads to stunted growth, and nobody wants a tree that struggles from day one.
The right approach means healthier roots, faster establishment, and trees that thrive year after year without extra fuss.
You'll need a few simple tools—a shovel, mulch, and maybe a wheelbarrow for heavy soil—but the real secret lies in understanding your tree's needs. Evergreens hate soggy feet, so well-draining soil and proper spacing (usually 8-12 feet apart) make all the difference.
Whether you're planting a 5-gallon container tree or a bare-root sapling, the method stays the same: loosen the soil, tease out roots gently, and set it deep enough so the top of the root ball sits just below ground level.
After planting, water deeply to settle the soil and keep moisture consistent for the first 6-12 months. A 3-inch layer of mulch protects roots from temperature swings and keeps weeds at bay.
The payoff? Trees that grow 2-3 feet taller per year and develop strong root systems that anchor them through storms. No more wilting branches or mysterious dieback—just steady, reliable growth.
Works for any climate, though timing matters: fall or early spring gives roots time to establish before extreme heat or cold. Avoid planting in summer heatwaves or winter freezes. Here's how to get it right the first time—no second chances with these long-lived giants.
📚 In This Guide
- What you need
- Instructions
- Tips and common mistakes
- Wrapping up and next steps
What you need
- ● Evergreen tree saplings: Choose disease-resistant varieties (e.g., Pinus, Juniperus, or Thuja) with 1- to 3-gallon root balls for best results.
- ● Shovel or spade: A 24–30-inch digging tool for planting holes.
- ● Garden gloves: Heavy-duty to protect hands from roots and soil.
- ● Wheelbarrow or bucket: For transporting soil, compost, or mulch.
- ● Measuring tape: To ensure proper spacing (6–10 feet apart, depending on tree maturity).
- ● Watering can or hose with nozzle: A gentle spray setting for post-planting hydration.
- ● Native soil or topsoil: 2–3 cubic yards (adjust based on hole size).
- ● Compost or aged manure: 5–10 gallons to enrich soil and improve drainage.
- ● Organic mulch: 2–4 inches of pine straw, wood chips, or shredded bark (keep 3–6 inches away from trunk).
- ○ Slow-release fertilizer (optional): 10–20 lbs of 10-10-10 or 12-12-12 blend for nutrient boost.
- ● Tree stakes & ties: For young trees in windy areas (2–3 stakes per tree).
- ● Soil moisture meter: To monitor root zone hydration.
- ● Root stimulator: Mycorrhizal fungi or liquid rooting hormone for faster establishment.
- ● Pruning shears: For trimming dead branches post-planting.
Step-by-step guide to planting evergreen trees for lasting growth
Here's the proven method I use to plant evergreens that thrive for decades—not just survive the first few years.
🪴 Step 1: Choose and Prepare the Planting Site
Evergreens need space to grow their root systems without competing with other plants. Dig a hole twice as wide as the root ball but only as deep as the container's height. This prevents burying the trunk too deep, which can cause rot. I always test the soil first—evergreens prefer slightly acidic soil with a pH between 5.0 and 6.5. If your soil is too alkaline, amend it with 1-2 pounds of sulfur per 100 square feet a few months before planting.
Pick a location with the right light conditions for your specific evergreen. Most varieties thrive in full sun (6+ hours daily), but some like rhododendrons prefer partial shade (3-4 hours of morning sun)**. Avoid low spots where cold air settles—this can damage tender roots in winter. I mark the planting spot with a stake to ensure I dig in the right place.
🌱 Step 2: Remove the Tree from Its Container and Inspect Roots
Gently squeeze the sides of the container to loosen the root ball before lifting the tree out. If roots are circling tightly around the root ball, use your hands to tease them apart—this prevents girdling as the tree matures. I always check for any damaged or dried-out roots and trim them back with clean, sharp pruners. Healthy roots should be white or light tan, not brown or mushy.
Soak the root ball in a bucket of water for 15-30 minutes before planting. This helps rehydrate the roots and makes it easier to remove any excess soil from the container. If the root ball is tightly bound, I carefully cut through the outer edges with a knife to encourage outward root growth. Never let the root ball dry out completely before planting.
💧 Step 3: Plant the Tree at the Correct Depth and Water Thoroughly
Place the tree in the hole so the top of the root ball sits 1-2 inches above ground level. This ensures the tree doesn’t settle too deeply over time. Fill the hole with native soil, tamping it down gently as you go to remove air pockets. I avoid adding amendments like compost or fertilizer directly into the planting hole—this can burn young roots. Instead, I mix a slow-release fertilizer into the backfill soil.
Water the tree deeply right after planting to settle the soil and eliminate air pockets. Use 5-10 gallons of water depending on the tree size, and let it soak in completely. Mulch the area with 2-3 inches of organic mulch, keeping it 6 inches away from the trunk to prevent rot. This helps retain moisture and regulate soil temperature. I always water again after a week to encourage root establishment.
☀️ Step 4: Stake Only When Necessary and Protect Young Trees
Most evergreens don’t need staking unless they’re in a windy location or have a top-heavy growth habit. If you do stake, use two stakes placed diagonally and tie the tree loosely with soft fabric strips—never wire, which can cut into the bark. I check the ties every few weeks to ensure they’re not too tight as the tree grows.
Protect young trees from winter damage by wrapping the trunk with tree guard or burlap in the first few years. This prevents sunscald and rodent damage. I also avoid heavy pruning for the first year—just remove any dead or broken branches. Evergreens establish roots slowly, so patience is key. After the first year, you’ll see stronger growth and better resilience.
Tips & tricks for perfect evergreen tree planting
Planting evergreens for lasting growth isn't just about digging a hole—it's about creating an environment where roots can thrive for decades. Here are my hard-won insights to help your trees establish strong root systems.
Soil Preparation Secret: Before amending your soil with sulfur, test it properly using a soil test kit from your local extension office. I've seen cases where gardeners over-amended alkaline soil with sulfur, creating a toxic environment. Aim for that 5.0-6.5 pH range—evergreens like firs and pines actually prefer the slightly more acidic end (around 5.0-5.5). If your soil tests perfect but still feels compacted, consider adding 1-2 inches of compost to the bottom of the planting hole before adding your tree.
Root Ball Rescue: That 15-30 minute soak before planting is non-negotiable, but here's what I do differently: I wrap the root ball in a burlap sack before soaking. This prevents soil from washing away during the soaking process and makes it easier to handle when planting. After soaking, I gently unravel any circling roots by hand—no need for pruners unless you see truly damaged sections. Think of it like untangling headphones: patience prevents permanent damage.
Watering Wisdom: The 5-10 gallons of water immediately after planting is just the beginning. I've learned the hard way that evergreens need consistent moisture during their first growing season. Set up a drip irrigation system or create a watering basin around the tree by mounding soil slightly outward from the trunk. This creates a natural reservoir that keeps roots hydrated even during dry spells. Water again after a week to encourage deeper root growth—this second watering is often what makes the difference between survival and thriving.
Winter Protection Pro Tip: When wrapping young trees for winter, don't just slap on burlap and call it a day. I use tree guards that wrap around the trunk but leave the top open—this prevents sunscald while still allowing some air circulation. For extra protection in harsh winters, I add a layer of 2-3 inches of mulch around the base (keeping it 6 inches away from the trunk) and water thoroughly before the ground freezes. This creates an insulating blanket that protects roots from temperature fluctuations.
Pro Tips for Planting Evergreen Trees
- Planting evergreens for lasting growth isn't just about digging a hole—it's about creating an environment where roots can thrive for decades.
- Soil Preparation Secret: Before amending your soil with sulfur, test it properly using a soil test kit from your local extension office.
- Root Ball Rescue: That 15-30 minute soak before planting is non-negotiable, but here's what I do differently: I wrap the root ball in a burlap sack before soaking.
Frequently asked questions
Got questions about planting evergreen trees?
You’re not alone! Here are answers to the most common concerns to help you plant with confidence and keep your evergreens thriving for years.
When is the best time to plant evergreen trees?
The ideal window is late fall to early spring (especially November–March in most climates), when soil is cool and moist but not frozen. Avoid peak summer heat, which stresses young roots. Pro tip: If planting in summer, water deeply 2–3 times per week to compensate for dry conditions.
Can I plant evergreen trees in winter?
Yes! Winter planting works well in mild climates (USDA Zones 7–10), but avoid freezing temperatures or snow cover. If your area gets harsh winters, wait until early spring. Bare-root trees planted in winter can establish roots before summer heat arrives—just mulch heavily to protect roots.
Are there affordable evergreen tree alternatives to expensive nursery varieties?
Consider native species like Pinus strobus (eastern white pine) or Juniperus virginiana (eastern red cedar), which are hardy, low-maintenance, and often sold at lower prices. Check local nurseries for "whips" (young, slender trees) or bare-root options for budget-friendly choices.
Why is my evergreen tree turning brown after planting?
Brown needles are usually normal for the first year (a sign of transplant shock), but if it persists beyond 12 months, check for overwatering (root rot) or underwatering (drought stress). Ensure proper spacing (6–10 ft apart) and avoid compacting soil around the base. Fix it: Water deeply but infrequently, and mulch 3 inches away from the trunk.
How do I choose the right evergreen for my climate?
Match your tree to your hardiness zone! For example:
- Cold climates (Zones 3–5): Colorado blue spruce (Picea pungens) or balsam fir (Abies balsamea).
- Hot/dry areas (Zones 7–10): Arizona cypress (Cupressus arizonica) or Italian cypress (Cupressus sempervirens).
- Coastal/mild zones (6–9): Leyland cypress (× Cupressocyparis leylandii) or Hinoki cypress (Chamaecyparis obtusa).
Wrapping up and next steps
Planting evergreen trees isn’t just about adding beauty to your landscape—it’s an investment in year-round resilience and long-term growth. By choosing the right species, preparing the soil, and following proper techniques, you’ll set the stage for a thriving, low-maintenance green haven.
Whether you’re a seasoned gardener or a beginner, every shovel of dirt is a step toward a healthier, more vibrant outdoor space.
Ready to get started? Pick your favorite evergreen variety, mark your calendar for the best planting window, and dig in! 🌲✨ Your future shade—and curb appeal—will thank you.