
Pruning
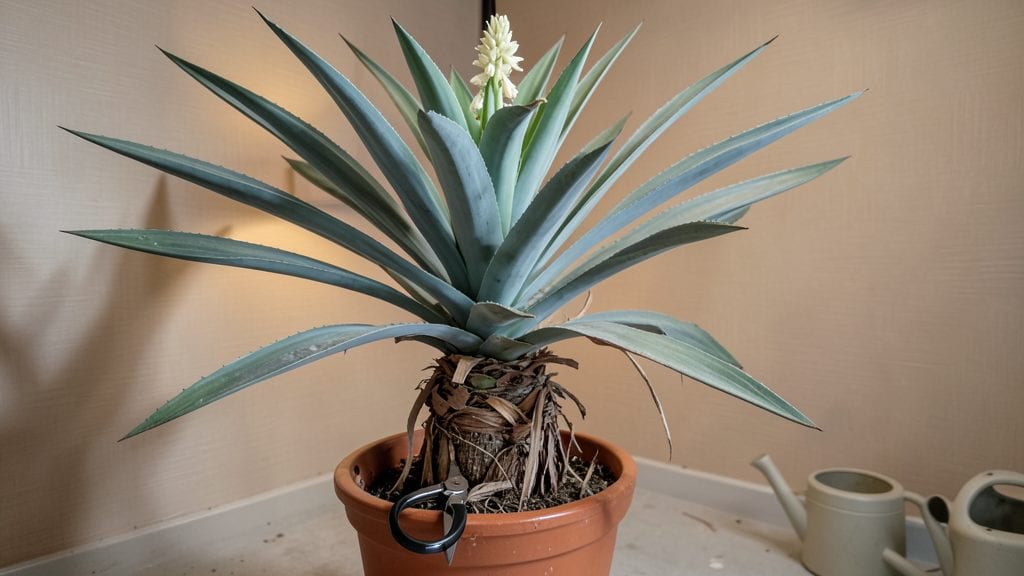
Cutting back outdoor yucca plants isn't just about tidying up—it's the secret to keeping them shockingly lush and thriving for years. 🌿 I learned the hard way that yuccas don’t respond well to random trimming; they need precision cuts at the right time to avoid stressing the plant.
The difference between a healthy, bushy yucca and one that struggles is often just a matter of when and how you make those cuts.
Timing is everything with yuccas. The best time to cut back is in late winter or early spring, just as new growth begins to emerge. This gives the plant time to recover before the heat of summer.
You’ll need sharp pruners or shears—never dull tools, as they tear the leaves—and a disinfectant to clean them between cuts. The goal is to remove only dead, damaged, or yellowing leaves while leaving the healthy ones to photosynthesize and feed the plant.
When you do it right, your yucca will reward you with bold, sword-like foliage that stays vibrant all season. The plant will focus its energy on new growth instead of struggling with old, dying leaves.
Plus, you’ll avoid the risk of disease or pest problems that come from leaving dead material on the plant too long. Think of it as a springtime reset—like giving your yucca a fresh start for the year ahead.
Here’s the thing—yuccas are tough, but they’re not invincible. Over-pruning or cutting into the central growing point (the crown) can kill the plant, so always leave at least a few healthy leaves.
And if you’re dealing with a massive, overgrown yucca, you can divide it in the process—just make sure each section has roots and at least one healthy leaf. Ready to give your yucca the care it deserves?
📚 In This Guide
- What you need
- Instructions
- Tips and common mistakes
- Wrapping up and next steps
What you need
- ● Sharp bypass pruners – Choose a pair with 4- to 6-inch blades for clean cuts (avoid dull tools—they crush stems!).
- ● Disinfectant (rubbing alcohol or bleach solution) – 1 part bleach to 9 parts water to sterilize tools and prevent disease spread.
- ● Gloves (heavy-duty or gardening gloves) – Yucca leaves can be spiky and sharp—protect your hands!
- ○ Pruning saw (optional but helpful for thick stems) – A folding pruning saw with 7- to 8-inch blades works best for stubborn, woody growth.
- ● Garden kneeler or stool – For comfort, especially if your yucca is tall or ground-level access is tricky.
- ● Trash bag or bucket – To collect pruned debris and keep your workspace tidy.
- ● Hose or water source – For rinsing tools and wetting the base of the plant before cutting (reduces sap splatter).
- ● Hand pruners with extended handles – For reaching high branches without straining.
- ● Plant wound sealant (like pruning paste) – Only needed if you’re making large cuts (e.g., removing a significant portion of the trunk).
- ● Loppers with a bypass blade – If your yucca has thick, mature stems (3+ inches in diameter).
- ● Safety glasses – Protects your eyes from debris, especially when sawing.
- ● Notebook or camera – To sketch or photograph the plant’s structure before pruning (helps with decision-making!).
Step-by-step instructions for cutting back outdoor yucca plants
Here's how to revive your yucca's vigor with clean, strategic cuts—no guesswork.
✂️ Step 1: Time Your Trim for Optimal Regrowth
Wait until early spring when new growth begins—you'll see pale green shoots emerging from the base. This timing ensures your yucca has energy to recover before summer heat. Avoid cutting in fall or winter; the plant needs reserves for dormancy.
If your yucca has dead or brown fronds from winter, remove those first—they drain energy. Healthy fronds stay firm and upright. Never cut more than one-third of the plant in a single session; yuccas are tough but not indestructible.
✂️ Step 2: Gather Tools and Sanitize for Clean Cuts
Use sharp, sterilized pruning shears or a clean saw for thicker stems. Dip blades in rubbing alcohol before cutting to prevent disease spread. I always sanitize tools between plants—yucca sap can harbor bacteria that infect other succulents.
Wear gloves (yucca sap can irritate skin) and have a bucket ready for debris. Place it under the plant to catch fallen fronds—yucca leaves are sharp and can puncture tires or soil. This keeps your workspace tidy and safe.
✂️ Step 3: Remove Dead and Damaged Fronds First
Start at the base and work upward. Cut dead fronds (brown, mushy, or hollow stems) 1-2 inches below the damage. For yellowing leaves, wait until they're fully brown—cutting too early stresses the plant. You'll see healthy fronds have thick, waxy green leaves with no soft spots.
If a frond is partially dead, trim only the damaged section. Never cut into green tissue—this creates wounds that invite rot. I always make cuts at a 45-degree angle to shed water away from the stem, reducing rot risk.
✂️ Step 4: Thin Overcrowded Growth for Airflow
Look for tight clusters of fronds growing inward. These block sunlight and trap moisture, inviting fungal issues. Remove every other frond in crowded areas, cutting at the base. Aim to leave 3-4 inches of space between remaining fronds for airflow.
For pups (baby yuccas) growing at the base, decide whether to remove them. If you want more plants, dig them up now—yuccas resent being crowded. If not, leave them but thin surrounding fronds to reduce competition. Always cut pups at the base with a clean slice.
✂️ Step 5: Clean Up and Monitor Recovery
After trimming, remove all debris from the base. Yucca fronds can harbor pests or disease, so compost them separately or dispose of them. Water the plant deeply (about 1 gallon per foot of height) to help it recover—this encourages new root growth.
Watch for new shoots in 4-6 weeks. Healthy regrowth looks bright green and firm. If you see yellowing at the tips after trimming, your plant is stressed—reduce watering and provide morning sun only until it stabilizes.
Tips & tricks for precision yucca trimming
Reviving your yucca doesn't have to be intimidating—these key strategies will help you trim with confidence and keep your plant thriving.
Timing is Everything: Early spring is your best window for trimming because that's when your yucca naturally starts regrowing. Look for those pale green shoots at the base—this is your cue that the plant has stored enough energy to recover. I learned this the hard way after cutting back in late winter, only to see my yucca struggle through summer. The plant needs that energy reserve to bounce back from the stress.
The 45-Degree Angle Secret: When cutting fronds, always make your cuts at a 45-degree angle just above a leaf node or growth point. This angle helps water run off the stem instead of pooling, which drastically reduces the risk of rot. I used to make straight cuts and noticed more browning at the cut edges—until I started using this technique. It's a small detail that makes a big difference in recovery.
One-Third Rule for Stress Management: Never trim more than one-third of your yucca in a single session. This rule prevents over-stressing the plant and gives it enough foliage to continue photosynthesis while it recovers. If your yucca looks particularly weak, stick to removing only dead fronds that first year. Think of it like giving your plant a spa day—you wouldn't shave your head bald in one visit, would you?
Airflow Strategy for Healthy Growth: After trimming, focus on creating space between remaining fronds. Aim for 3-4 inches of space between each one to improve airflow and prevent fungal issues. I noticed my yuccas stayed healthier after implementing this spacing, especially in humid climates. You'll know you've done it right when sunlight can reach all parts of the plant without obstruction.
Pro Tips for Cutting Back Outdoor Yucca Plant
- Reviving your yucca doesn't have to be intimidating—these key strategies will help you trim with confidence and keep your plant thriving.
- Timing is Everything: Early spring is your best window for trimming because that's when your yucca naturally starts regrowing.
- The 45-Degree Angle Secret: When cutting fronds, always make your cuts at a 45-degree angle just above a leaf node or growth point.
Frequently asked questions
Got questions about trimming your yucca plants? You’re not alone! Here are answers to common concerns—from timing to troubleshooting—to keep your outdoor yucca thriving after a cut.
When is the best time to cut back outdoor yucca plants?
The ideal time is late winter or early spring (just before new growth starts) or after flowering in spring/summer. Avoid cutting in fall or winter—yuccas need energy to store for dormancy. If you must prune in summer, do it in the early morning to reduce stress from heat.
How do I know if I’m cutting too much off my yucca?
Never remove more than 1/3 of the plant’s height in one season. Focus on dead, damaged, or overgrown leaves—never cut into the woody base or rosette. If you over-prune, your yucca may struggle to recover. Pro tip: Leave at least 3-5 healthy leaves per stem to ensure photosynthesis.
What should I do with the cuttings after trimming?
Yucca cuttings can root easily! Let them dry for 1-2 days, then plant in well-draining soil. Water lightly until established. Alternatively, use them as natural mulch or compost. Warning: Yucca sap can irritate skin—wear gloves when handling!
Why is my yucca dying after pruning?
Common causes include over-pruning, fungal infections (from wet cuts), or underwatering. If yellowing or wilting occurs, check for root rot (soil too soggy) or pests (like scale). Fix it: Trim only healthy growth, sterilize tools with rubbing alcohol, and water at the base—not the leaves.
Can I cut back a yucca that’s never been trimmed before?
Start with light maintenance: Remove brown, dried leaves or pups (offsets) to encourage fuller growth. For mature yuccas, focus on deadheading spent blooms first. Remember: Yuccas are resilient—go slow, and your plant will thank you!
Wrapping up and next steps
Cutting back your outdoor yucca plant doesn’t have to be intimidating—it’s all about timing, technique, and a little patience! 🌱 With the right tools and steps, you’ll keep your plant thriving, pest-free, and ready to bloom spectacularly.
Remember, healthy pruning = happy yucca, so don’t hesitate to roll up your sleeves and give it a go.
Now that you’re armed with the know-how, pick a calm day and start trimming. Your yucca will thank you with bold foliage and stunning flowers all season long! 🌸