Pruning
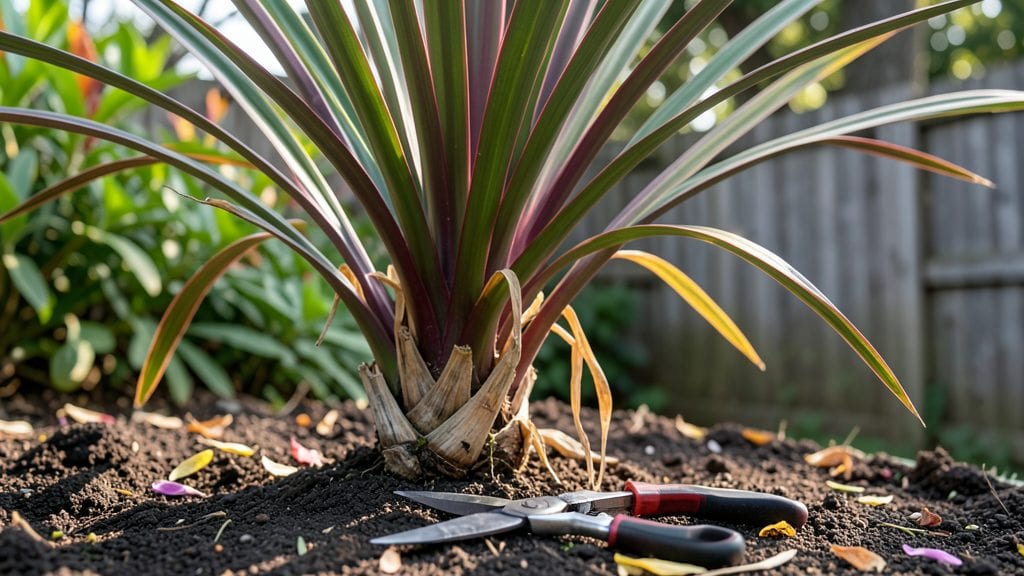
Trimming cordyline plants keeps them vibrant and full of life all year long. ✨ I’ve learned that a little precision cutting transforms these dramatic plants from straggly to stunning—it’s the difference between a showstopper and a sad corner plant.
The key is timing and technique, not brute force. Most people wait until the plant looks ragged, but regular light trims keep it lush without sacrificing growth.
You’ll need just a few tools: sharp pruners for clean cuts, a clean cloth to wipe away sap, and maybe a ladder if your cordyline is taller than you are. The best time to trim is in late winter or early spring, just as new growth starts to emerge.
This gives the plant time to recover before summer heat stresses it. Never cut more than a third of the plant at once—this keeps it from going into shock.
After trimming, you’ll notice new growth shooting up faster and the plant filling out with rich, jewel-toned foliage. The cuts heal quickly, and the plant responds by putting energy into fresh, healthy fronds.
For extra flair, shape the top with a slight taper—this mimics how they grow in nature and keeps them looking intentional, not hacked. The results are worth the effort: a cordyline that stays vibrant through every season.
If you’re nervous about making mistakes, start small—just remove a few dead or damaged fronds. Over time, you’ll develop an eye for what looks balanced. And here’s the secret: cordylines are forgiving.
Even if you trim too much, they bounce back with surprising resilience. Now grab those pruners and let’s get to work!
📚 In This Guide
- What you need
- Instructions
- Tips and common mistakes
- Wrapping up and next steps
What you need
- ● Sharp pruning shears: Bypass pruners (4–6" blade) for clean cuts on stems and leaves. Pro tip: Disinfect blades with rubbing alcohol to prevent disease spread! 💡
- ● Hand pruners: For smaller stems or tight spaces (3–4" blade).
- ● Gloves: Heavy-duty gardening gloves (nitrile-coated for grip and protection).
- ○ Loppers (optional): For thicker stems (up to 2" diameter).
- ○ Pruning saw (optional): If dealing with very thick, woody growth.
- ● Rag or paper towels: For cleaning sap or debris from tools.
- ● Sealing wax or pruning paste: To protect exposed cuts (especially in larger stems).
- ● Trash bag or bucket: For collecting clippings (1–2 gallon size).
- ○ Ladder or step stool (optional): For tall plants (3–4 ft reach).
- ● Hose or spray bottle: To rinse tools and clean up sap.
- ● Good weather: Choose a dry, overcast day to avoid stressing the plant.
- ● Safety first: Wear long sleeves and closed-toe shoes to protect from sap irritation.
- ● Know your plant: Identify dead, diseased, or overcrowded growth before you start cutting!
Step-by-step instructions for trimming cordyline plants
Here's my go-to method for keeping your cordylines vibrant and healthy year-round.
✂️ Step 1: Gather Your Tools and Assess the Plant
Start by sharpening a pair of clean, bypass pruners—dull blades tear stems and invite disease. I also grab a small bucket of soapy water to disinfect tools between cuts. Examine your cordyline for dead, yellowed, or crossing branches. These are your first targets—they rob energy from healthy growth.
Look for the plant's natural shape. Cordylines grow in a fan-like pattern, so aim to maintain that open structure. If you're unsure, snap a quick photo before cutting—you'll thank yourself later when the plant looks balanced.
✂️ Step 2: Remove Dead or Damaged Foliage First
Cut out any brown, crispy, or mushy leaves at their base using a 45-degree angle. This prevents water from pooling on the stem and causing rot. If a branch is completely dead, snip it back to the nearest healthy growth point. You'll notice the plant's center often holds the oldest leaves—these are prime candidates for removal.
Don't skip this step, even if the dead leaves look minor. Every cut you make now means fewer weak spots later. For stubborn stems, use clean pruning shears to make a clean cut just above a leaf node. You'll see small buds or growth points there—these are where new leaves will emerge.
✂️ Step 3: Shape the Plant for Balance and Airflow
Step back and visualize the plant's ideal shape—a full, rounded silhouette with no bare spots. I like to start at the top and work my way down, removing the longest stems first. Cut just above a leaf node where new growth can sprout. For thick stems, use a sharp saw if your pruners struggle—cordylines can get woody over time.
Focus on opening up the center to improve airflow. Crowded growth leads to fungal issues and weakens the plant. If you're trimming after flowering, remove spent flower stalks at their base. These suck energy from the foliage, and cutting them encourages new leaf production.
💧 Step 4: Clean Up and Encourage New Growth
After trimming, wipe down the plant with a damp cloth to remove dust and sap. This helps prevent pests from latching onto fresh cuts. Water the base thoroughly but avoid soaking the foliage—wet leaves can develop fungal spots. I usually give my cordylines a light feeding with balanced fertilizer after pruning to support regrowth.
Watch for new shoots emerging from the leaf nodes within 2-4 weeks. These are your reward for precise cuts! If you notice any yellowing after trimming, it's normal—just reduce watering slightly until the plant adjusts. The key is to trim in stages if needed; you don't have to do it all at once.
⏰ Step 5: Schedule Regular Maintenance for Year-Round Color
For best results, trim cordylines in early spring before new growth starts and again in late summer to shape for winter. This two-step approach keeps the plant looking fresh without shocking it. In mild climates, you can trim lightly every 4-6 months to maintain color and shape.
Here's the thing—cordylines are forgiving. Even if you over-trim, they'll bounce back. Just avoid cutting into old wood (the bare stems at the base)—new growth won't emerge from there. With regular trims, your plant will stay vibrant, compact, and full of color all year.
Tips & tricks for perfect cordyline trimming
A few simple tricks can transform your cordyline from ragged to showstopping. Let's dive into the details that make all the difference.
The Angle Matters: In Step 2, when you're cutting dead foliage at a 45-degree angle, this isn't just about looks—it's about plant health. That angle prevents water from pooling on the stem after rain, which drastically reduces rot risk. I've seen too many plants develop fungal issues because of straight-across cuts that create little water traps. Take your time with this step, especially on thicker stems.
Visualize Before You Cut: Before making any cuts in Step 3, step back and really look at your plant's natural shape. Cordylines have that gorgeous fan-like structure, and we want to preserve that. I always snap a quick photo before starting—it's amazing how different the plant looks from a distance. This helps me spot uneven growth patterns I might miss up close. Think of it as your plant's "before" photo for a makeover.
Timing is Everything: The instructions mention trimming in early spring and late summer, but here's what nobody tells you: morning is the best time to trim. Plants are fully hydrated from the night's watering but haven't yet lost moisture to the hot afternoon sun. This reduces stress on the plant. Plus, you'll notice new growth appears faster when you trim in the morning—it's like giving your plant a fresh start to the day.
Don't Forget the Flower Stalks: If your cordyline has flowered, those spent stalks might look harmless, but they're actually energy vampires. In Step 3, when you remove them at the base, you're not just cleaning up—you're redirecting that energy back into leaf production. I've seen plants go from looking tired to vibrant within weeks after removing just a few flower stalks. It's like giving your plant a much-needed energy boost.
Pro Tips for Trimming Cordyline Plants
- A few simple tricks can transform your cordyline from ragged to showstopping.
- The Angle Matters: In Step 2, when you're cutting dead foliage at a 45-degree angle, this isn't just about looks—it's about plant health.
- Visualize Before You Cut: Before making any cuts in Step 3, step back and really look at your plant's natural shape.
Frequently asked questions
Got questions about trimming your Cordyline plants? You’re not alone!
Here are some of the most common queries—plus expert answers to keep your plants thriving and looking their best.
When is the best time to trim Cordyline plants?
Trim your Cordyline anytime it looks overgrown or leggy, but spring and early summer are ideal for major pruning. This gives the plant time to recover before winter. Light trims to shape or remove dead leaves can happen year-round.
How much can I cut back without harming the plant?
You can safely remove up to one-third of the plant’s height in a single session. Avoid cutting into old, woody stems—focus on leggy growth or yellowed leaves. If you’re unsure, trim conservatively and monitor for new growth.
Can I propagate from the cuttings?
Cordyline cuttings root easily. After trimming, dip the ends in rooting hormone (optional) and plant them in well-draining soil. Keep the soil moist and place in bright, indirect light until roots form—usually in 4-6 weeks.
Why are my Cordyline leaves turning brown after trimming?
Brown leaves after pruning are normal if they were already damaged or dying. However, excessive browning could signal stress—check for overwatering, poor drainage, or sudden temperature drops. Reduce watering and ensure good airflow to help recovery.
How do I keep my Cordyline looking neat between trims?
For a polished look, pinch back the tips of new growth occasionally to encourage bushiness. Remove any stray leaves or stems with clean pruners, and wipe the foliage with a damp cloth to keep it dust-free. A little maintenance goes a long way!
Wrapping up and next steps
Trimming your Cordyline plants isn’t just about keeping them tidy—it’s your secret to year-round vibrancy and healthier growth! With the right tools, timing, and techniques, you’ll unlock lush foliage that steals the show.
Whether you’re pruning for shape, color, or revival, confidence comes with practice—so don’t hesitate to get your hands dirty!
Ready to take your Cordyline game to the next level? Plan your next trim—maybe even experiment with propagation from those cuttings! Your garden (and future plant babies) will thank you. 🌿✨