
Trees
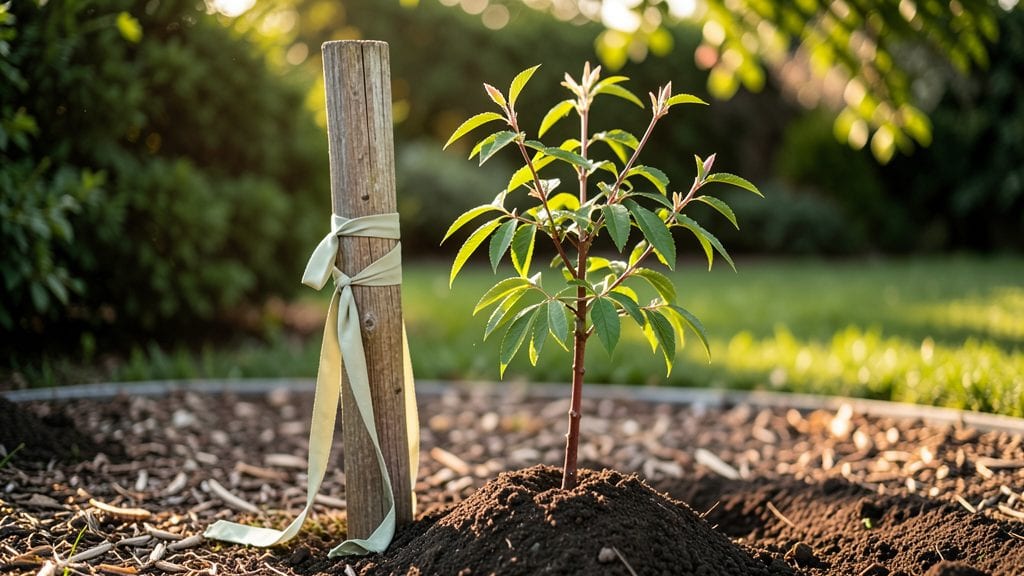
Staking newly planted trees isn't just about keeping them upright—it's about giving their roots the confidence to anchor deeply without struggling. I learned the hard way that skipping stakes with a young oak led to a crooked trunk that never fully recovered, even after years of growth.
The right stakes and ties create a temporary support system that lets roots establish naturally, not one that strangles the tree as it matures.
You'll need 2-3 wooden or metal stakes (never plastic—they don't hold up), wide fabric ties (never wire or narrow straps), and a mallet for driving stakes. The stakes should go 6-12 inches deep, angled slightly outward from the trunk to avoid leaning pressure.
For species like willows or birches with shallow roots, use softer ties that won't cut into bark as the tree sways in wind. The key is balance: enough support to prevent toppling, but not so rigid the tree grows weak from over-reliance.
After the first growing season, check if the tree can stand alone—if the stakes are still needed, leave them for another year at most. The goal is root independence, not crutches.
Once removed, you'll notice new growth patterns: trees that were staked too long often develop weak trunks or lean unnaturally. For deep-rooted trees like maples or oaks, you might remove stakes after just 12 months, while shallow-rooted fruit trees may need them for 2 seasons—but never beyond.
Here's the real secret: species matter. Fast-growing trees like poplars need staking for 1 season, while slow-growing conifers might handle it for 2. And always tie the tree above the root flare—never at the base, where it can girdle the trunk as the tree grows.
The stakes should be just tight enough to prevent movement, not so tight the tree can't sway slightly in the wind. That natural movement actually strengthens the roots.
📚 In This Guide
- What you need
- Instructions
- Tips and common mistakes
- Wrapping up and next steps
What you need
- ● Stakes: 2–4 wooden or metal stakes per tree (2–3 ft tall, ½–1 in diameter)
- ● Tapered tops (to prevent digging into the tree trunk)
- ● Strap or Tie: Tree tie straps (soft, wide fabric or rubber, 1–2 in wide)
- ● OR soft tree tape (avoid wire or plastic that can girdle the trunk)
- ● Shovel: Round-point or flat-edged for digging holes
- ● Mallet or Hammer: For driving stakes into the ground
- ● Measuring Tape: To ensure proper stake placement (12–18 in from the trunk)
- ● Water: For hydrating the tree post-staking
- ● Stake anchors or ground spikes (for extra stability in windy areas)
- ● Tree guard or protective wrap (to shield the trunk from rubbing)
- ● Mulch (2–4 in layer around the base, keeping it 6 in away from the trunk)
- ● Garden gloves (to keep hands clean and comfortable)
Step-by-Step instructions for staking newly planted trees
Here's how to properly support young trees without causing long-term damage to their roots.
Choose the Right Stakes and Ties
Select two 4-6 foot tall wooden or metal stakes for each tree. I prefer wooden stakes because they're gentler on roots if they need to be removed later. Drive one stake on each side of the tree, about 6-12 inches from the trunk, angled slightly outward. This triangular formation provides the most stable support.
Use soft tree ties—never wire or plastic strips that can cut into the bark as the tree grows. The ties should be 3-4 inches wide to distribute pressure evenly. I keep a supply of these on hand because regular garden twine or zip ties will girdle the trunk over time. Make sure you have enough ties to wrap around the trunk twice without overlapping.
Position the Tree Correctly Before Staking
Before attaching anything, check that the tree is planted at the correct depth. The root flare—the area where roots spread from the trunk—should be 1-2 inches above the soil line. If it's buried too deep, the tree will struggle to breathe and may rot. Once depth is confirmed, gently straighten the trunk if needed, but don't force it.
Position the stakes so they're not directly touching the trunk. Leave at least 2 inches of space between the stake and bark to prevent rubbing. I like to visualize an equilateral triangle when placing the stakes—this ensures balanced support. The ties should go above and below where the stakes meet, creating an "X" shape that holds the tree securely without constricting growth.
Secure the Tree Without Restricting Movement
Wrap the first tie around the trunk and stake, leaving 1-2 inches of slack. This allows the tree to sway slightly in the wind, which actually strengthens its trunk over time. Tighten the tie just enough to prevent leaning—you should be able to fit one finger between the tie and the trunk. I always start the tie at the bottom and work upward to avoid pulling the bark downward.
Add a second tie 6-12 inches higher on the trunk, repeating the same loose fit. The upper tie prevents the tree from bending at the midpoint, which is where weak stems often snap. Double-check that neither tie is twisted or too tight. If the tree feels immobilized, loosen it immediately—restricted movement weakens roots faster than wind damage.
Monitor and Adjust Over Time
Check the stakes and ties every 2-4 weeks during the first growing season. Trees grow surprisingly fast, and what was loose at planting may become too tight after just a few weeks. If you see the tie digging into the bark or the tree leaning against it, loosen or replace the tie immediately. I've seen trees with deep grooves from ties that weren't checked regularly.
Most trees can be removed from stakes after 1-2 growing seasons, unless they're particularly top-heavy or in windy locations. To remove stakes, cut the ties first, then pull the stakes straight out. Never pry them sideways—this can tear roots. After removal, watch the tree for a few weeks to ensure it's stable on its own. If it leans, you may need to restake temporarily.
Prepare for Stake Removal
Start planning to remove stakes before the tree becomes dependent on them. By the time the trunk is 1 inch in diameter, most trees have developed enough strength to stand alone. I mark the removal date on my calendar when I first plant the tree, so I don't forget. The best time to remove stakes is early spring before new growth begins.
When removing stakes, do it gradually if possible. Cut one tie completely, then loosen the other slightly over several days. This helps the tree adjust to wind forces without sudden shock. After removal, water deeply to help the roots establish in the newly undisturbed soil. You'll often see new root growth within weeks—this is a sign the tree is thriving without artificial support.
Tips & tricks for perfectly staking newly planted trees
Staking trees properly is all about balance—supporting growth without smothering it. These small details make a big difference in how your young trees thrive.
Stake Placement Matters: When driving your 4-6 foot stakes in Step 1, angle them slightly outward rather than straight up. This creates a more stable triangular formation that resists leaning forces. I've seen stakes pulled right out when they're planted vertically—this angled approach prevents that. Also, make sure the stakes are buried deep enough so they don't wobble when you push on them, but not so deep they become impossible to remove later.
Tie Tightness is Critical: In Step 3, the 1-2 inches of slack in your ties might seem like a lot, but it's essential. Trees need to sway slightly in the wind to develop strong stems. I've seen trees with ties so tight they created deep grooves in the bark—this actually weakens the tree. Think of the ties as a gentle reminder to stand straight, not a straightjacket. You should be able to fit one finger between the tie and trunk without forcing it.
Root Flare Visibility Check: Before you even think about staking, do this quick check in Step 2: Look at where the roots spread from the trunk. That 1-2 inches above soil line is your target. If it's buried, gently scrape soil away—buried root flares can't breathe properly and may rot. I've dug up trees where the flare was completely covered, and they were already showing signs of stress. This one simple check can save you from replanting.
Monitoring Schedule: The 2-4 week monitoring interval in Step 4 is non-negotiable. Trees grow faster than you might expect, and what feels loose at planting can become too tight in just a few weeks. I mark my calendar with reminders because I've seen ties that were perfect at planting become dangerously snug by the second check. If you notice the tree leaning against the stake or the tie digging in, adjust immediately—better to check too often than too little.
Pro Tips for Staking Newly Planted Trees
- Staking trees properly is all about balance—supporting growth without smothering it.
- Stake Placement Matters: When driving your 4-6 foot stakes in Step 1, angle them slightly outward rather than straight up.
- Tie Tightness is Critical: In Step 3, the 1-2 inches of slack in your ties might seem like a lot, but it's essential.
Frequently asked questions
Got questions about staking your newly planted trees? You’re not alone—proper staking can feel tricky! Here are answers to the most common concerns to help you plant with confidence.
Do I really need to stake every newly planted tree?
Not always! Staking is most critical for young, shallow-rooted, or top-heavy trees (like willows, maples, or newly planted fruit trees) in windy areas. Mature trees or deep-rooted species (e.g., oaks) often stabilize on their own. Test the soil: If the tree wobbles more than 5–10 degrees, stake it for the first 1–2 years.
How long should I leave the stakes in?
Stakes should stay in place for 1–2 years max—longer can cause girdling (where the trunk grows around the stake) or weaken roots. Remove them once the tree’s root system is strong enough to support itself. Pro tip: Check annually by gently tugging the tree; if it resists, it’s ready for stake freedom!
What if my tree is leaning after planting? Can I straighten it with stakes?
Yes, but act fast! Within 24–48 hours of planting, adjust the stakes to gently guide the trunk upright. Use flexible ties (not wire) to avoid damaging the bark. For severe leans, bury the stakes deeper or add a third stake on the opposite side for balance. Warning: Never force a tree—gradual correction prevents root stress.
Are there alternatives to traditional stakes and ties?
Try these low-stress options:
- Tree guards: Plastic or metal guards (like Tree Gator) protect trunks while providing natural support.
- Burlap wraps: Secure the tree to a nearby sturdy post with soft fabric to reduce friction.
- No stakes at all: For small trees, mound soil or mulch around the base to weigh it down (works best in calm areas).
My tree’s bark is rubbing against the stake—what should I do?
This is a red flag! Immediate action:
- Loosen or remove the tie right away to prevent girdling.
- Wrap the stake with tree-friendly foam tubing or a rubber guard to create a barrier.
- Check ties monthly—they should allow slight trunk movement (like a gentle hug).
Wrapping up and next steps
Staking newly planted trees isn’t just about stability—it’s about giving them the confidence to thrive while protecting their delicate roots.
By choosing the right materials, securing stakes properly, and monitoring growth, you’re setting the stage for strong, resilient trees that will reward you for years to come. Your effort today is their foundation tomorrow!
Ready to take the next step? Start by inspecting your tree’s progress every few weeks—loosen stakes as needed and celebrate those first signs of independence! 🌱 For extra peace of mind, consider marking your calendar to revisit this guide before planting season begins.