Vegetables
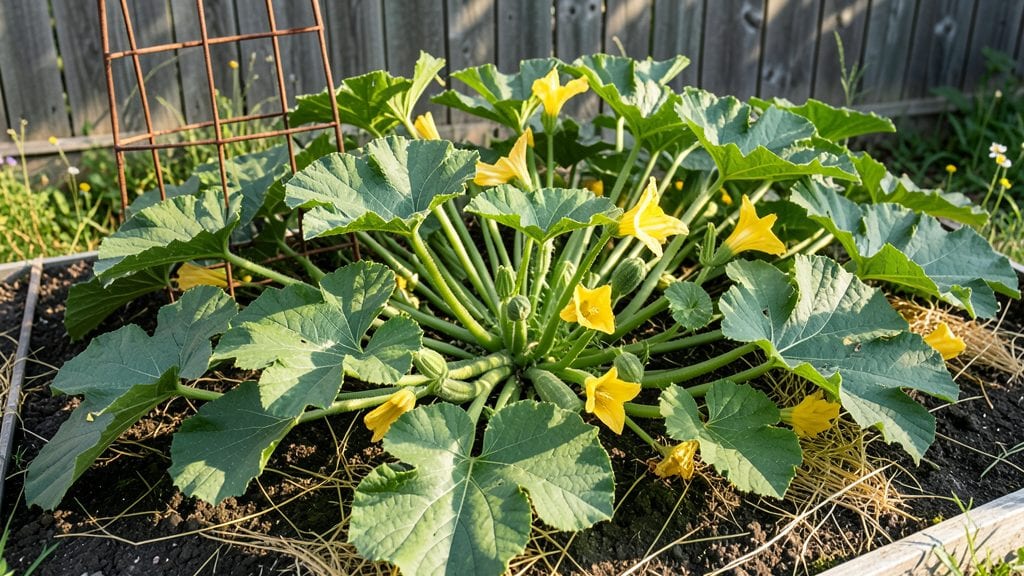
Understanding squash plant growth stages turns a guessing game into a predictable harvest. 🌱 From the moment those first sprouts poke through soil to the day you pick plump, vine-ripened squash, each phase has its own care needs—and I’ve tracked them all to save you from common pitfalls.
The early weeks focus on sturdy seedlings, while later stages demand vigilance against pests and proper pollination. Knowing these stages means fewer surprises and more consistent yields, even if you’re new to growing squash.
The journey starts with germination, where soil warmth and moisture trigger those tiny seeds to split open. Within 7-14 days, you’ll spot delicate seedlings reaching for light—this is when proper spacing (2-3 feet apart) prevents crowding later.
As they grow, watch for broad leaves unfolding; these signal the plant’s shift toward flowering, which happens roughly 4-6 weeks after planting. The key here is consistent watering—1-2 inches per week—without letting soil dry out completely, or you’ll stress the plant before it even flowers.
Once those bright yellow blooms appear, you’re in the fruiting stage, where squash vines transform from leafy giants into heavy producers. 🌻 Prune excess vines to direct energy toward fruit development, and keep an eye out for squash vine borers—tiny but devastating pests that chew through stems.
Harvest begins when squash feel firm to the touch and rinds harden, usually 50-60 days after flowering, depending on the variety. The earlier you pick, the more you encourage new fruit to form, extending your harvest window.
This visual guide breaks down each stage with care tips tailored to home gardens, from seed-starting hacks to troubleshooting common issues like powdery mildew. Whether you’re growing zucchini, butternut, or acorn squash, mastering these stages means fewer wasted plants and more homegrown goodness on your table.
Let’s walk through it step by step—no gardening degree required.
📚 In This Guide
- What you need
- Instructions
- Tips and common mistakes
- Wrapping up and next steps
What you need
- ● Seeds: Choose butternut, zucchini, or pumpkin seeds (5–10 per plant, depending on variety). Opt for heirloom or organic seeds for best results.
- ● Containers or Garden Bed: Containers: 5-gallon pots (1–2 per plant) with drainage holes.
- ● Garden Bed: Well-draining soil in a sunny spot (6+ hours of sunlight daily).
- ● Potting Mix: High-quality, sterilized seed-starting mix (avoid garden soil—it may contain pests or diseases).
- ● Fertilizer: Starter Fertilizer: Balanced (10-10-10) or compost for seedlings.
- ● Growth Fertilizer: Low-nitrogen (5-10-10) once plants are established.
- ● Watering Can or Hose: With a gentle spray nozzle for seedlings.
- ● Garden Gloves: To protect hands while handling soil or prickly squash vines.
- ● Mulch: Straw or shredded leaves to retain moisture and suppress weeds.
- ● Row Covers: Lightweight fabric to protect young plants from pests or frost.
- ● Trellis or Cage: For vining varieties like butternut squash (3–4 ft tall).
- ● pH Test Kit: To ensure soil pH is 6.0–7.0 (squash prefers slightly acidic to neutral soil).
- ● Plant Markers: Labels to track varieties and planting dates.
- ● Pruning Shears: For trimming excess vines or yellowing leaves.
- ● Compost Tea: Organic liquid fertilizer for a nutrient boost mid-season.
Understanding squash growth: a step-by-step visual journey
Here's how I track squash development—from tiny sprouts to vine-ripping harvests—so you know exactly what to expect at each stage.
🌱 Step 1: Germination and Seedling Emergence
Squash seeds typically sprout within 7-14 days after planting, depending on soil warmth. You'll notice the first sign when a small loop of the seedling pushes through the soil surface. This is called the hypocotyl, and it's your first visual cue that everything's working.
Keep the soil consistently moist but not soggy during this time—watering too much can cause the seeds to rot before they sprout. Once the seedling emerges, it will quickly unfurl its first true leaves, which look like small, rounded shapes. These leaves are your signal that the seedling is establishing itself and ready for its next growth phase.
🌿 Step 2: Vegetative Growth and Vine Development
Within 2-3 weeks after sprouting, your squash plant will enter its vegetative stage, where it focuses on growing leaves and vines. You'll see rapid growth as the plant develops broad, lobed leaves—this is when squash plants start to look distinctly like their mature selves.
The vines will begin to spread outward, and you might notice small tendrils forming at the tips. These tendrils help the plant climb or sprawl, depending on the variety. This is also the time to watch for male flowers, which appear first and look like small yellow blooms without any swelling at the base. Don't be alarmed if you see a few drop off—they're just testing the waters before the real action begins.
☀️ Step 3: Flowering and Pollination
About 4-6 weeks after germination, female flowers will start to appear. You can tell them apart from male flowers because they have a tiny squash-like swelling at their base, where the fruit will eventually form. These flowers typically open in the morning and close by afternoon, so you'll need to be observant.
Pollination happens when bees or other pollinators transfer pollen from the male flowers to the female flowers. If you're growing squash in a greenhouse or an area with few pollinators, you might need to hand-pollinate by gently transferring pollen from the male flowers to the female flowers using a small brush. Watch for the female flowers to wilt slightly after successful pollination—a sign that fruit development has begun.
🪴 Step 4: Fruit Development and Maturation
Once pollinated, the female flowers will begin to swell into squash fruits within 7-10 days. At this stage, the fruits will start small and hard, but they'll grow rapidly as the plant channels energy into their development. You'll notice the skin toughening and the shape becoming more defined.
Monitor the size and color of the squash as it matures. Most varieties are ready to harvest when they reach their full size and the skin turns a deep, solid color—whether it's green, yellow, or orange, depending on the type. For example, zucchini is typically harvested when it's about 6-8 inches long, while butternut squash can take much longer to reach maturity. Always check the variety's specific guidelines to ensure you're harvesting at the perfect time.
⏰ Step 5: Harvesting and Post-Harvest Care
Harvest squash in the morning when the fruits are cool and firm. Use a sharp knife or pruning shears to cut the squash from the vine, leaving a small stem attached. This helps extend the shelf life of your harvest. Handle the squash gently to avoid bruising, which can lead to spoilage.
After harvesting, store squash in a cool, dry place with good air circulation. Most varieties keep well for 1-2 weeks at room temperature, though some, like winter squash, can be stored for months in a cool, dark environment. Keep an eye out for any signs of rot or soft spots—these are indicators that the squash is no longer fresh and should be used or composted promptly.
Tips & tricks for perfect squash plant growth
Growing squash from seed to harvest is easier when you know what to watch for at each stage.
Germination Timing: The 7-14 day window for germination depends on soil temperature. I've found that soil needs to be at least 60°F for consistent sprouting. If your seeds haven't emerged after 14 days, gently scratch the soil surface to check for rot—sometimes seeds sprout but get buried by soil settling. Keep soil moist but not waterlogged during this critical period.
Vegetative Growth Watch: During the 2-3 week vegetative stage, don't be surprised if your squash plants seem to grow overnight! These plants are heavy feeders, so side-dress with compost when vines reach 12 inches long. The first true leaves should appear within 7-10 days of sprouting, signaling the plant is establishing its energy reserves for flowering.
Pollination Strategy: When female flowers appear in weeks 4-6, I recommend hand-pollinating in the morning when flowers are fresh. Use a small paintbrush to transfer pollen from male flowers (they appear first) to female flowers (look for the tiny squash swelling at the base). This ensures better fruit set, especially in areas with limited bee activity. Watch for the female flowers to wilt slightly after successful pollination.
Harvesting Cues: For summer squash like zucchini, harvest when fruits reach 6-8 inches—any longer and they become seedy and less tender. Winter squash varieties need to fully mature on the vine, so check your specific variety's guidelines. Always harvest in the morning when fruits are cool and firm, leaving a small stem attached to preserve shelf life.
Pro Tips for Squash Plant Growth Stages
- Growing squash from seed to harvest is easier when you know what to watch for at each stage.
- Germination Timing: The 7-14 day window for germination depends on soil temperature.
- Vegetative Growth Watch: During the 2-3 week vegetative stage, don't be surprised if your squash plants seem to grow overnight!
Frequently asked questions
about squash growth stages—because every gardener deserves clarity! Here are answers to the most common questions to help you nurture thriving plants from seed to harvest.How long does it take for squash plants to go from seed to harvest?
Most squash varieties take 50 to 70 days to mature after germination, depending on the type (summer vs. winter). Summer squash (like zucchini) can be ready in as little as 45 days, while winter squash (like butternut) may take up to 100 days. Check seed packets for exact timelines!
What’s the best temperature for squash seed germination?
Squash seeds germinate best in soil temperatures between 70°F and 90°F (21°C–32°C). If your soil is too cold, use a seedling heat mat or wait until nighttime temps stay above 55°F (13°C). Patience pays off—rushing can lead to weak seedlings!
Why are my squash leaves turning yellow or curling?
Yellowing or curling leaves often signal pests (like squash bugs or aphids) or diseases (powdery mildew). Check the undersides of leaves for pests and remove affected foliage immediately. Improve airflow between plants and avoid overhead watering to prevent fungal issues.
Can I grow squash in containers, or does it need a garden bed?
Yes! Squash thrives in containers if you choose compact varieties (like ‘Eight Ball’ zucchini) and provide at least 5-gallon pots per plant. Ensure pots have drainage holes and use a lightweight potting mix. Just be prepared for smaller yields—container-grown squash may need more frequent harvesting!
How do I know when squash is fully ripe for harvest?
For summer squash, harvest when firm and 1–3 inches long (like zucchini). For winter squash, wait until the skin hardens and the stem dries (like butternut squash). A gentle tap should sound hollow—time to pick! Overripe squash turns seedy and tough.
Wrapping up and next steps
Understanding the squash plant growth stages from seed to harvest empowers you to nurture thriving vines and bountiful yields! 🌱 Whether you’re a beginner or seasoned gardener, each phase—from germination to fruiting—offers a chance to fine-tune care and troubleshoot early.
With the right knowledge and a little patience, your garden can become a productive paradise.
Ready to take the next step? Start planting! Pick your favorite squash variety, gather your supplies, and watch your garden transform. Happy growing—your future harvests will thank you! 🎉