
Planting
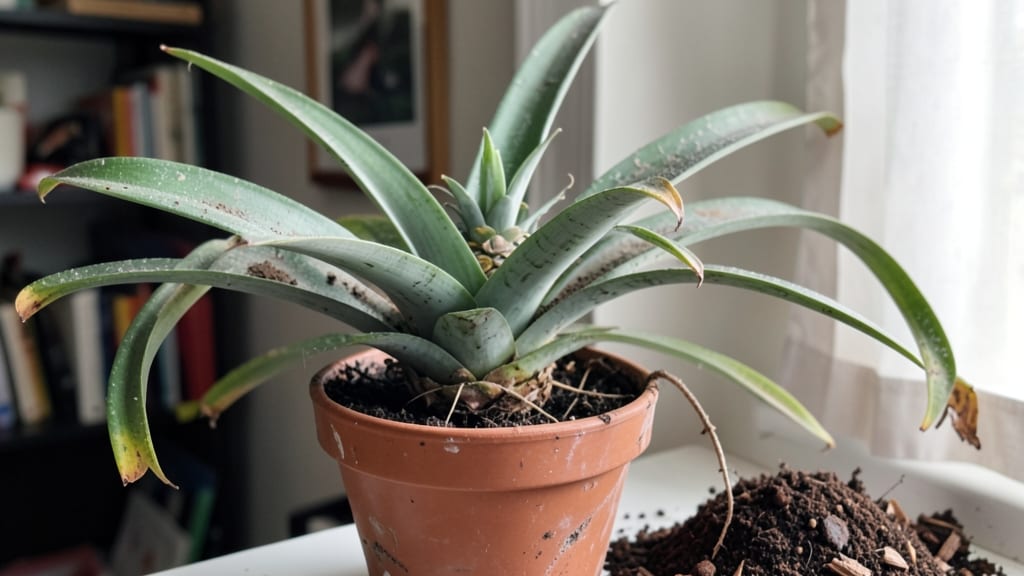
Repotting a pineapple plant gives it the room to grow roots that spread wider than your current pot can handle. 🌱 I’ve watched my pineapple’s leaves go from tight and stiff to lush and spreading—proof that a fresh container and soil mix can transform a struggling plant into a thriving one.
The key is timing: wait until you see roots circling the bottom or poking out of drainage holes, usually every 18-24 months for mature plants.
You’ll need a container just 1-2 inches wider than the current pot—too big slows drainage and encourages rot. A terracotta or ceramic pot with drainage holes works best, and a well-draining mix of cactus soil and perlite keeps roots happy.
Skip the fancy additives; pineapples hate soggy feet, and this combo stays loose while holding enough moisture. Grab a trowel, gloves, and a saucer to catch any soil runoff during the move.
After gently removing the plant, tease apart any root-bound clusters with your fingers—no need to force them. Place it in the new pot, fill gaps with fresh soil, and water lightly to settle everything.
The first few weeks are critical: keep it in bright, indirect light and avoid heavy watering until new roots establish. You’ll know it’s thriving when the leaves perk up and new growth starts at the base within 4-6 weeks.
Here’s the secret I learned the hard way: pineapples hate being repotted in winter. Aim for spring or early summer when temperatures stay above 60°F and days are long. If you live in a humid climate, mist the leaves occasionally to mimic their tropical home—just don’t drown the roots.
With the right timing and care, your pineapple will reward you with bold new leaves and maybe even a flower spike down the line.
📚 In This Guide
- What you need
- Instructions
- Tips and common mistakes
- Wrapping up and next steps
What you need
- ● New pot: A container with drainage holes, 2-3 inches larger in diameter than the current pot (e.g., 6–8 inches for a mature pineapple). Terracotta or ceramic is ideal for airflow.
- ● Well-draining potting mix: A blend of 50% cactus/succulent soil, 30% perlite or pumice, and 20% coarse sand or orchid bark. Avoid heavy garden soil!
- ○ Gloves (optional but recommended): Pineapple plants can have sharp leaves—protect your hands!
- ● Trowel or small shovel: For gently loosening roots and adding soil.
- ● Watering can or spray bottle: For post-repotting hydration (go light!).
- ○ Fertilizer (optional but helpful): A balanced, water-soluble fertilizer (10-10-10) diluted to half-strength for a post-repotting boost.
- ● Rooting hormone: Speeds up recovery if your pineapple has damaged roots.
- ● Mulch (e.g., gravel or pebbles): Adds a decorative touch and helps retain moisture.
- ● Plant support (e.g., small stake): Useful if your pineapple is top-heavy or leggy.
- ● Spray bottle with hydrogen peroxide (3%): Sanitizes tools and pots to prevent disease.
Step-by-Step guide for repotting pineapple plants
Here's how I refresh pineapple plants for stronger growth—no guesswork, just clear steps.
🌱 Step 1: Choose the Right Pot and Prepare New Soil
Pineapples need a pot 1-2 inches larger in diameter than their current container to encourage root expansion. I use terracotta pots because they wick away excess moisture—pineapples rot easily if their roots stay soggy. The new pot should have drainage holes, and I always add a 1-inch layer of small gravel or perlite at the bottom to prevent compaction.
Use a well-draining cactus or succulent mix combined with 30% perlite or pumice to improve aeration. Avoid garden soil—it compacts and suffocates roots. Mix the soil ingredients in a clean bucket until it's light and fluffy. The texture should resemble coarse sand when squeezed.
🪴 Step 2: Gently Remove the Plant and Inspect Roots
Water the pineapple plant 24 hours before repotting so the soil is moist but not dripping. This makes the root ball easier to handle without breaking delicate roots. Turn the pot on its side and gently tap the edges until the plant slides out. If it resists, run a knife around the inside edge to loosen the soil.
Inspect the roots for signs of rot (mushy, black areas) or pests (tiny white insects or webbing). Trim any damaged roots with sterilized scissors, but leave healthy white or light tan roots intact. If the plant has multiple pups (baby plants) at the base, separate them now—each pup can grow into its own pineapple with proper care.
💧 Step 3: Repot and Settle the Plant
Place the pineapple plant in the center of the new pot, ensuring the base sits just above the soil line—burying the base too deep can cause rot. Fill the sides with the prepared soil mix, pressing lightly as you go to eliminate air pockets. Stop when the soil reaches ½ inch below the pot’s rim—this prevents water from spilling out during irrigation.
Give the pot a gentle shake to help soil settle around the roots. Water lightly until moisture seeps from the drainage holes, but avoid soaking the plant. The goal is to moisten the soil without displacing it. Place the repotted pineapple in a spot with bright, indirect light for 1 week to reduce stress.
☀️ Step 4: Adjust Light and Water Gradually
After the first week, move the pineapple to its permanent location with 4-6 hours of morning sun and afternoon shade. Direct afternoon sun can scorch the leaves, especially right after repotting. Watch for new growth at the tips of the leaves—this signals the plant is recovering and ready for normal care.
Water only when the top 1-2 inches of soil feel dry. Stick your finger in the soil to check; if it’s damp, wait another day. Overwatering is the #1 killer of repotted pineapples. After 4-6 weeks, resume regular watering (every 2-3 weeks) once the plant shows signs of established growth.
Tips & tricks for repotting pineapple plants
A few simple tricks will help your pineapple plant thrive after repotting—these are the game-changers I've learned from years of growing my own.
Pot Size Matters: That 1-2 inch larger pot recommendation in Step 1 isn't arbitrary—it gives roots room to spread without becoming root-bound. I've seen pineapples in pots that were too small develop stunted growth and yellowing leaves. If you're unsure about size, measure your current pot's diameter and add exactly 1.5 inches to your new pot's measurement.
Soil Texture is Everything: The cactus mix with 30% perlite isn't just a suggestion—it's critical. I've ruined plants by using regular potting soil (seriously, don't make my mistake!). The perlite creates air pockets that prevent root rot. Test your mix by squeezing it: it should crumble easily between your fingers, not hold together like wet sand.
Root Inspection Secrets: When you're checking roots in Step 2, look for healthy roots that are white or light tan. Dark brown or black roots are rotten and must be trimmed. Between us, I've found mealybugs hiding in the roots before—they look like tiny white cotton balls. If you spot them, soak the roots in soapy water for 10 minutes before repotting.
Light Transition Strategy: That first week of bright indirect light in Step 3 is crucial for recovery. I place my repotted pineapples under a grow light if I don't have a perfect spot. After the week, I gradually increase sunlight exposure by moving them closer to the window each day. Sudden full sun can cause leaf burn, which looks like crispy brown edges.
Pro Tips for Repotting Pineapple Plant
- A few simple tricks will help your pineapple plant thrive after repotting—these are the game-changers I've learned from years of growing my own.
- Pot Size Matters: That 1-2 inch larger pot recommendation in Step 1 isn't arbitrary—it gives roots room to spread without becoming root-bound.
- Soil Texture is Everything: The cactus mix with 30% perlite isn't just a suggestion—it's critical.
Frequently asked questions
Got questions about repotting your pineapple plant? You’re not alone!
Here are answers to the most common concerns—so you can keep your tropical friend happy and healthy after the move.
When is the best time to repot a pineapple plant?
The ideal time is spring or early summer when the plant is actively growing. Avoid repotting in winter, as cooler temperatures slow recovery. If your pineapple is root-bound (roots circling the pot) or the soil is depleted, don’t wait—act now! Just be gentle to avoid stressing the plant.
How often should I repot my pineapple plant?
Repot every 2–3 years or when you notice roots growing out of drainage holes. Pineapples prefer being slightly root-bound, so avoid over-potting. If the soil breaks down quickly (like 1–2 years), opt for a smaller pot with fresh, well-draining mix instead of upsizing.
Can I repot a pineapple plant without a pot? (Bare-root method)
Yes! If your pineapple is small (like a pup), you can plant it directly into soil without a pot. For mature plants, a shallow, wide container mimics their natural habitat. Use a mix of cactus/succulent soil + perlite for drainage. Just ensure the area gets bright, indirect light—pineapples hate soggy roots!
What if my pineapple plant turns yellow or droops after repotting?
Don’t panic! Yellowing leaves or wilting often mean overwatering or root shock. Let the soil dry completely between waterings (stick your finger in—if it’s damp, wait). Place the plant in bright, indirect light and avoid fertilizing for 4–6 weeks. Most pineapples bounce back in 2–3 weeks.
What’s the best pot material for repotting pineapples?
Use terracotta or ceramic pots with drainage holes—they breathe and prevent rot. Avoid plastic, which traps moisture. For outdoor pineapples (in warm climates), a fiberglass or wooden planter works too. Pro tip: Size up only 1–2 inches in diameter—pineapples prefer snug spaces!
Can I reuse the old soil when repotting?
Nope! Old soil loses nutrients and compacts over time. Replace 100% of it with a fresh mix of cactus/succulent soil + perlite/pumice (ratio 60:40). If you’re short on time, sterilize the old soil by baking it at 200°F (93°C) for 30 minutes to kill pests, but repotting is still better.
Wrapping up and next steps
Repotting your pineapple plant is a simple yet rewarding task that ensures its health and vibrant growth! 🌱 By choosing the right pot, soil, and timing, you’ll help your plant thrive—whether it’s a young sapling or a mature, fruiting plant. Remember: patience and gentle care go a long way.
Now that you’re armed with the know-how, take the next step—schedule your repotting session and give your pineapple a fresh start. Watch it flourish, and soon, you might just enjoy the sweet reward of homegrown fruit! 🍍✨