
Companion Plants
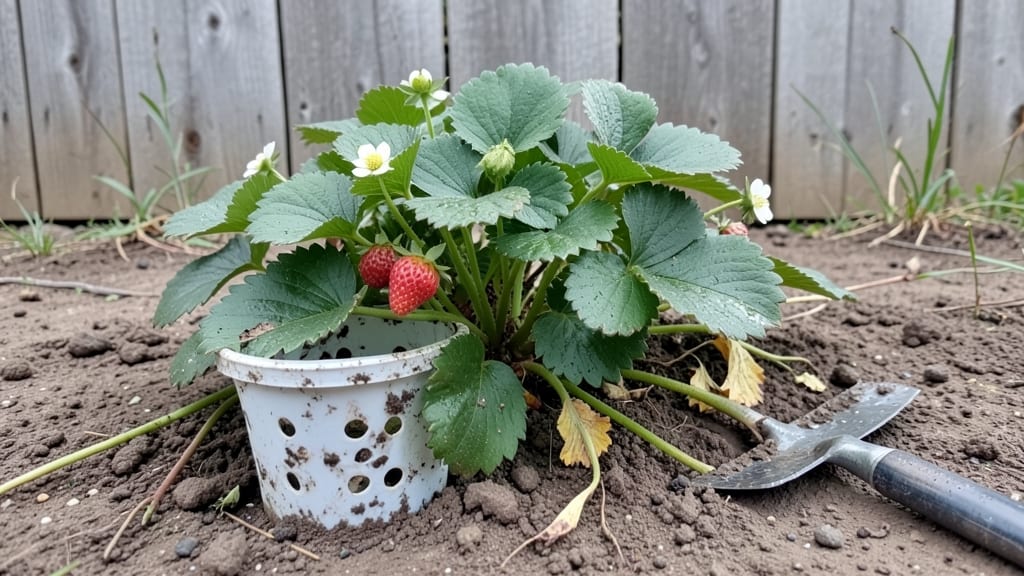
Repotting strawberry plants can double your harvest if you do it right—this is how I went from struggling with crowded roots to overflowing baskets of fruit. 🌱 The key isn’t just moving them to a bigger container; it’s giving their roots fresh air, better drainage, and the space to spread out.
I’ve repotted mine every other year, and the difference in fruit size and quantity is shocking.
You’ll need a container at least 12 inches wide (or deeper for everbearing varieties), fresh potting mix designed for containers, and a handful of perlite or sand to improve drainage. I use black plastic pots because they absorb heat, which strawberries love, but any container with drainage holes works.
Gather pruning shears too—you’ll be trimming those long runners later. The whole process takes about 30 minutes, and timing matters: late winter or early spring, just as new growth starts.
After repotting, your plants will look stressed at first—droopy leaves, maybe even a few yellow ones—but that’s normal. Keep them in partial shade for a week while they adjust, then move them back to full sun.
Water deeply every 2-3 days, letting the top inch of soil dry out between waterings. Within 4-6 weeks, you’ll see new leaves pushing out, and by summer, those berries will be bigger and more abundant than ever.
The secret isn’t forcing growth; it’s giving the roots the right conditions to thrive.
Here’s the thing—most people rush the repotting process, which leads to root shock or disease. Take your time with the roots, tease them apart gently if they’re tangled, and avoid packing the soil too tightly. And if you’re growing everbearing varieties?
Pinch off the first few flowers you see—the plant will reward you with a second, even bigger harvest later in the season. Trust the process, and your strawberries will thank you with fruit that’s sweeter and more plentiful than you’ve ever had.
📚 In This Guide
- What you need
- Instructions
- Tips and common mistakes
- Wrapping up and next steps
What you need
- ● New pots or containers: 1-2 containers per plant (depending on size)
- ● Minimum 5-gallon capacity for mature plants (bigger is better!)
- ● Drainage holes mandatory (or drill them yourself!)
- ● Material: Terracotta, fabric, or plastic (terracotta breathes best but dries faster).
- ● High-quality potting mix: 1 bag (or enough to fill containers)
- ● Look for well-draining, organic mix (avoid garden soil—it compacts!).
- ○ Optional: Amend with perlite or vermiculite (10-20%) for extra aeration.
- ● Pruning tools: 1 pair of sterilized scissors or pruners (clean with rubbing alcohol!).
- ● 1 small trowel or hand fork (for gentle root separation).
- ● Watering supplies: Watering can or hose with a gentle spray nozzle (avoid blasting roots!).
- ● 1-2 cups of room-temperature water per plant for initial watering.
- ● Slow-release fertilizer (balanced 10-10-10 or organic)—mix 1 tbsp per gallon of soil.
- ● Mulch (straw, pine needles, or shredded bark) to retain moisture and deter weeds.
- ● Epsom salt (1 tsp per gallon of water) for a magnesium boost (especially if leaves look yellow).
- ● Plant support (small stakes or cages) if your strawberries are heavy-fruited varieties.
Step-by-Step instructions for repotting strawberry plants
Here’s how to refresh your strawberries for stronger roots and bigger fruit.
🪴 Step 1: Choose the Right Containers and Soil Mix
Pick 6-8 inch deep pots with drainage holes—strawberries hate soggy roots. I use terra cotta containers because they wick away excess moisture naturally. Fill each with a mix of 50% potting soil and 50% compost (the compost adds nutrients strawberries crave). Avoid garden soil—it compacts and blocks root growth.
Moisten the mix lightly before planting. You’ll know it’s ready when a handful clumps together but crumbles easily when squeezed. This balance keeps roots happy without drowning them. If the mix feels dry, add a sprinkle of water and mix again.
✂️ Step 2: Gently Remove and Inspect the Roots
Water the plant 24 hours before repotting—this loosens the root ball and makes it easier to handle. Gently slide the plant from its old container, shaking off old soil to check for root-bound signs (roots circling the pot or growing through drainage holes). If you see these, it’s time to trim the roots with clean scissors.
Snip any black, mushy roots (a sign of rot) immediately. Healthy roots should be white or light tan. If the plant looks stressed, give it a 10-minute soak in water before repotting—this helps revive any damaged roots. Never force the roots; strawberries are delicate and recover best when handled gently.
🌱 Step 3: Plant at the Correct Depth and Firm Soil
Position the plant so the crown (where leaves meet roots) sits just above the soil line. Burying it too deep causes rot, while leaving it exposed slows growth. Fill the pot with your soil mix, pressing lightly as you go to remove air pockets. Leave 1 inch of space at the top for watering.
Strawberries need good air circulation, so avoid packing the soil too tightly. Tap the pot gently on the table to settle the mix, then water deeply until it drains from the bottom. You’ll know it’s right when water runs out the drainage holes—this ensures excess moisture doesn’t linger.
☀️ Step 4: Acclimate and Care for Recovery
Place the repotted strawberries in bright, indirect light for the first 3-5 days. This helps them adjust without shock. After that, move them to full sun (6+ hours daily). Strawberries bounce back fastest when they get consistent light—watch for new leaves forming in 7-10 days as a sign they’re recovering.
Water every 2-3 days, keeping the soil evenly moist but not soggy. Overwatering now can undo all your work. After 2 weeks, feed with a balanced fertilizer (10-10-10) to boost growth. You’ll see stronger stems and more buds in 4-6 weeks—that’s your reward for repotting.
🌿 Step 5: Prune and Support for Bigger Harvests
Once the plant stabilizes, trim any weak or damaged leaves to redirect energy to fruit production. Strawberries grow best when they focus on new growth and berries, not repairing old damage. Remove any flower buds if you’re repotting in early spring—this encourages larger, healthier plants for a bigger harvest later.
Add straw mulch (yes, the kind for fruit!) around the base to protect berries from rot and pests. This also keeps soil moist and warm, which strawberries love. Within 8-10 weeks, you’ll have plump, sweet berries—proof your repotting paid off.
Tips & tricks for repotting strawberry plants
A few key strategies that'll help your strawberries thrive after repotting—and avoid the most common mistakes that sabotage growth.
Container Selection: Terra cotta pots are ideal because they breathe, but any container with drainage holes works. I've seen people use plastic pots successfully too—just make sure they have holes and aren't too shallow. The 6-8 inch depth is crucial for root development, so avoid anything less than 6 inches deep. If you're repotting multiple plants, use containers that are at least 12 inches apart to prevent competition for nutrients.
Root Revival Technique: That 24-hour pre-watering is your secret weapon for stress-free repotting. I learned this the hard way after seeing plants shock when pulled from dry soil. For extra tender roots, add a tablespoon of seaweed fertilizer to the water during that 10-minute soak in Step 2—it helps revive damaged roots and boosts recovery. The goal is to keep roots moist but never soggy during this process.
Soil Mix Secrets: The 50/50 potting soil to compost ratio is perfect, but if you want to customize, add a handful of perlite to improve drainage. I've also found that adding a slow-release fertilizer to the soil mix at planting time eliminates the need for early feeding. Just mix in 1-2 tablespoons of organic fertilizer granules per pot before adding your strawberry plant. This gives you a head start on the 2-week feeding schedule mentioned in Step 4.
Light Transition Strategy: The 3-5 day acclimation period in bright indirect light is where most people fail. I recommend placing your repotted plants near an east-facing window during this time, as morning sun is gentler than afternoon heat. After the 5 days, gradually move them to full sun over 2-3 days rather than all at once—this prevents sunburn on newly transplanted plants. Watch for those new leaves forming around day 7-10 as your confirmation that they're recovering well.
Pro Tips for Repot Strawberry Plants
- A few key strategies that'll help your strawberries thrive after repotting—and avoid the most common mistakes that sabotage growth.
- Container Selection: Terra cotta pots are ideal because they breathe, but any container with drainage holes works.
- Root Revival Technique: That 24-hour pre-watering is your secret weapon for stress-free repotting.
Frequently asked questions
Got questions about repotting strawberries? You’re not alone! Here are the most common concerns—and their solutions—to help you grow thriving plants with confidence.
When is the best time to repot strawberry plants?
The ideal time is early spring (before new growth starts) or late summer (after fruiting). Avoid repotting during extreme heat or cold—roots need time to recover. If your plants are root-bound (circling roots) or struggling in old soil, act fast! Pro tip: Check for roots peeking out of drainage holes as a sign it’s time.
How do I know if my strawberries need repotting?
Watch for these red flags:
- Roots circling the pot (like a pretzel!)
- Yellowing leaves or stunted growth
- Soil drying out too quickly (overcrowding = less water retention)
- Fewer berries or smaller harvests
Can I repot strawberries into any container?
Nope! Strawberries need well-draining pots (at least 6 inches deep) with holes to prevent root rot. Fabric grow bags or terracotta pots work great, but avoid plastic without drainage. For hanging baskets, use a 3-gallon minimum per plant—smaller pots = smaller harvests. Pro tip: Add perlite or sand to heavy soil mixes for extra airflow.
What should I do if my strawberries wilt after repotting?
Wilting is normal for 1–2 weeks as roots adjust! Keep soil lightly moist (not soggy) and place pots in partial shade for a few days. Avoid fertilizing until new growth appears. If wilting persists beyond 2 weeks, check for root rot (smelly, mushy roots)—trim affected areas and repot with fresh, sterile soil. Pro tip: Mist leaves daily to reduce stress.
Will repotting my strawberries affect next year’s harvest?
Not if done right! Repotting boosts harvests by giving roots more space and nutrients. However, June-bearing varieties may take a year to rebound fully. Ever-bearing or day-neutral types often produce well the same season. Pro tip: Prune old leaves after repotting to redirect energy to root growth—more roots = more berries!
Wrapping up and next steps
Repotting your strawberry plants is a simple yet powerful way to revitalize their roots, boost growth, and unlock bigger, sweeter harvests! 🌱 By choosing the right pot, soil, and timing—plus addressing common concerns like pests or transplant shock—you’re giving your plants the fresh start they deserve.
With patience and care, you’ll soon enjoy plump, juicy berries that taste like summer in every bite.
Ready to transform your garden? Grab your supplies, follow the steps, and watch your strawberries thrive! Next, explore companion plants to pair with your repotted strawberries for an even more productive patch.