
Pruning
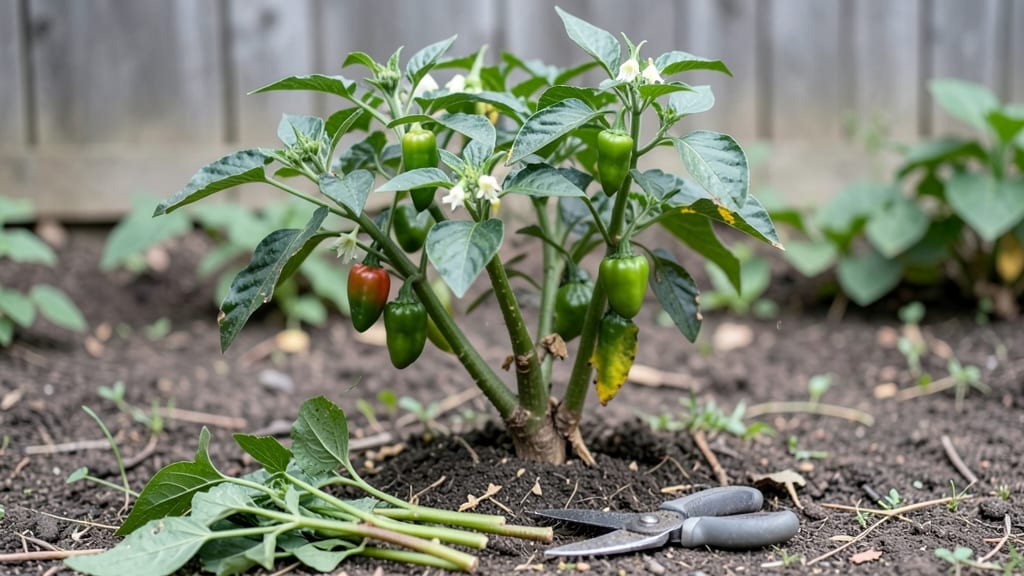
Pruning chilli plants isn't just about shaping them—it's the secret to doubling your harvest and keeping plants vigorous. I learned this the hard way when my first attempt left me with a bush full of leaves and zero peppers.
The right cuts redirect energy where it matters: to fruit production, not just foliage. What seemed like a gamble became my most productive season yet.
Timing and technique matter more than most gardeners realize. You'll want to prune in the morning when plants are hydrated, using clean shears to avoid disease. Start by removing the lower leaves to improve air circulation—this alone cuts down on fungal issues.
Then, focus on suckers (those little shoots between stems) and any leggy growth that's sapping energy from potential peppers. Think of it like sculpting: every cut should serve a purpose.
Within weeks, you'll notice thicker stems and more flowers setting fruit. My favourite variety, 'Carolina Reaper,' went from producing 10 peppers to over 50 after I mastered this method.
The plants stay compact, easier to manage, and the fruit ripens faster. Even if you've pruned wrong before, this approach is forgiving—just don't overdo it, and you'll see results.
This works for all chilli types, from sweet bell peppers to fiery habaneros, and adapts to containers or in-ground planting. The key is consistency: a little maintenance now means a bountiful harvest later. Ready to transform those scraggly bushes into pepper powerhouses?
📚 In This Guide
- What you need
- Instructions
- Tips and common mistakes
- Wrapping up and next steps
What you need
- ● Pruning shears or scissors – Sharp, clean, and sterilized (bypass pruners work best for precision cuts). Quantity: 1 pair (or 2 if pruning multiple plants).
- ● Gloves – Garden or nitrile gloves (to protect from thorns and spicy sap). Quantity: 1 pair.
- ● Rubbing alcohol (70% or higher) – For sterilizing tools between cuts to prevent disease spread.
- ○ Disinfectant spray (optional but recommended) – Hydrogen peroxide (3%) or a commercial garden disinfectant for tool sanitization.
- ○ Small bucket or container – For collecting pruned material (optional but handy for composting).
- ● Good weather – Choose a dry, sunny day (avoid pruning after rain to prevent fungal risks).
- ● Patience & a sharp eye – Take your time to identify the right cuts for optimal growth.
- ● Compost bin or trash bag – For disposing of diseased or pest-infested prunings (don’t compost these!).
- ● Hand lens or magnifying glass – For spotting pests or early signs of disease on leaves/stems.
- ● Pruning sealant – Like tree wound paint (controversial but some swear by it for large cuts).
- ● Notebook & pen – To track pruning dates and plant responses for future reference.
- ● Safety glasses – If your chilis are thorny monsters (like habaneros or Scotch bonnets!).
Step-by-step guide to pruning chili plants for maximum yield
Healthy chili plants need strategic cuts to redirect energy toward fruit production—not just foliage.
Identify the Right Time to Prune
Prune your chili plants in the morning when temperatures are cooler and humidity is lower. This reduces stress on the plant and gives it time to recover before the heat of the day. I wait until the plant has at least 6-8 leaves and a sturdy stem—usually 4-6 weeks after transplanting. Pruning too early can stunt growth, while waiting too long means you miss the window for optimal fruit production.
Look for secondary stems (suckers) growing from the base or between the main stem and branches. These compete with your main plant for nutrients. If you see leggy growth or yellowing leaves, that’s another sign it’s time to prune. Healthy plants have vibrant green leaves and strong stems ready for shaping.
Remove Suckers for Stronger Growth
Suckers are the small shoots that grow from the stem junctions (where branches meet the main stem). Use clean, sharp pruning shears to snip these off at the base, just above where they meet the main stem. Don’t leave a stub—this prevents disease and encourages cleaner regrowth. I prune suckers every 2-3 weeks during the growing season to keep the plant focused on fruit production.
If you see suckers growing from the base of the plant, remove them immediately—they drain energy that could go toward peppers. A well-pruned plant will have fewer but stronger branches, each bearing more fruit. Watch for new suckers after each pruning session; they’ll appear within 1-2 weeks if conditions are right.
Trim Leggy or Overgrown Branches
Leggy branches are long, thin stems with sparse leaves. These happen when plants get too much shade or inconsistent light. Use your pruning shears to cut these back to a healthier, shorter section of the stem—ideally one with 2-3 leaves remaining. This encourages bushier growth and more flower production.
If a branch is yellowing or diseased, remove it entirely to prevent spread. Sterilize your shears with rubbing alcohol between cuts to avoid contamination. After trimming, step back and assess the plant’s shape—you want an open, airy structure that allows sunlight to reach all branches evenly.
Encourage Flowering with Strategic Cuts
To boost flower production, prune the top of the main stem (the terminal bud) when it reaches 12-18 inches tall. This forces the plant to send out secondary branches, each of which can produce more peppers. I do this once per season, usually in early summer when the plant is established but before flowering begins.
After pruning the top, watch for new side shoots to form within 1-2 weeks. These will become your new fruiting branches. Avoid over-pruning—never cut more than one-third of the plant’s foliage at once. A balanced plant with plenty of leaves ensures it can still photosynthesize enough to support fruit growth.
Maintain and Monitor After Pruning
After pruning, water deeply to help the plant recover. Keep the soil moist but not soggy for the next 5-7 days, then return to your normal watering schedule. Fertilize with a balanced, low-nitrogen fertilizer (like 10-10-10) to support new growth. You’ll see new leaves emerging within 10-14 days—that’s your sign the plant is healing.
Continue monitoring for new suckers or leggy growth and prune as needed. By late summer, your plant should be covered in flowers and small peppers. If peppers stop forming, check for overwatering, pests, or nutrient deficiencies—these can stress the plant and reduce yield. A well-pruned chili plant will reward you with bigger, healthier peppers all season long.
Tips & tricks for pruning chili plants
Precision pruning transforms your chili plants from bushy foliage monsters into pepper-producing powerhouses. Here's how to maximize your harvest without stressing the plant.
Timing is Everything: The 4-6 week window after transplanting is critical for establishing a strong root system before pruning. I've learned the hard way that pruning too early can stunt growth, while waiting too long means you miss the peak flowering period. Watch for those 6-8 leaves and sturdy stems—this is your plant's way of saying "I'm ready!"
Tool Prep Prevents Problems: Sterilize your pruning shears with rubbing alcohol between cuts to prevent disease spread. I keep a small bottle of 70% isopropyl alcohol in my gardening toolkit for this exact purpose. Sharp, clean tools make cleaner cuts that heal faster, reducing stress on your plant. Don't skip this step—it's the difference between healthy regrowth and potential infections.
The One-Third Rule: Never remove more than one-third of the plant's foliage at once, as specified in Step 4. This maintains the plant's ability to photosynthesize while still redirecting energy toward fruit production. Think of it like giving your plant a haircut—you want to shape it, not shave it bald. After each pruning session, step back and assess the plant's overall shape to ensure proper airflow and sunlight penetration.
Recovery Routine: That 5-7 day moist-but-not-soggy watering schedule after pruning is non-negotiable. I've seen plants recover beautifully when given this gentle care, while others struggled when watered inconsistently. The key is to help the plant focus its energy on healing rather than compensating for stress. You'll notice new leaves emerging within 10-14 days—a clear sign your plant is thriving and ready for another round of maintenance.
Pro Tips for Pruning Chilli Plants
- Precision pruning transforms your chili plants from bushy foliage monsters into pepper-producing powerhouses.
- Timing is Everything: The 4-6 week window after transplanting is critical for establishing a strong root system before pruning.
- Tool Prep Prevents Problems: Sterilize your pruning shears with rubbing alcohol between cuts to prevent disease spread.
Frequently asked questions
Got questions about pruning your chilli plants? You’re not alone! Here are some of the most common queries—plus clear, actionable answers to keep your peppers thriving.
When is the best time to prune chilli plants?
Prune chilli plants after they’ve established 4-6 true leaves (about 4-6 weeks old) and before flowering to encourage bushier growth. Avoid heavy pruning during fruiting—just trim dead or diseased leaves year-round. Early morning pruning minimizes stress on plants.
How much should I cut off my chilli plant?
Remove no more than 25-30% of the plant’s foliage in a single session. Focus on:
- Dead, yellow, or diseased leaves
- Suckers (weak shoots between main stem and branches)
- Overcrowded stems blocking airflow
Will pruning reduce my chilli harvest?
Not if done right! Pruning increases yields by redirecting energy to fewer, healthier branches and fruits. Over-pruned plants may struggle, but strategic cuts (like removing suckers) boost airflow, reducing pests/diseases and letting peppers ripen faster. Less stress = more flavor!
Can I prune chilli plants in hot or humid climates?
Yes, but time it carefully—prune during cooler parts of the day (early morning or late afternoon) to avoid shock. In humidity, let cuts heal for 1-2 days before heavy watering to prevent fungal infections. Pro tip: Use sterilized pruners and avoid wetting leaves during pruning.
What if my chilli plant looks sad after pruning?
Don’t panic! Mild wilting is normal—your plant is adjusting. Revive it with:
- Bright, indirect light (no direct sun for 24 hours)
- Water only when the top inch of soil is dry
- A balanced fertilizer (like 10-10-10) 1 week post-prune
Wrapping up and next steps
Pruning your chilli plants isn’t just about trimming—it’s about unlocking their full potential for bigger yields and stronger growth. By mastering the right techniques and timing, you’ll encourage bushier plants, healthier blooms, and a harvest that’ll make your taste buds dance! 🌶️✨
Ready to take the next step? Grab your pruners, roll up your sleeves, and give your chilli plants the care they deserve. Your future harvests will thank you!