
Pruning
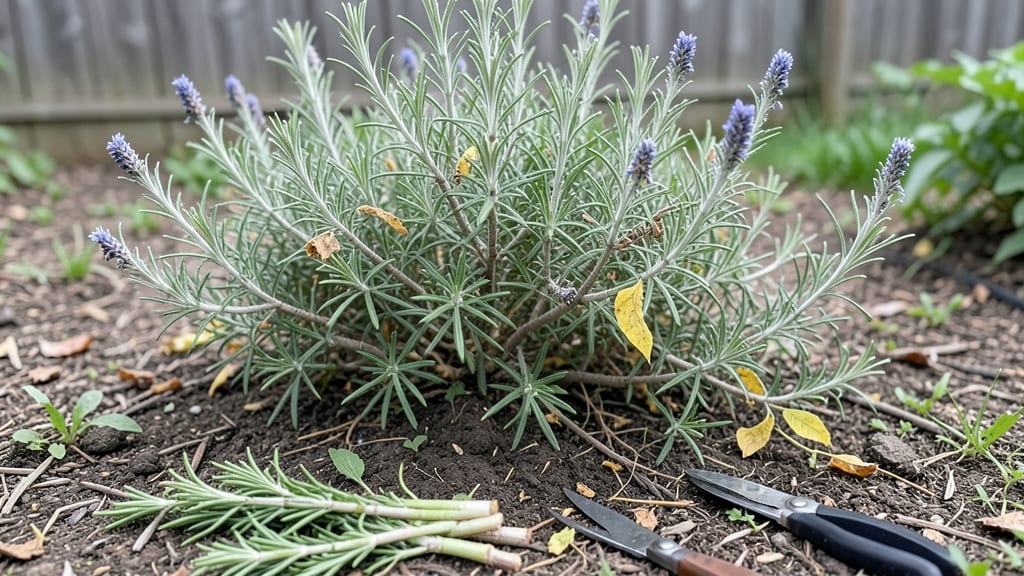
Knowing how to prune a plant can turn a scraggly shrub into a lush, vibrant beauty—it’s the secret behind my roses’ transformation from sad to showstopping in just a few hours. ✨ of focused pruning, and the secret isn’t complicated: it’s about timing, the right tools, and knowing where to cut.
The first step is gathering your tools—a sharp pair of pruners (dull blades tear stems), gloves for protection, and rubbing alcohol to sterilize cuts. You’ll also want a small bucket for clippings and maybe a notebook to track which branches you remove.
Most people skip this prep, and that’s when mistakes happen—like spreading disease or accidentally cutting too much.
By the end, you’ll have a plant that looks fuller, produces more blooms, and stays healthier longer. The key is cutting just above a leaf node or bud, never leaving stubs, and always making clean slices.
For flowering plants, prune right after they bloom; for fruit trees, wait until winter. Every cut encourages new growth in the right places.
This method works for everything from roses and hydrangeas to fruit trees and even herbs. The principles stay the same—what changes is how aggressively you prune. Ready to give it a try? Your plants will thank you.
📚 In This Guide
- What you need
- Instructions
- Tips and common mistakes
- Wrapping up and next steps
What you need
- ● Pruning shears: Bypass pruners (for clean cuts on stems up to ½ inch thick) or anvil pruners (for thicker branches). Pro tip: 💡 Sharpen blades before use for precision!
- ● Hand pruners: For smaller branches (¼ inch or less). Look for ergonomic grips to avoid hand fatigue.
- ● Loppers: For medium-sized branches (½ to 1½ inches thick). Opt for bypass-style loppers for cleaner cuts.
- ● Pruning saw: For thick branches (1½+ inches). A curved-tooth saw prevents tearing wood.
- ● Disinfectant: Rubbing alcohol (70% or higher) or a commercial pruning sealant to sterilize tools between cuts and prevent disease spread.
- ● Gloves: Heavy-duty gardening gloves (nitrile-coated for grip and protection against thorns or sap).
- ● Bucket or bag: For collecting pruned branches (a 5-gallon bucket or mesh bag works well).
- ○ Sharpie or marker: Permanent marker for labeling cuts (optional but helpful for tracking progress).
- ● Hose or spray bottle: To clean tools mid-pruning and rinse off sap.
- ● Pruning sealant: For sealing large cuts (over ½ inch) to prevent pests or disease entry.
- ● Ladder or step stool: For reaching higher branches safely (ensure it’s stable and rated for your weight).
- ● Plant growth regulator: If pruning to encourage blooms (e.g., for roses or flowering shrubs).
- ● Notebook or app: To sketch your plant’s structure or track pruning dates.
Instructions: how to prune a plant for healthier growth
Here's my go-to method for pruning that keeps plants fuller and more productive.
🌿 Step 1: Identify the Right Time to Prune
Most plants respond best when pruned in early spring or right after flowering. This timing encourages new growth before the active season begins. For flowering plants, I always wait until after the blooms fade—cutting back too early removes next year's flower buds.
Look for healthy, mature stems—these are your best candidates. Avoid pruning when the plant is under stress from drought, extreme heat, or disease. You'll know it's the right moment when the plant looks vigorous, with bright green leaves and no signs of yellowing or wilting.
✂️ Step 2: Gather the Right Tools and Clean Them
Use sharp, clean pruning shears—dull blades tear stems instead of making clean cuts. I keep a small bottle of rubbing alcohol handy to wipe down blades between cuts, preventing the spread of disease. For thicker stems, grab bypass pruners or a hand saw to avoid crushing the wood.
Disinfect your tools before you start. A quick wipe with alcohol ensures no old plant pathogens hitch a ride to your next cut. Store tools in a dry place after use to keep them rust-free and ready for the next pruning session.
🌱 Step 3: Make Precision Cuts at the Right Spots
Cut just above a leaf node—that’s where new growth will sprout. Angle the cut at 45 degrees to shed water away from the stem, reducing rot risk. Avoid leaving stubs; a clean cut heals faster and looks better. For dead or diseased branches, cut back to healthy green tissue—you’ll see a clear contrast between living and dead wood.
If you're shaping a shrub, aim for an open center—this improves airflow and sunlight penetration. For flowering plants, trim back one-third of the oldest stems to encourage new blooms. Watch for suckers (shoots growing from the base) and remove them to redirect energy to stronger growth.
💧 Step 4: Monitor and Care for the Plant After Pruning
Water the plant deeply after pruning to help it recover. The roots need moisture to support new growth, especially if you’ve made significant cuts. Avoid fertilizing right away—pruned plants focus energy on healing before producing new leaves or flowers.
Keep an eye out for new shoots emerging from the cut areas within 2-4 weeks. If you notice yellowing leaves or wilting, it might mean the plant is stressed—adjust watering or provide light shade until it stabilizes. Pruning is a conversation with your plant; listen to how it responds.
⏰ Step 5: Schedule Regular Maintenance Pruning
Light pruning every 4-6 weeks keeps plants tidy and encourages bushier growth. Pinch back the tips of new growth to prompt branching—this is how you get that lush, full look. For fruit-bearing plants, prune after harvest to shape the plant for next season.
Take notes on what works! Jot down which cuts produced the best results and adjust your approach each time. Over time, you’ll develop a rhythm with your plants—knowing exactly when and how to prune for the healthiest, most vibrant growth.
Tips & tricks for perfect plant pruning
A few small details can make all the difference between a plant that thrives and one that struggles after pruning.
Timing is Everything: Early spring or right after flowering is ideal, but don't overlook seasonal variations. For tropical plants, prune during their natural growth spurts—usually spring or early summer. If you missed the spring window, you can do a light maintenance prune in late summer, but avoid heavy cuts that might stimulate new growth too close to winter. The key is always to prune when your plant is actively growing, not dormant.
Tool Technique: When using pruning shears, squeeze the handles firmly but don't crush the stems. I've learned the hard way that forcing the cut can damage the plant tissue. For thicker branches, use bypass pruners—they make cleaner cuts that heal faster. And here's what nobody tells you—always cut just outside the branch collar (that swollen area where the branch meets the trunk) to prevent decay. That little detail makes a huge difference in long-term plant health.
Visual Cues for Perfect Cuts: That 45-degree angle isn't just for looks—it helps water run off the cut instead of pooling. To make perfect angles every time, place your thumb on the underside of the stem where you want to cut, then angle your shears to match. For leaf nodes, look for the tiny bump where leaves attach—this is where new growth will emerge. If you're unsure, cut just above where leaves meet the stem, but never leave stubs. The plant will thank you with stronger regrowth.
Post-Pruning Care: After making your cuts, don't just walk away! Water deeply right after pruning to help the plant recover. I've seen many gardeners skip this step and end up with stressed plants. Also, keep an eye out for new shoots emerging within 2-4 weeks—they're your plant's way of saying "thank you" for the pruning. If you notice yellowing leaves, it might mean your plant is adjusting, but if it persists beyond a couple weeks, check your watering schedule or light exposure.
Pro Tips for Prune A Plant
- A few small details can make all the difference between a plant that thrives and one that struggles after pruning.
- Timing is Everything: Early spring or right after flowering is ideal, but don't overlook seasonal variations.
- Tool Technique: When using pruning shears, squeeze the handles firmly but don't crush the stems.
Frequently asked questions
Got questions about pruning? You’re not alone—even seasoned gardeners need a refresher now and then! Here are answers to the most common queries to help you prune like a pro.
When is the best time to prune my plant?
Timing depends on your plant type! For floral bloomers (like roses or hydrangeas), prune right after they finish flowering. Evergreens and fruit trees should be pruned in late winter or early spring before new growth starts. Deciduous trees can handle pruning in late fall or winter when they’re dormant. Always avoid pruning during extreme heat or cold.
What if I cut too much off by mistake?
Don’t panic! Over-pruning can stress a plant, but most recover with time. Water deeply and avoid fertilizing for a few weeks to help it bounce back. If you’ve removed too many branches (over ⅓ of the plant), it may take a season or two to regrow. For severe cases, focus on care—light, water, and patience—while new growth emerges.
Can I prune a plant without sharp tools?
While it’s possible to use scissors or even your hands for small trims, dull tools cause damage and increase the risk of disease. Invest in a bypass pruner for clean cuts on stems up to ½ inch thick, and a pruning saw for thicker branches. Sharp tools make all the difference in plant recovery and appearance!
Will pruning kill my plant?
Pruning shouldn’t kill a healthy plant—it’s actually a way to improve its health! However, over-pruning, wrong timing, or poor technique can stress it. Always cut at a 45-degree angle just above a leaf node or bud, and avoid removing more than ⅓ of the plant’s foliage at once. If your plant looks sad after pruning, give it extra care (water, shade, and no fertilizer) for a few weeks.
How do I prune a plant that’s never been trimmed before?
Start slow! First, remove dead, diseased, or crossing branches to improve airflow. Then, shape the plant by cutting back overgrown stems to encourage bushier growth. For young plants, focus on training their structure early. If it’s a large shrub or tree, consider hiring a professional for the first pruning to avoid mistakes. Think of it as a “haircut”—better to start with a gentle trim than a drastic overhaul!
Pro Tip:
Always sterilize your tools with rubbing alcohol or a 10% bleach solution before and after pruning to prevent spreading bacteria or fungi. A little prep goes a long way in keeping your plants thriving!
Wrapping up and next steps
Pruning isn’t just about trimming—it’s about revitalizing your plants for lush growth and vibrant blooms! 🌿 Whether you’re shaping a shrub, encouraging fruit production, or simply keeping your garden tidy, precision cuts make all the difference.
With the right tools, timing, and techniques, you’ll unlock healthier, fuller plants that thrive year after year.
Ready to put your new skills to work? Start with one plant this weekend—pick a branch to prune, follow the steps you’ve learned, and watch your green thumb shine! 🌟 For extra confidence, revisit our FAQs or grab a pruning guide tailored to your favorite plants. Happy pruning!