Propagation
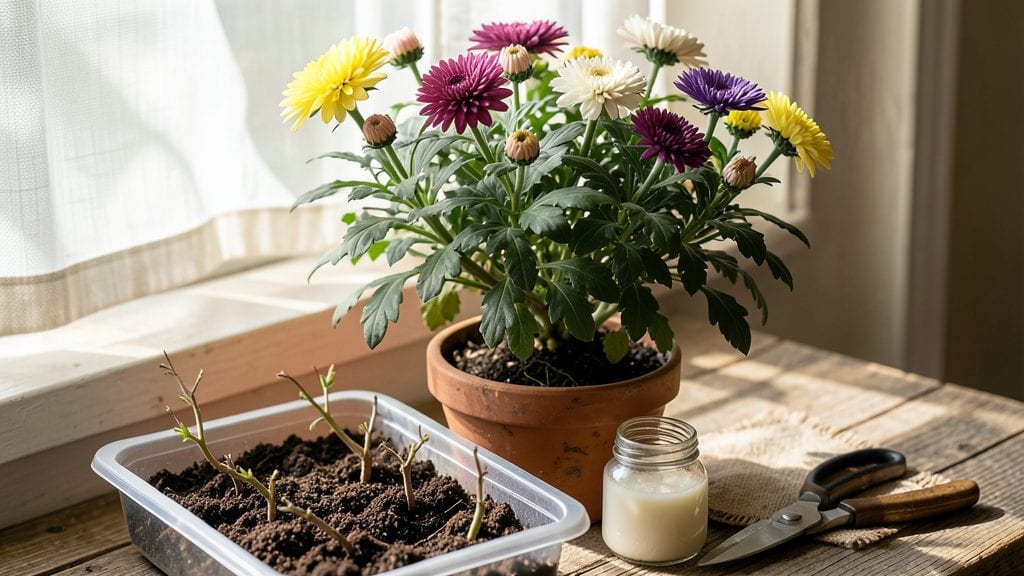
Propagating chrysanthemums through layered cuttings lets you multiply plants in just a few weeks—no nursery tags required. 🌱 I’ve turned a single bush into a dozen thriving plants using this method, and the best part?
You don’t even need fancy tools. The secret lies in the plant’s natural ability to root while still attached, creating perfect mini-clones that stay true to the parent’s vibrant blooms and hardy growth.
All you’ll need is a pair of clean pruners, a small pot for rooting, and some potting mix. Timing matters too—spring or early summer gives you the warm soil and long days needed for strong root development.
The process is simple: bend a healthy stem down, make a small cut, and tuck it into the soil. Within weeks, you’ll see tiny roots forming, ready to become independent plants.
What you end up with is a garden full of identical chrysanthemums that bloom just as prolifically as the original. The plants stay compact, disease-resistant, and perfectly suited to your climate.
Plus, you’ll have extras to share with neighbors—because everyone loves free, thriving plants. Ready to turn one bush into many?
This method works for both garden varieties and container-grown chrysanthemums, making it perfect for small spaces or expanding your garden without breaking the bank. Let’s get those cuttings rooted and growing!
📚 In This Guide
- What you need
- Instructions
- Tips and common mistakes
- Wrapping up and next steps
What you need
- ● Healthy chrysanthemum plants: Choose mature, non-flowering stems (4–6 inches long) with at least 2–3 leaf nodes.
- ● Sharp pruning shears or clean scissors: Sterilize with rubbing alcohol to prevent disease.
- ○ Rooting hormone (optional but recommended): A powder or gel to boost root growth (e.g., Clonex or Rootone).
- ● Plastic or metal clips: 3–5 small clips (e.g., bobby pins or plastic plant propagation clips) to secure layers.
- ● Moisture-retentive medium: Sphagnum moss or a mix of perlite + peat (sterilized).
- ● Clear plastic bag or humidity dome: To trap moisture (e.g., a ziplock bag with holes punched in it).
- ● Spray bottle: For misting layers and keeping them damp.
- ● Garden gloves: To protect hands from thorns or sap.
- ● Small pots or trays: 2–3 shallow containers (4–6 inches wide) with drainage holes.
- ○ Pencil or chopstick: For gently prodding soil around layers (optional).
- ● Fertilizer (low-nitrogen, 5-10-5):** 1 tsp per gallon of water—add after roots form (4–6 weeks).
- ● Grow lights or sunny windowsill: Bright, indirect light (6+ hours/day) for best results.
Step-by-Step instructions for propagating chrysanthemum plants
Here’s the foolproof way to multiply your chrysanthemums using layered cuttings—no fancy tools, just patience and a sharp eye!
🌱 Step 1: Select Healthy Stems for Layering
Choose 4-6 healthy, non-flowering stems per plant, each with at least 3-4 leaf nodes (those little bumps where leaves grow). Look for stems that are thick as a pencil—they’ll root best. Avoid stems with flowers or buds, as they’ll focus energy on blooming instead of rooting.
Use clean, sharp pruning shears to make a 45-degree cut just above a leaf node. This angled cut gives the stem more surface area to heal and root. If you’re working with a mature plant, you can even bend a stem gently downward—this encourages callusing, which speeds up root formation.
💧 Step 2: Create the Layer and Encourage Root Growth
Select a stem and make a small slit (about ½ inch long) in the bark just above a leaf node using your pruning shears. This tiny wound will help roots emerge faster. Gently bend the stem downward until the slit touches the moist potting mix (about 2-3 inches deep). Secure it in place with a plastic plant tie or a small U-shaped wire pin.
Keep the potting mix consistently moist—not soggy, but damp enough that your finger sinks in slightly. Place the pot in a bright, indirect light spot (like a shaded windowsill) where temperatures stay between 65-75°F. Roots should appear in 4-6 weeks, but check weekly by gently tugging the stem—if there’s resistance, roots are forming!
☀️ Step 3: Separate and Transplant Rooted Cuttings
Once the layered stem has 2-3 inches of new roots, it’s ready to separate. Use your pruning shears to cut just below the new root growth, leaving the original plant intact. Gently remove the rooted cutting and plant it in its own 4-inch pot filled with fresh potting mix.
Water lightly to settle the soil, then place the new pot in bright, indirect light for a week to help it adjust. Avoid direct sun at first—it can stress the young roots. After 7-10 days, gradually introduce it to morning sun to harden it off before moving outdoors.
✂️ Step 4: Maintain and Encourage New Growth
Keep the soil evenly moist but never waterlogged—chrysanthemums hate soggy roots. Fertilize lightly with a balanced 10-10-10 fertilizer every 4-6 weeks to encourage strong growth. Pinch back the tips of new shoots to promote bushier growth, just like you would with a mature plant.
By late summer, your new chrysanthemum cuttings will be ready to bloom—or you can keep them growing for another season! The best part? You’ve just doubled (or quadrupled!) your chrysanthemum collection without spending a dime on new plants.
Tips & tricks for perfect chrysanthemum propagation
Here's what nobody tells you about getting those layered cuttings to root like a pro—these little tricks make all the difference!
Timing Secret: The 4-6 week window for root growth is your best friend, but don't get impatient! I've seen roots appear as early as 3 weeks in perfect conditions (warmth, humidity, and bright indirect light), but they often take the full 6 weeks. The key is consistency—check weekly by gently tugging the stem near the slit. If you feel resistance, roots are forming!
The Technique That Changed Everything: In Step 2, when making that ½-inch slit, I learned the hard way that deeper isn't better—keep it shallow! A deeper cut can damage the stem's ability to transport water and nutrients. Instead, focus on making it clean and precise right above a leaf node. Pro tip: Dip your pruning shears in rubbing alcohol between cuts to prevent spreading any potential pathogens.
Temperature Matters: Those 65-75°F temperatures in Step 2 aren't just arbitrary—they're perfect for chrysanthemum root growth. If your home runs cooler, consider using a small heat mat under the pot (set to low) or moving the pot to a warmer spot like near a sunny window during the day. Just avoid placing it directly on a heat source—consistent warmth is key, not sudden temperature swings.
Make-Ahead Strategy: You can actually prepare your chrysanthemum stems for layering up to a week in advance! In Step 1, after making your 45-degree cuts, store the plant in a plastic bag with a damp paper towel to maintain humidity. This gives the cut ends time to callus over (develop a protective layer), which speeds up root formation when you're ready to layer. Just keep the stems out of direct sunlight during this waiting period.
Pro Tips for Propagating Chrysanthemum Plants
- Here's what nobody tells you about getting those layered cuttings to root like a pro—these little tricks make all the difference!
- Timing Secret: The 4-6 week window for root growth is your best friend, but don't get impatient!
- The Technique That Changed Everything: In Step 2, when making that ½-inch slit, I learned the hard way that deeper isn't better—keep it shallow!
Frequently asked questions
Got questions about propagating chrysanthemums? You’re not alone! Here are answers to the most common concerns—so you can grow confidently and successfully.
When is the best time to take chrysanthemum cuttings?
The ideal window is late spring to early summer (May–June) when plants are actively growing but before flowering. Avoid cutting in fall or winter, as growth slows, and roots struggle to form. If you’re propagating indoors, use a grow light to mimic summer conditions year-round.
How do I know if my cutting is healthy enough to root?
Look for 4–6 inches of non-flowering, semi-hardwood stems with at least 3–4 sets of leaves. Avoid woody or overly mature growth—these root poorly. Healthy cuttings should feel plump (not shriveled) and have a greenish hue at the base. Trim just below a leaf node for the best results.
Why aren’t my chrysanthemum cuttings rooting?
Common culprits include:
- Low humidity: Use a plastic bag or humidity dome to trap moisture.
- Poor lighting: Cuttings need bright, indirect light (6+ hours/day).
- Overwatering: Keep soil moist but not soggy—root rot is a silent killer.
- Wrong season: Dormant plants (fall/winter) won’t root. Wait for spring!
Can I propagate chrysanthemums from store-bought flowers?
Yes, but with a catch! Store-bought mums are often sterile hybrids (bred not to reproduce). If you try, use layering (bending a stem to touch soil) or cuttings from the base of the plant. For guaranteed results, propagate from a garden-grown chrysanthemum with healthy stems.
How long does it take for chrysanthemum cuttings to root?
With the right conditions, roots typically appear in 2–4 weeks. Gently tug the cutting—if resistance is felt, roots are forming! Patience is key: Avoid disturbing the cutting until you see new growth (3–4 inches tall). Speed up rooting by keeping temps between 65–75°F.
What’s the best way to transition rooted cuttings to pots?
Once roots are 1–2 inches long, transplant to small pots with well-draining soil. Water lightly, then place in partial shade for 1–2 weeks to reduce stress. Gradually introduce sunlight to harden off plants. Pro tip: Add a slow-release fertilizer to boost early growth!
Wrapping up and next steps
Propagating chrysanthemums through layered cuttings is a rewarding way to expand your garden with minimal effort! 🌱 With the right tools, patience, and a few weeks of care, you’ll soon enjoy lush, thriving plants ready to brighten up your space.
Whether you’re a seasoned gardener or just starting out, this method makes it easy to multiply your favorites—so grab those cuttings and get growing! Your next step? Pick a healthy stem, follow the steps, and watch your chrysanthemums flourish in no time.