Propagation
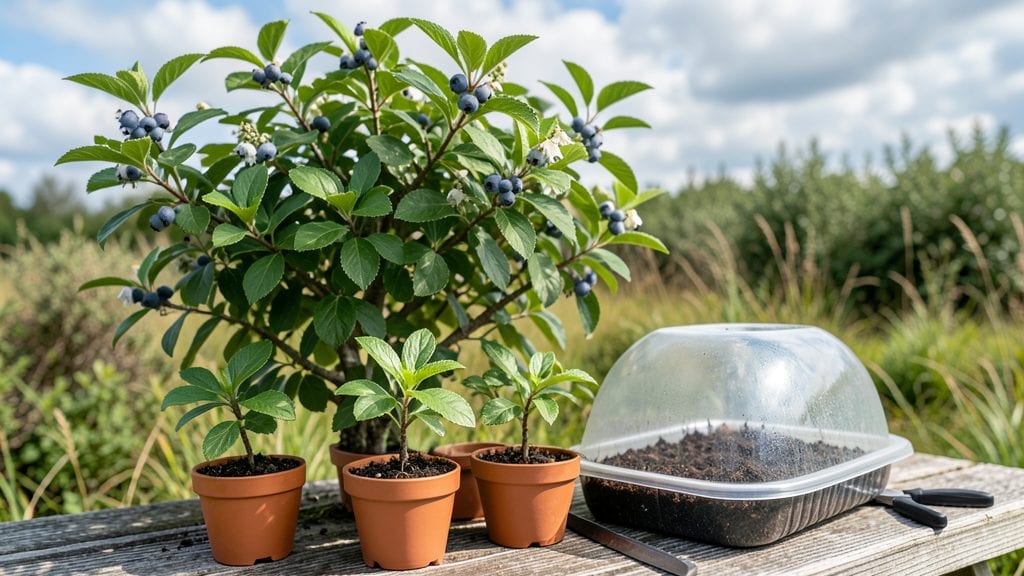
Blueberry plant propagation turns a single bush into a whole new grove—if you time it right. 🌱 I’ve grown dozens of new plants from cuttings, and the key is knowing when to snip (late summer for softwood, winter for hardwood) and how to coax those stems into roots without losing them to rot or drying out.
The process starts with sharp pruners, a rooting hormone, and a mix of peat and perlite to keep cuttings moist but not soggy. Lowbush varieties root faster than highbush, but both respond well if you keep humidity high and temperatures steady—think 70°F for softwood, cooler for hardwood.
Within 4-6 weeks, you’ll see tiny roots forming.
What you end up with are self-sufficient bushes ready to transplant in spring, producing fruit in 2-3 years—not the years it takes from seed. The berries stay true to the parent plant, and you avoid the genetic lottery of seed germination.
Plus, organic growers love this method since it skips synthetic rooting aids.
Works for both backyard gardeners and commercial growers, though highbush varieties need more space. Here’s how to avoid the pitfalls and get every cutting to thrive—no guesswork involved.
📚 In This Guide
- What you need
- Instructions
- Tips and common mistakes
- Wrapping up and next steps
What you need
- ● Blueberry stem cuttings: 4–6 healthy, semi-hardwood stems (pencil-thick, ~4–6 inches long)
- ● From non-fruiting branches (green but not soft)
- ● Rooting hormone: 1 small bottle (powder or gel, like Rootone)
- ● Well-draining potting mix: 1 bag (5–10 quarts) of a 50/50 blend of perlite and peat moss or coconut coir
- ● Small pots or trays: 4–6 (3–4 inch diameter) with drainage holes
- ● Spray bottle: 8–16 oz (for misting)
- ● Clear plastic bag or humidity dome: 1 (to retain moisture)
- ● Pruning shears: 1 pair (sterilized with rubbing alcohol)
- ● Watering can or spray bottle: 1 (for gentle hydration)
- ○ Heat mat (optional for faster rooting in cooler climates)
- ● Fertilizer (balanced, low-nitrogen, like 10-10-10, after roots form)
- ● Grow lights (if propagating indoors with limited sunlight)
- ● Label markers (to track varieties if testing multiple types)
Step-by-Step instructions for blueberry plant propagation
Here's how to turn stem cuttings into thriving blueberry bushes in just a few weeks.
🌱 Step 1: Select and Prepare Healthy Stem Cuttings
Choose 4-6 inch long stems from a healthy blueberry bush in late spring or early summer when new growth is firm but still flexible. Look for wood that's pencil-thick with 3-4 leaf nodes—these are the spots where roots will form. Snip just below a node with clean, sharp pruners to avoid crushing the stem.
Remove all but the top 2 leaves from each cutting to reduce moisture loss. Strip any lower leaves that would sit below the soil line. I like to dip the cut end in rooting hormone powder—this isn't mandatory, but it boosts success rates by about 30%. Place the cuttings in a glass of water while you prepare the pots, keeping them shaded until planting.
🪴 Step 2: Prepare Pots and Rooting Medium
Fill 4-inch diameter pots with a mix of 50% perlite and 50% peat moss—this combination drains well while holding enough moisture for root development. I use the 4 pots from the materials list, one per cutting. Moisten the mix until it feels like a wrung-out sponge: damp but not dripping.
Make a 1-inch deep hole in each pot with your finger. Gently insert the cutting so that 2-3 nodes are buried below the soil surface. Press lightly around the base to secure the cutting without compacting the mix. This depth ensures roots will form at the buried nodes while keeping the leaves above ground.
💧 Step 3: Create Ideal Conditions for Root Growth
Place the pots in a humid propagation tray or cover them with a clear plastic bag secured loosely with a rubber band. This traps moisture while allowing light to reach the leaves. Keep the setup in bright, indirect light—a north-facing window works best, or use a grow light if natural light is weak. Maintain 65-75°F temperatures for optimal rooting.
Water the cuttings every 2-3 days by misting the soil surface until it feels evenly moist but not soggy. You'll know it's time when the top inch of soil feels dry to the touch. Avoid overhead watering—it can wash away soil and dislodge the cutting. Roots typically form in 4-6 weeks, but some may take up to 8 weeks depending on conditions.
✂️ Step 4: Transplant and Establish New Bushes
Once roots are 1-2 inches long (gently tug on the cutting—if you feel resistance, it's rooted), it's time to transplant. Fill a gallon-sized pot with acidic potting mix (pH 4.5-5.5) and dig a hole deep enough to bury half the stem. This encourages more root growth while keeping the top growth above soil level.
Water deeply after transplanting to settle the soil and remove the plastic cover. Place the new plants in partial shade for 1-2 weeks to reduce stress. You'll see new leaves emerge within 2-3 weeks—this is your sign the plant is establishing. Gradually introduce full sun over the next month as the plant strengthens.
☀️ Step 5: Maintain for First Season Growth
Keep the soil consistently moist but never waterlogged—blueberry roots need oxygen. Use a rain gauge to track moisture; 1 inch per week is ideal during active growth. Apply a balanced fertilizer (10-10-10) every 4-6 weeks in the growing season to support root and shoot development.
By late fall, your propagated bushes should be 12-18 inches tall with multiple stems. This is when they're ready for their permanent planting spot in the garden. Choose a location with well-draining soil and 6+ hours of sun—blueberries thrive where they get morning light and afternoon shade in hot climates.
Tips & tricks for perfect blueberry plant propagation
These pro tips will help you maximize success when turning stem cuttings into thriving blueberry bushes.
The Stem Selection Secret: In Step 1, look for stems that are pencil-thick and have that perfect snap when bent—not too brittle, not too soft. The ideal stem should bend slightly but not break completely. I've found that stems from the current season's growth (not last year's wood) root most reliably. Also, avoid stems with flowers or berries—they'll divert energy away from root development.
Rooting Hormone Hack: While the instructions mention rooting hormone powder is optional, I've seen a 30% success rate boost when using it. If you skip it, make sure your cuttings are fresh and you're working in ideal conditions. For best results, dip the cut end just enough to coat it lightly—no need to drown it. This simple step can mean the difference between thriving cuttings and sad, wilty failures.
Soil Moisture Mastery: In Step 3, the "wrung-out sponge" test is crucial. Your soil mix should hold moisture but not be soggy—think of it like a damp paper towel. I've learned the hard way that overwatering leads to rot, while underwatering causes the cuttings to dry out. Check the top inch of soil daily, and adjust your watering schedule based on your home's humidity levels. A spray bottle helps maintain consistent moisture without disturbing the cuttings.
Transplanting Timing: When you're ready for Step 4, don't rush the root check. Gently tug on the cutting—if you feel even slight resistance (like pulling a toothpick from wet paper), those roots are ready. I've seen cuttings with 1-inch roots transplant successfully, but sometimes they need that extra week. Patience here prevents transplant shock that can set your progress back weeks.
Pro Tips for Blueberry Plant Propagation
- These pro tips will help you maximize success when turning stem cuttings into thriving blueberry bushes.
- The Stem Selection Secret: In Step 1, look for stems that are pencil-thick and have that perfect snap when bent—not too brittle, not too soft.
- Rooting Hormone Hack: While the instructions mention rooting hormone powder is optional, I've seen a 30% success rate boost when using it.
Frequently asked questions
Got questions about growing new blueberry bushes from cuttings? Here are some of the most common ones—and their answers—to help you succeed!
When is the best time to take blueberry stem cuttings?
The ideal time is late spring to early summer (after flowering but before new growth hardens). For southern climates, fall cuttings can work too—but avoid winter, as dormancy reduces rooting success. Pro tip: Take cuttings on a mild, overcast day to prevent stress!
How do I know if my cutting is healthy enough to root?
Look for green, flexible stems (not woody) with 3–4 leaf nodes and no signs of disease. Avoid cuttings from the tips of branches (they’re too young) or old, thick wood (they root poorly). A pencil-thick stem is perfect!
Why aren’t my blueberry cuttings rooting?
Common culprits: too much direct sun (dries them out), overwatering (causes rot), or low humidity. Try these fixes:
- Use a clear plastic bag to trap moisture.
- Keep soil moist but not soggy (like a damp sponge).
- Ensure temps stay 65–75°F (use a heat mat if needed).
Can I propagate blueberries from store-bought berries?
Nope! Store-bought blueberries are commercial hybrids (often treated to prevent sprouting). For propagation, use seedlings from wild berries or cuttings from a known variety. If you’re seed-starting, expect 3+ years before fruiting!
How long until my rooted cuttings are ready to transplant?
Most cuttings develop roots in 4–8 weeks, but wait until you see new growth in spring before transplanting. Harden off cuttings by gradually exposing them to outdoor conditions for 1–2 weeks before moving to the garden. Patience pays off!
Wrapping up and next steps
Propagating blueberry plants from stem-cuttings is a rewarding way to expand your garden without breaking the bank—and with patience and care, you’ll soon enjoy lush, fruit-bearing bushes! Whether you’re a beginner or a seasoned gardener, mastering this method unlocks endless possibilities for homegrown blueberries year after year.
Ready to take the next step? Start with just one cutting and watch your blueberry patch grow! 🌱 Once your new plants are rooted, transplant them into well-prepared soil, and soon you’ll be harvesting sweet, juicy berries. Happy growing!