
Propagation
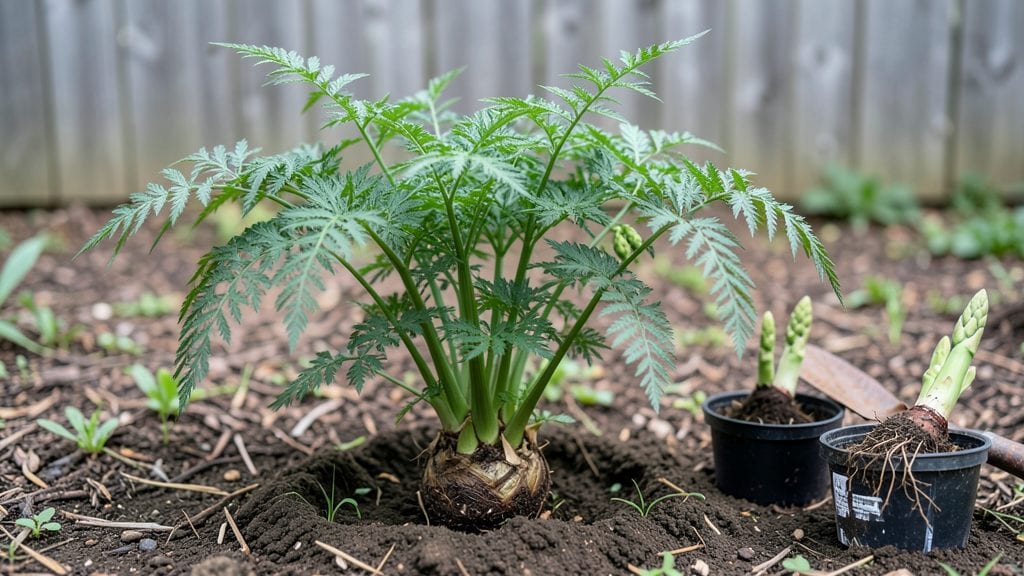
Propagating asparagus plants from small cuttings lets you grow your own harvest without waiting years for crowns to mature. I’ve multiplied my asparagus patch this way three times—each time, the young shoots arrive faster and stronger than store-bought plants ever could.
The secret lies in timing: harvest crowns in early spring when roots are active but before spears emerge, or divide established clumps when they’re dormant in late fall.
You’ll need sharp pruners, a clean knife, and a mix of 50% compost and 50% garden soil—moist but not soggy. Space new plants 12 inches apart in trenches 6-8 inches deep, then water deeply.
The first year focuses on root growth, not harvesting; patience here means 3-4 years of spears instead of waiting the usual 5-6 years. My biggest mistake? Planting too shallow—always bury crowns deep enough so the top sits 2 inches below soil level.
By summer’s end, you’ll see 1-2 foot tall ferns instead of spears—don’t panic, that’s normal. Mulch heavily to retain moisture and suppress weeds, and fertilize lightly in early spring with 10-10-10. The payoff comes in year three: thick, velvety spears that outperform anything you’ve grown before.
This method works for both Mary Washington and Jersey Knight varieties, and even small gardeners can fit a patch in a 3-foot trench.
For container growers, use 5-gallon pots with drainage and plant two crowns per pot—they’ll share roots happily. Cold frames extend the season in Zone 4, and southern gardeners can divide in early March instead of fall.
The key is consistency: asparagus rewards patience with decades of harvests, but only if you start right. Let’s get those cuttings in the ground!
📚 In This Guide
- What you need
- Instructions
- Tips and common mistakes
- Wrapping up and next steps
What you need
- ● Asparagus crowns or healthy fern cuttings (1–3 per plant, 6–12 inches long, with at least 2–3 buds or nodes).
- ● Well-draining soil mix (equal parts potting soil, compost, and perlite or sand—avoid clay-heavy soil).
- ● 5–7 gallon containers or nursery pots (with drainage holes; one per cutting).
- ● Organic mulch (straw, shredded leaves, or wood chips—2–3 inches thick).
- ● Watering can or hose with a gentle spray nozzle (for consistent moisture).
- ○ Fertilizer (optional but helpful): Balanced 10-10-10 or low-nitrogen fertilizer (e.g., 5-10-10) for root growth.
- ● Compost tea or worm castings (for organic boost).
- ● Pruners or sharp knife (sterilized with rubbing alcohol).
- ● Garden trowel (for transplanting later).
- ● Gloves (to protect hands from soil and sharp edges).
- ○ pH testing kit (optional but recommended—asparagus thrives in pH 6.5–7.5).
- ○ Row cover or shade cloth (optional for young plants in hot climates).
- ● Sunlight: Full sun (6–8 hours daily)—asparagus is a sun-worshipper!
- ● Climate: Start indoors in spring (4–6 weeks before last frost) or outdoors in early spring/fall (avoid summer heat).
- ● Hardiness zones: 3–10 (adjust timing for your zone).
- ● Patience: Asparagus takes 2–3 years to establish before harvesting!
Instructions for propagating asparagus plants from cuttings
Here's how to multiply your asparagus patch using simple crown divisions and root cuttings.
Select Healthy Crowns for Division
Choose established asparagus crowns that are at least 3-4 years old and show vigorous growth. Look for crowns with multiple fern-like shoots emerging from a central root mass. These are the best candidates for propagation because they've already built a strong root system. Avoid crowns with yellowing fronds or sparse growth—these won't produce strong new plants.
Dig carefully around the crown with a spade, keeping 6-8 inches of soil attached to the roots. This soil helps protect delicate roots during transplanting. Gently shake off excess dirt to inspect the roots. Healthy roots should be white or pale tan, firm to the touch, and free of rot or slimy spots. If you see any dark, mushy areas, trim those sections away with sterilized pruners before proceeding.
Divide and Prepare Crowns for Planting
Using a sharp knife or clean pruning shears, separate the crown into smaller sections, ensuring each piece has 3-5 healthy buds at the base. These buds will grow into new shoots. Handle the crowns gently—rough treatment can damage the delicate root structure. If your crown is particularly large, you can divide it into 2-3 smaller sections to ensure each new plant has enough energy to establish itself.
Trim any damaged or overly long roots back to 4-6 inches using sterilized tools. This encourages the plant to focus its energy on growing new roots rather than maintaining old ones. Keep the trimmed crowns in a shaded, cool area while you prepare the planting site. The goal is to work quickly to minimize stress on the plants.
Plant Divided Crowns in Prepared Soil
Choose a planting site with full sun exposure and well-draining soil. Asparagus thrives in soil with a pH of 7.0-7.5, so test your soil and amend it with lime if necessary. Dig a trench 6-8 inches deep and 12 inches wide, spacing each crown 12-18 inches apart in the row. This spacing allows room for the plants to spread and reduces competition for nutrients.
Place each divided crown in the trench with the buds facing upward and the roots spread out evenly. Cover the crowns with 2-3 inches of soil, leaving the buds exposed. Water the trench thoroughly until the soil is evenly moist but not soggy. This initial watering helps settle the soil around the roots and encourages quick establishment. Avoid overwatering, as asparagus roots are susceptible to rot in waterlogged conditions.
Maintain and Encourage Root Growth
For the first 2-3 weeks, keep the soil consistently moist by watering every 2-3 days. You'll know the soil is at the right moisture level when the top 1-2 inches feel damp but not wet. After this initial period, reduce watering to once a week, allowing the soil to dry slightly between waterings. This encourages deeper root growth, which is crucial for long-term harvest success.
Do not harvest any spears during the first 2-3 years of growth. Instead, allow the plants to focus on building their root systems. You'll see new fronds emerge in 4-6 weeks, signaling that the plants are establishing themselves. Once the fronds turn brown and die back in late fall, mulch the area with 2-3 inches of organic mulch to protect the crowns over winter.
Tips & tricks for perfect asparagus propagation
These insights will help you avoid common pitfalls and maximize your success when multiplying asparagus plants through crown division.
Root Health is Everything: In Step 1, when inspecting roots, look for the crisp white or pale tan color that indicates vitality. Any section showing dark, mushy spots should be trimmed immediately with sterilized pruners—this prevents rot from spreading to healthy sections. I've seen many gardeners overlook this step, only to have their new plants fail within weeks. Remember, healthy roots mean healthy growth.
Division Precision Matters: When dividing crowns in Step 2, aim for each section to contain 3-5 healthy buds—this ensures each new plant has enough energy to establish itself. I recommend using a sharp knife rather than pulling sections apart by hand, as this prevents tearing delicate root structures. For particularly large crowns, dividing into 2-3 sections gives each new plant a better chance of thriving independently.
Soil Preparation is Non-Negotiable: The trench dimensions in Step 3 (6-8 inches deep, 12 inches wide) are crucial for proper root development. Before planting, I always test soil pH and amend with lime if needed to reach that ideal 7.0-7.5 range. Well-draining soil prevents waterlogging, which asparagus roots cannot tolerate. A simple soil test kit makes this easy to verify before you begin.
Watering Strategy Makes All the Difference: During the critical 2-3 week establishment period in Step 4, maintaining consistent moisture is key. I check soil moisture by feeling the top 1-2 inches—it should feel damp but not wet. Overwatering can lead to root rot, while underwatering stresses young plants. After this period, reducing to weekly watering encourages deeper root growth, which is essential for long-term harvest success.
Pro Tips for Propagating Asparagus Plants
- These insights will help you avoid common pitfalls and maximize your success when multiplying asparagus plants through crown division.
- Root Health is Everything: In Step 1, when inspecting roots, look for the crisp white or pale tan color that indicates vitality.
- Division Precision Matters: When dividing crowns in Step 2, aim for each section to contain 3-5 healthy buds—this ensures each new plant has enough energy to establish itself.
Frequently asked questions
about propagating asparagus plants—because even the greenest thumbs need a little guidance! Here are answers to the most common queries to help you grow a thriving asparagus patch.How long does it take for asparagus crowns to produce spears after propagation?
Patience is key! After planting, it typically takes 2–3 years before your propagated asparagus crowns produce harvestable spears. In the first year, focus on establishing strong roots—skip harvesting entirely. By year two, you might see a few spears, but full production won’t peak until year three.
Can I propagate asparagus from store-bought spears?
Unfortunately, no—store-bought asparagus spears are pre-harvested and treated to prevent sprouting. For propagation, you’ll need to dig up healthy, mature crowns from an existing asparagus patch (with permission!) or purchase certified disease-free crowns from a nursery.
What’s the best time of year to divide asparagus crowns?
The ideal window is early spring (March–April) or early fall (September–October), when the soil is workable but not frozen or scorching. Avoid dividing in summer (stressful for plants) or winter (frozen ground). If you must divide in summer, do it in early morning to reduce heat stress.
Why aren’t my asparagus cuttings sprouting after planting?
Common culprits include poor soil drainage (asparagus hates soggy roots!), improper depth (crowns should sit 2–3 inches below soil), or pest/disease damage (check for asparagus beetles or fungal spots). Ensure your cuttings have full sun (6+ hours/day) and well-draining soil. If they’re still dormant after 4–6 weeks, gently inspect for rot or pests.
Can I grow asparagus in containers instead of a garden bed?
Yes! Asparagus thrives in large containers (minimum 12–18 inches deep) with drainage holes, using a mix of potting soil + compost. Choose a permanent spot (asparagus dislikes transplanting) and opt for dwarf varieties like ‘Baby Girl’ or ‘Purple Passion.’ Containers warm up faster in spring, so start indoors if your climate is cold.
Wrapping up and next steps
Propagating asparagus from small cuttings is a rewarding way to expand your garden with minimal effort! 🌱 With patience and the right techniques—like using healthy crowns, proper spacing, and consistent care—you’ll soon enjoy a thriving asparagus patch for years to come.
The key is to start small, stay consistent, and let nature do the rest.
Now that you’re armed with the know-how, take the next step: grab those cuttings, prep your soil, and get growing! Whether you’re a beginner or a seasoned gardener, every harvest will remind you of the joy of nurturing your own homegrown bounty. Happy gardening! 🌿