
Transplanting
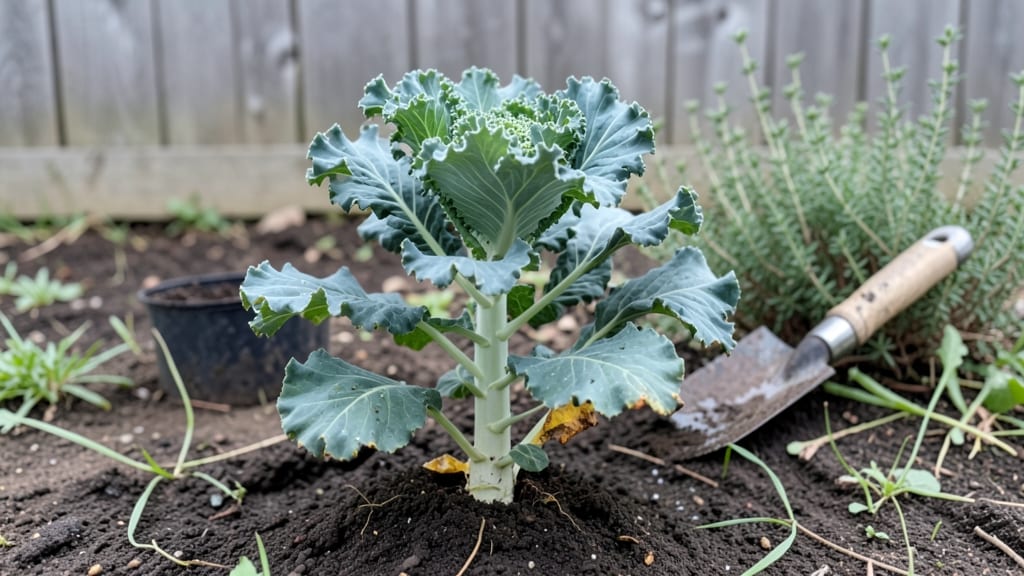
Planting kale seedlings in cool weather unlocks the secret to bold, sweet leaves that store-bought can’t match. 🌱 I learned this after my first batch of pampered seedlings wilted the moment they hit the garden—until I realized timing, soil, and shade matter more than most guides admit.
The key is treating them like tough outdoor plants from day one: rich, loose soil mixed with compost, spacing them 12-18 inches apart so they don’t crowd, and planting just deep enough to cover the roots without burying the stem.
Water deeply right after, then again in 3-4 days, but let the top inch dry between waterings—overwatering is the silent killer of young kale.
By week three, you’ll see those ruffled, vibrant leaves pushing through, and the flavor? Nothing compares to homegrown kale harvested fresh from the garden. The real magic happens when you time it right—spring and fall give the best results, but with proper care, even summer planting works in cooler climates.
Here’s where most gardeners stumble: skipping the hardening-off process or ignoring pests like cabbage moths. I’ll show you how to spot those early warning signs and fix them before they become problems. Let’s get those seedlings in the ground the right way!
📚 In This Guide
- What you need
- Instructions
- Tips and common mistakes
- Wrapping up and next steps
What you need
- ● Kale seedlings: 6–12 hardened-off starts (adjust based on your garden space and desired harvest size). Look for sturdy, dark green leaves with no yellowing.
- ● Well-draining potting mix or compost-rich garden soil: Aim for a mix with organic matter (e.g., 60% topsoil + 40% compost or aged manure).
- ● Fertilizer: A balanced, organic option like 10-10-10 or compost tea to give your seedlings a nutrient boost.
- ● Watering can or hose with a gentle spray nozzle: For even, thorough hydration without disturbing the seedlings.
- ○ Garden twine or stakes (optional but helpful): To support taller varieties if needed.
- ● Trowel or transplanting spade: A small hand trowel works best for delicate seedlings.
- ○ Garden gloves (optional): To protect your hands from soil and thorns (if your kale variety has them!).
- ● Measuring tape or ruler: For spacing seedlings 12–18 inches apart (or 18–24 inches for larger varieties).
- ● Mulch (straw, grass clippings, or shredded leaves): To retain moisture and suppress weeds.
- ● Sunlight: Choose a spot with full sun (6+ hours/day) or partial shade (4–6 hours) for cooler climates.
- ● Temperature: Wait until nighttime temps are above 50°F (10°C) to avoid frost damage.
- ● Soil prep: Loosen soil to a depth of 6–8 inches for easy root establishment.
Step-by-Step guide to planting hardened-off kale seedlings
Here’s how to get your kale thriving in the garden—no guesswork, just strong, healthy plants.
🌱 Step 1: Choose the Right Spot and Prepare the Soil
Kale loves full sun to partial shade—at least 4-6 hours of direct sunlight daily. I pick a spot with morning sun and afternoon shade to prevent bolting, especially in hot climates. Avoid low-lying areas where cold air settles, as kale can’t tolerate frost.
Use the 5 gallons of well-aged compost to enrich the soil before planting. Work it into the top 6 inches of soil, breaking up any clumps. Kale prefers soil with a pH between 6.0 and 7.0, so if your soil tests acidic, mix in a handful of lime per planting hole. The goal is loose, fertile soil that drains well but holds moisture.
🪴 Step 2: Dig Holes and Plant Seedlings Properly
Dig holes twice as wide as the seedling’s root ball and just as deep. Gently remove each seedling from its container, loosening the roots if they’re circling. Kale seedlings should sit at the same depth they were in their pots—burying too deep can suffocate stems, while planting too shallow exposes roots to drying out.
Place one seedling per hole, spacing them 12-18 inches apart in rows 24 inches apart. This gives leaves room to grow without overcrowding. Fill the hole halfway with soil, then water deeply to settle it around the roots. Once the water soaks in, top off with more soil and press lightly to remove air pockets.
💧 Step 3: Water Deeply and Mulch for Retention
After planting, water each seedling with 1 gallon of water to encourage root growth into the surrounding soil. Kale needs consistent moisture, especially during its first few weeks. Water at the base rather than overhead to prevent fungal diseases like downy mildew, which thrives in damp leaves.
Spread the 3 gallons of organic mulch around each plant, keeping it 2 inches away from the stem. Mulch locks in moisture, suppresses weeds, and keeps soil temperatures stable. Check the soil moisture daily—kale wilts quickly when thirsty, but soggy soil invites rot. Aim for 1 inch of water per week, adjusting for rain.
☀️ Step 4: Protect and Monitor for Early Growth
In the first week, watch for signs of stress like yellowing leaves or wilted stems. If you planted in hot weather, provide afternoon shade with a lightweight row cover until seedlings adjust. Kale grows best in 55-75°F soil temperatures, so avoid planting when ground temps exceed 80°F—it’ll bolt prematurely.
Fertilize lightly after 3-4 weeks with a balanced organic fertilizer (like the 1 pound of 5-5-5 fertilizer you’ve got). Sprinkle it around the base, not on leaves, and water it in. You’ll see new leaves emerge within a week—that’s your signal everything is working. Harvest outer leaves when they reach 6-8 inches to encourage bushier growth.
✂️ Step 5: Maintain and Harvest for Continuous Yields
Kale thrives with regular care. Water deeply every 2-3 days during dry spells, always checking the top inch of soil first. If pests like cabbage worms appear, handpick them or use neem oil spray (mix 1 tablespoon per gallon of water). Avoid chemical sprays—they can linger in leafy greens.
Harvest leaves by cutting the outer stems with clean scissors, leaving the inner leaves to keep growing. This method gives you continuous harvests for 6-8 weeks per planting. In cooler climates, kale often overwinters—just add more mulch before frost to protect roots. You’ll know it’s time to replant when leaves start to taste bitter or bolt in spring.
Tips & tricks for planting kale seedlings
Here’s what I’ve learned after planting kale for years—these little tricks make all the difference between healthy plants and struggling seedlings.
Soil Temperature Matters: Kale thrives when soil temperatures stay between 55-75°F. If your ground feels warmer than 80°F, wait a few days or plant in the late afternoon when temps cool. I’ve seen seedlings wilt dramatically when planted too early in hot weather—just because the air feels mild doesn’t mean the soil is ready. Use a soil thermometer if you’re unsure, especially in spring or fall transitions.
Root Ball Technique: In Step 2, when loosening those circling roots, I like to gently break them up with my fingers rather than cutting with scissors. This encourages the roots to spread outward instead of growing in circles. If your seedlings have very compacted root balls, soak them in water for 10 minutes before planting to help them expand slightly—this gives them a better chance to establish quickly.
Watering Wisdom: The 1 gallon per seedling initial watering in Step 3 is crucial, but don’t stop there. I’ve found that watering deeply every morning for the first week helps prevent transplant shock. Kale roots need time to grow into the surrounding soil, and consistent moisture makes all the difference. Use a watering can with a gentle spray nozzle to avoid disturbing the soil around the stems.
Mulch Placement: When you spread that 3 gallons of organic mulch, keep it 2 inches away from the stem—this prevents rot while still protecting the roots. I like to create a small well around each plant to direct water straight to the roots. For extra protection in hot climates, add a thin layer of straw mulch on top of your regular mulch to retain even more moisture.
Pro Tips for Planting Kale Seedlings
- Here’s what I’ve learned after planting kale for years—these little tricks make all the difference between healthy plants and struggling seedlings.
- Soil Temperature Matters: Kale thrives when soil temperatures stay between 55-75°F.
- Root Ball Technique: In Step 2, when loosening those circling roots, I like to gently break them up with my fingers rather than cutting with scissors.
Frequently asked questions
Got questions about planting kale seedlings? You’re not alone! Here are answers to the most common concerns—from timing to troubleshooting—to help you grow a bountiful harvest with confidence.
When is the best time to plant kale seedlings outdoors?
Plant kale seedlings after the last frost when soil temps are above 40°F (4°C). For cooler climates, aim for early spring or late summer (fall crops tolerate light frost!). Avoid extreme heat—kale bolts (goes to seed) when temps hit 80°F (27°C). Check your local frost dates for precision!
How long does it take for kale seedlings to grow after transplanting?
With proper care, kale seedlings establish roots in 1–2 weeks and reach harvestable size (6–8 inches tall) in 4–6 weeks. Baby leaves can be picked in as little as 30 days! Patience pays off—consistent watering and soil nutrients speed up growth.
How often should I water newly planted kale seedlings?
Keep soil consistently moist (not soggy) for the first 2 weeks post-transplant. Water deeply 2–3 times per week, adjusting for rain. Mulch (straw or grass clippings) retains moisture and prevents weeds. Avoid overhead watering to reduce disease risk.
What should I do if my kale seedlings look wilted or yellow?
Yellow leaves often signal overwatering or nutrient deficiency (like nitrogen). Wilted plants may need more water (check soil moisture) or shade if stressed by heat. For pests (like aphids), spray with soapy water or introduce beneficial insects like ladybugs. Adjust care and monitor closely!
Can I plant kale seedlings in containers instead of a garden bed?
Kale thrives in 5+ gallon containers with drainage holes. Use a well-draining potting mix and place pots in full sun to partial shade. Dwarf varieties (like ‘Dwarf Blue Curled’) are ideal for containers. Just ensure containers get 1–2 inches of water per week and fertilize every 3–4 weeks.
Wrapping up and next steps
You’ve got all the tools and know-how to plant hardened-off kale seedlings and set them up for a bountiful, healthy harvest! 🌱 With the right spacing, soil prep, and care, your kale will thrive—whether you’re growing it for crisp salads, hearty sautés, or nutrient-packed smoothies.
Remember, consistency is key: water wisely, protect from pests, and give those leaves the love they deserve.
Ready to take the next step? Mark your calendar for your first harvest in 6–8 weeks—and celebrate every leafy success along the way! For even more tips, check out our guide on extending your kale season or join a local gardening group to swap tricks with fellow green thumbs.