
Orchid Care
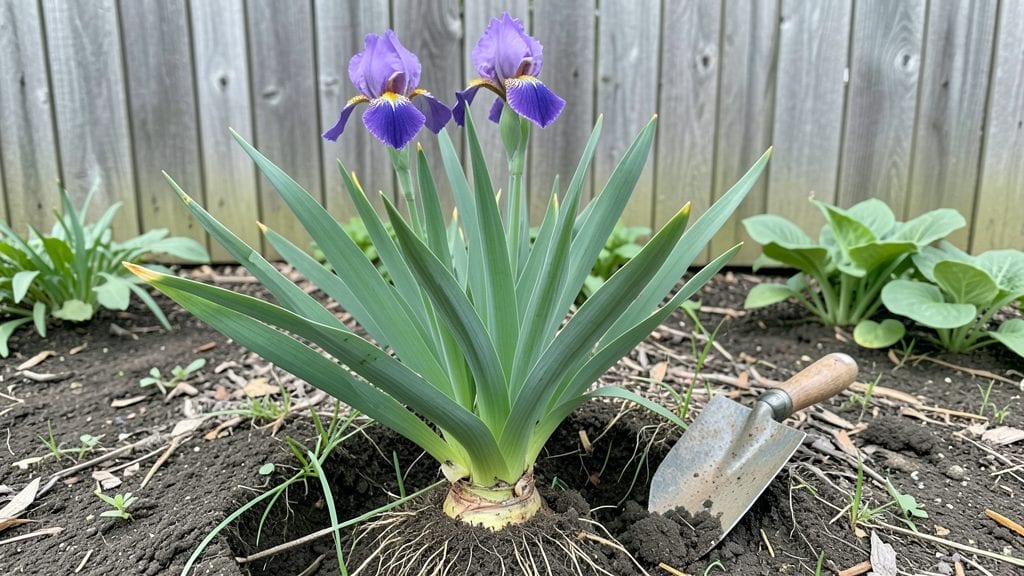
Planting iris roots in early fall sets the stage for stunning spring blooms that make your garden the envy of the neighborhood. I’ve planted dozens of irises, and the difference between a thriving clump and a sad, sparse one comes down to how you handle those thick, fleshy roots.
The secret isn’t complicated—it’s about getting the soil, spacing, and sunlight just right.
You’ll need a sunny spot with well-draining soil, a shovel, and a little patience. Dig a trench about 6 inches deep, loosen the soil, and mix in compost for extra nutrients. Irises hate soggy roots, so if your soil drains poorly, add sand or gravel.
The roots should spread naturally—no need to force them into tight holes. Plant them 3-4 inches deep, with the top of the root crown just above soil level.
Once planted, water lightly to settle the soil, then let nature take over. Irises thrive in full sun and need very little watering after the first year. By spring, you’ll see fan-shaped leaves emerging, followed by those iconic sword-shaped blooms in shades of purple, yellow, or white.
The best part? They multiply over time, giving you more flowers without extra effort.
Fair warning: Overwatering or planting too deep will kill your irises faster than you can say "late frost." But get this right, and you’ll have cut flowers for years with almost no maintenance. Here’s how to do it without a single mistake—promise.
📚 In This Guide
- What you need
- Instructions
- Tips and common mistakes
- Wrapping up and next steps
What you need
- ● Iris roots: Healthy, dormant rhizomes (preferably bearded iris for beginners). Aim for 3–5 rhizomes per planting spot.
- ● Garden soil: Well-draining, slightly sandy loam (or 50/50 mix of garden soil and compost for richer growth). Avoid heavy clay.
- ● Bone meal or phosphorus-rich fertilizer: 1–2 tablespoons per planting hole (boosts root and bloom development).
- ● Organic mulch: 1–2 inches of shredded bark, straw, or pine needles (retains moisture, regulates temperature).
- ● Garden trowel or spade: For digging holes 6–8 inches deep and 12–18 inches apart (spacing depends on rhizome size).
- ● Pruning shears: To trim old foliage (leave 3–4 inches of new growth attached).
- ● Gloves: Heavy-duty (iris roots can be tough and may have sharp edges!).
- ● Watering can or hose: With a gentle spray nozzle (irises hate soggy roots!).
- ● Ruler or measuring tape: Ensures proper depth and spacing (critical for airflow and growth!).
- ● Soil pH test kit: Irises thrive in slightly acidic to neutral soil (pH 6.0–7.0). Adjust with lime or sulfur if needed.
- ● Slow-release granular fertilizer: 1 cup per 10 sq ft (applied in early spring for extra vigor).
- ● Mulch ring or edging: Keeps mulch contained and prevents it from smothering rhizomes.
- ● Drip irrigation system: For automated, low-stress watering (especially in hot climates).
Step-by-Step instructions for planting iris roots
Here's my foolproof method for getting irises established with minimal fuss and maximum bloom potential.
Prepare the Planting Site for Optimal Growth
Choose a location with full sun exposure—at least 6 hours of direct sunlight daily. Irises thrive in well-draining soil, so avoid low spots where water pools after rain. If your soil is heavy clay, mix in 2-3 inches of coarse sand or perlite to improve drainage. I like to test drainage by digging a hole, filling it with water, and watching how quickly it drains—if it takes longer than 30 minutes, amend the soil.
Loosen the soil to a depth of 12 inches using a garden fork or tiller. This breaks up compacted layers and encourages root spread. Work in a 2-inch layer of compost to provide nutrients without overwhelming the roots. The goal is soil that feels light and crumbly, like a well-aerated cake batter.
Inspect and Prepare the Iris Roots
When you receive your iris rhizomes, let them dry out for 24-48 hours before planting. This prevents rot from excess moisture. Inspect each rhizome for signs of damage or disease—discard any that are mushy, discolored, or have soft spots. Healthy rhizomes have firm, plump bases and a network of roots growing from the bottom.
Trim any dead or rotting roots with clean, sharp pruners, leaving only the healthy, white roots attached. If the rhizome has fan-shaped leaves, cut them back by half their length before planting. This reduces stress and helps the plant focus energy on root establishment. I like to make a small notch on the top of each rhizome with a pencil—this helps me remember which side was up when I replant later.
Plant the Rhizomes at the Correct Depth and Spacing
Position the rhizomes so that the top third is exposed to sunlight, with the roots facing downward. The top should be 1-2 inches above the soil line—burying them too deep causes rot, while leaving them too exposed can dry them out. Space rhizomes 12-18 inches apart in rows 18-24 inches apart to allow for future growth and airflow.
Gently press the soil around the rhizomes to secure them, but don’t compact it tightly. Water lightly to settle the soil, then let the area dry out for 2-3 days before watering again. This initial drying period helps the roots establish without sitting in soggy soil. You’ll see new roots forming within 2-3 weeks if conditions are right.
Mulch and Maintain Through the First Season
Apply a 2-inch layer of mulch around the plants, keeping it 3-4 inches away from the rhizomes to prevent rot. I use shredded bark or straw, which allows water to penetrate while suppressing weeds. Mulch also helps regulate soil temperature, keeping rhizomes cool in summer and insulated in winter.
Water deeply once a week during the first growing season, providing 1 inch of water per week. Irises are drought-tolerant once established, but young plants need consistent moisture to develop strong roots. You’ll know you’re watering correctly when the soil feels moist 2 inches below the surface but not soggy. Avoid wetting the leaves or rhizomes to prevent fungal diseases.
Encourage Blooms and Long-Term Health
After the first bloom cycle, cut back the flower stalks to 6 inches above the rhizome once they’ve finished blooming. This redirects energy to next year’s flowers and prevents seed production, which can weaken the plant. Leave the fan-shaped leaves until they turn yellow naturally—this ensures the rhizome stores enough nutrients for the following season.
In late fall, after the leaves have died back, apply a 2-inch layer of mulch to protect the rhizomes from freezing temperatures. Irises are hardy and don’t need winter care in most climates, but this extra layer helps in colder regions. You’ll see new growth emerging in early spring, signaling that your irises are thriving and ready to bloom again.
Tips & tricks for planting iris roots
Planting iris roots right from the start makes all the difference between blooms that wow and plants that struggle. Here are my battle-tested tips to help your irises thrive.
Soil Test Tip: The 30-minute drainage test in Step 1 is your best friend for avoiding soggy soil. If water disappears in under 10 minutes, your soil drains too quickly—mix in some compost to help retain moisture. If it takes longer than 30 minutes, you definitely need that 2-3 inches of sand or perlite to prevent rot. I've seen irises fail in both extremes, so this test is non-negotiable.
Rhizome Orientation: That pencil notch I mention in Step 2 isn't just for fun—it's a lifesaver when you replant later. The top of iris rhizomes naturally curves upward, but after a season, they can look different. The notch ensures you always plant them with the growing point facing up, which prevents stunted growth. Think of it as your iris's built-in GPS for proper planting.
Planting Depth Secret: The 1-2 inches above soil line in Step 3 is crucial for preventing rot while allowing sunlight to reach the growing point. I've learned this the hard way—burying them too deep smothers them, while leaving them exposed dries them out. A good rule of thumb is to plant them so the top third is visible, like a sunbathing lizard. This exposure helps prevent fungal issues too.
Watering Wisdom: The 2-3 day drying period after planting in Step 3 might seem counterintuitive, but it's essential for root establishment. Watering too soon can create anaerobic conditions that suffocate new roots. After that period, check soil moisture at 2 inches deep—it should feel like a wrung-out sponge, not a dripping towel. This balance is what gives irises their legendary drought tolerance once established.
Pro Tips for Planting Iris Roots
- Planting iris roots right from the start makes all the difference between blooms that wow and plants that struggle.
- Soil Test Tip: The 30-minute drainage test in Step 1 is your best friend for avoiding soggy soil.
- Rhizome Orientation: That pencil notch I mention in Step 2 isn't just for fun—it's a lifesaver when you replant later.
Frequently asked questions
Got questions about planting iris roots? You’re not alone! Here are answers to the most common concerns—so you can dig in with confidence and grow stunning blooms.
When is the best time to plant iris roots?
The ideal window is late summer to early fall (August–October), when the soil is still warm but cooling. This gives roots time to establish before winter. If you must plant in spring, do it early (March–April) to avoid heat stress. Avoid planting in mid-summer—roots can dry out or rot in extreme heat.
How long does it take for iris roots to bloom after planting?
Patience is key! Iris roots planted in fall may bloom the following spring, while spring plantings often take 1–2 years to flower. Healthy roots need time to build energy reserves. Focus on well-draining soil and sunlight to speed up the process.
Can I plant iris roots in containers instead of the ground?
Containers work well for small spaces or urban gardens. Use a well-draining mix (like 60% potting soil + 30% perlite + 10% compost) and a pot with drainage holes. Repot every 2–3 years to refresh the soil. Just ensure the container gets at least 6 hours of sunlight daily.
What should I do if my iris roots are soft or mushy when I plant them?
Soft, mushy roots signal rot, often from overwatering or fungal issues. Before planting, trim away any mushy sections with sterile shears, then dust the cuts with cinnamon or fungicide. Let the roots dry for 1–2 hours in shade before replanting. Avoid watering for 5–7 days to prevent further rot.
Do iris roots need fertilizer after planting?
Hold off on fertilizer for 6–8 weeks to avoid burning new roots. After that, apply a balanced, low-nitrogen fertilizer (like 5-10-10) in early spring and again after blooming. Organic options like compost or bone meal also work well. Over-fertilizing can harm tender roots—less is more!
Wrapping up and next steps
Planting iris roots is your ticket to a show-stopping spring display—and you’ve got all the know-how now! With the right timing, soil prep, and care, your irises will reward you with stunning blooms year after year. 🌸
Ready to dive deeper? Grab your gloves and get planting! For extra tips, check out our guide on iris care after planting to keep those roots thriving. Happy gardening!