
Picking
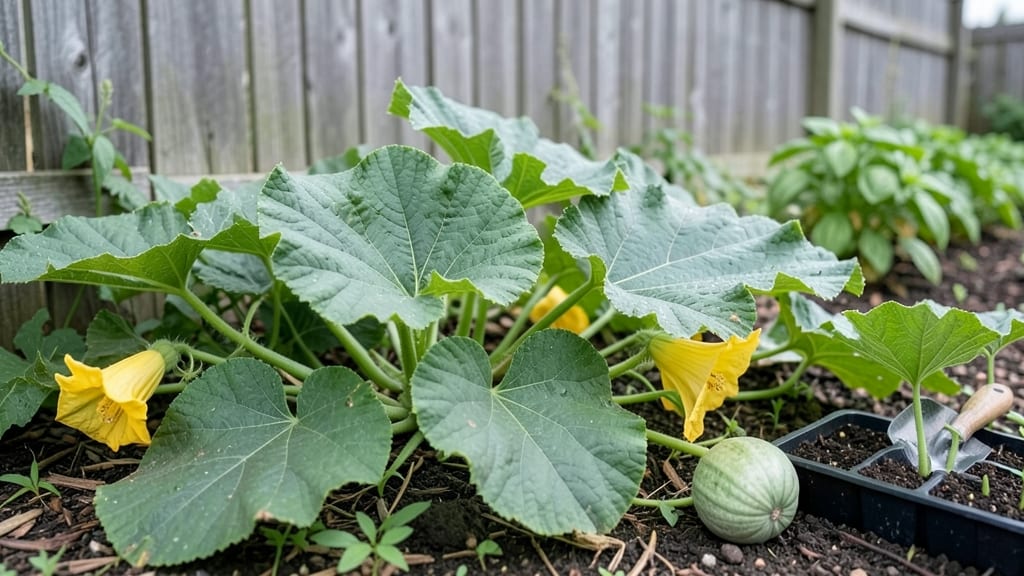
Planting Hubbard squash means you’re trading store-bought gourds for the real deal—sweet, nutty flesh straight from your garden. 🌱 I learned the hard way that these vines need more than just space; they demand rich soil, patience, and the right timing to avoid blight or stunted growth.
The secret to a bumper crop isn’t complicated, but it is specific: warm soil, proper spacing, and a few clever tricks to keep pests at bay.
Start with well-draining soil mixed with compost—Hubbard squash loves its nutrients—and wait until the ground reaches at least 70°F before planting. Give each vine 5-6 feet of space (they sprawl!) and bury seeds 1 inch deep, two per hill for better germination.
Companion plants like beans or marigolds nearby deter squash bugs, while avoiding cucumbers (they compete for the same pests). Most beginners overcrowd or plant too early—both lead to weak vines and fewer fruits.
Once sprouted, keep the soil consistently moist but not soggy, and watch for those first tendrils. Within 6-8 weeks, you’ll see male flowers appear—let them drop to encourage female blooms (the ones with tiny squash at their base).
A healthy vine can produce 10-15 squash, and with proper care, you’ll harvest from late summer through fall. The key? Prune aggressive side shoots early to focus energy on fruit development.
This method works in zones 3-10, though cooler climates need a 4-6 week head start indoors. Troubleshoot by checking for powdery mildew (spray with milk solution) or squash vine borers (cover young plants with row fabric).
With these steps, you’ll go from seed to harvest in 100 days—no greenhouse required. Ready to grow?
📚 In This Guide
- What you need
- Instructions
- Tips and common mistakes
- Wrapping up and next steps
What you need
- ● Hubbard squash seeds – Choose Cucurbita maxima varieties like ‘Blue Hubbard’ or ‘Delicious’ (3-5 seeds per plant, ~10-15 seeds total for a family-sized harvest).
- ● Well-draining soil – Amend with compost (2-3 inches mixed into the top 12 inches of soil) for nutrients.
- ● Fertilizer – A balanced 10-10-10 or 5-10-10 organic fertilizer (apply at planting and mid-season).
- ○ Watering can or hose – With a soaker hose attachment (optional but highly recommended for deep hydration).
- ● Garden trowel or transplanter – For digging holes (6-inch depth, 3-4 feet apart).
- ● Garden gloves – To protect hands from prickly vines.
- ○ Mulch (straw or black plastic) – To retain moisture and suppress weeds (optional but helpful in hot climates).
- ○ Trellis or stakes (optional) – For vining varieties (if growing vertically, use 6-foot stakes).
- ● Warm soil temperature – Wait until soil reaches 70°F (21°C) (use a soil thermometer if unsure).
- ● Full sun exposure – 6-8 hours daily (partial shade tolerated in hot climates).
- ● Space – Hubbard squash needs 3-4 feet of diameter per plant (or 5-6 feet for giant varieties).
Step-by-step instructions for planting Hubbard squash
Here's how to cultivate hardy, productive vines that yield squash all season long.
🌱 Step 1: Choose the Perfect Planting Spot and Prep Soil
Hubbard squash thrives in full sun—select a site that receives at least 8 hours of direct sunlight daily. I always test the soil first by digging a 6-inch deep hole; if the ground feels compacted or clay-heavy, amend it with 2-3 inches of compost mixed into the top 12 inches of soil. This improves drainage and prevents rot, which is Hubbard squash's biggest enemy.
Spread a 3-inch layer of straw mulch around the planting area to retain moisture and suppress weeds. This is especially important in hot climates where soil dries out quickly. Wait until soil temperatures reach at least 65°F—cold soil delays germination and weakens seedlings.
🌱 Step 2: Plant Seeds at the Right Depth and Spacing
Sow seeds 1 inch deep and 3 feet apart in all directions—Hubbard squash vines spread aggressively and need space to thrive. Plant 2-3 seeds per hill to ensure strong starts, then thin to the most vigorous seedling once they reach 4 inches tall. I always plant hills in a grid pattern for easier harvesting and vine management.
Water the seeds immediately after planting to settle the soil around them. Keep the planting area consistently moist until germination, which typically occurs in 7-14 days. Avoid overhead watering during this time—it can wash seeds away or create muddy soil that suffocates tender roots.
☀️ Step 3: Provide Consistent Care for Strong Vines
Once seedlings emerge, maintain 1-2 inches of mulch around each plant to conserve moisture and regulate soil temperature. Hubbard squash vines grow rapidly, so I fertilize with a balanced 10-10-10 fertilizer when vines reach 12 inches long, then switch to a low-nitrogen, high-potassium formula once flowers appear to encourage fruit development.
Water deeply 2-3 times per week, aiming for 1-2 inches of water per week. The key is consistency—Hubbard squash is drought-sensitive, and uneven moisture leads to misshapen fruit. You'll know you're doing it right when the soil feels moist 2-3 inches down but not soggy.
✂️ Step 4: Prune and Train Vines for Maximum Yield
When vines reach 6 feet long, begin pruning side shoots to direct energy into fruit production. I remove all but the strongest 2-3 vines per plant, cutting back with clean shears just above a leaf node. This prevents overcrowding and improves air circulation, reducing the risk of powdery mildew.
Train the main vines along a trellis or sturdy stakes if space is limited. Hubbard squash fruits are heavy, so I use 3-foot tall stakes placed 1 foot from the plant base to support the weight. This also makes harvesting easier and keeps squash off the ground, where they're more prone to rot.
🍎 Step 5: Harvest at Peak Ripeness for Best Flavor
Harvest Hubbard squash when the rind turns hard and the stem end dries out—this usually occurs 80-100 days after planting. I test ripeness by gently pressing the skin; if it doesn't dent easily, it's ready. Use pruning shears to cut the squash from the vine, leaving a 1-inch stem attachment to prevent rot during storage.
Store harvested squash in a cool, dry place with good airflow. A well-ventilated basement or garage keeps them fresh for 2-3 months. If you miss the harvest window, don't worry—Hubbard squash stores exceptionally well and can be enjoyed well into winter.
Tips & tricks for perfect Hubbard squash planting
These tried-and-true strategies will help you avoid common pitfalls and maximize your Hubbard squash harvest all season long.
Soil Temperature Matters: The 65°F soil temperature threshold isn't just a number—it's when Hubbard squash seeds finally activate their germination enzymes. I've seen seeds planted in cooler soil take twice as long to sprout, or worse, rot before emerging. Use a soil thermometer to confirm you've reached this critical threshold before planting. If your spring is slow to warm, consider using black plastic mulch a few weeks before planting to accelerate soil heating.
Spacing Strategy for Small Gardens: While the instructions call for 3 feet apart, I've successfully grown Hubbard squash in smaller spaces by using the "hill method" with 2-foot spacing between hills and 4-foot spacing between rows. This works because you're concentrating multiple vines in one spot, which creates a natural microclimate that retains more moisture. Just be prepared to prune aggressively once vines start competing for sunlight.
Watering Secret: The 1-2 inches per week guideline is perfect, but here's what nobody tells you: Hubbard squash roots are surprisingly shallow. Instead of watering the entire planting area, focus on creating a 12-inch wide wet zone around each plant's base. This encourages roots to spread outward where they can access moisture more efficiently. I water in the early morning so the foliage has all day to dry, which dramatically reduces powdery mildew risk.
Harvest Timing Hack: Those 80-100 days to maturity can feel like an eternity, but here's how to tell when your squash is truly ready: Look for the stem end to develop a papery texture that peels away easily. The skin should also develop a leathery toughness—press your thumbnail against it. If it doesn't dent, your squash is ready. I've found that harvesting at the earlier end of this window (around day 85) gives slightly sweeter, more tender flesh perfect for soups and stews.
Pro Tips for Planting Hubbard Squash
- These tried-and-true strategies will help you avoid common pitfalls and maximize your Hubbard squash harvest all season long.
- Soil Temperature Matters: The 65°F soil temperature threshold isn't just a number—it's when Hubbard squash seeds finally activate their germination enzymes.
- This works because you're concentrating multiple vines in one spot, which creates a natural microclimate that retains more moisture.
Frequently asked questions
Got questions about growing Hubbard squash? You’re not alone!
Here are answers to the most common queries—from timing to troubleshooting—to help you grow a thriving patch of these winter squash superstars.
When is the best time to plant Hubbard squash?
Hubbard squash thrives in warm soil, so plant seeds after the last frost when temperatures consistently stay above 60°F (15°C). For a head start, sow seeds indoors 4–6 weeks before transplanting. In warmer climates, you can even plant in early spring or late summer for a fall harvest!
How much space do Hubbard squash vines need?
These vines spread wide! Give each plant 3–5 feet of space in all directions (they can sprawl up to 10 feet). If space is tight, train vines vertically with trellises or strong cages. Just remember—more room = happier squash and fewer pests!
What are the most common pests or diseases, and how do I prevent them?
Hubbard squash faces threats like squash vine borers, powdery mildew, and cucumber beetles. Prevent issues by:
- Using row covers early in the season.
- Rotating crops yearly to avoid soil-borne diseases.
- Handpicking pests (like vine borers) or using neem oil as a spray.
- Ensuring good airflow to reduce mildew.
How long does it take for Hubbard squash to mature?
From seed to harvest, Hubbard squash typically takes 90–120 days, depending on the variety and growing conditions. Watch for hard rind and dull color—signs it’s ready to pick! Overripe squash won’t store well, so harvest promptly.
Can I grow Hubbard squash in containers or small gardens?
Yes! Choose large containers (at least 5-gallon size) with drainage holes and fill with well-draining soil. Use compact varieties like ‘Delicious’ or ‘Blue Hubbard.’ Place containers in full sun (6+ hours daily) and keep soil consistently moist. Just be prepared for smaller yields than in-ground planting.
Pro Tip:
For extra sweetness, let Hubbard squash mature fully on the vine—they’ll develop deeper flavor and better storage life. A fully ripened squash can last 3–6 months in a cool, dark place!
Wrapping up and next steps
Growing Hubbard squash is a rewarding journey that delivers sweet, nutritious harvests and lush garden beauty—no matter the season! With the right soil, spacing, and care, you’ll enjoy year-round vines and plump, flavorful squash.
Whether you’re a beginner or a seasoned gardener, these tips ensure success and turn your garden into a productive powerhouse.
Ready to dive in? Start small—plant a few seeds or seedlings this week—and watch your garden transform! 🌱 For even bigger yields, try expanding your patch next season or sharing tips with fellow plant lovers. Happy growing!