
Vegetables
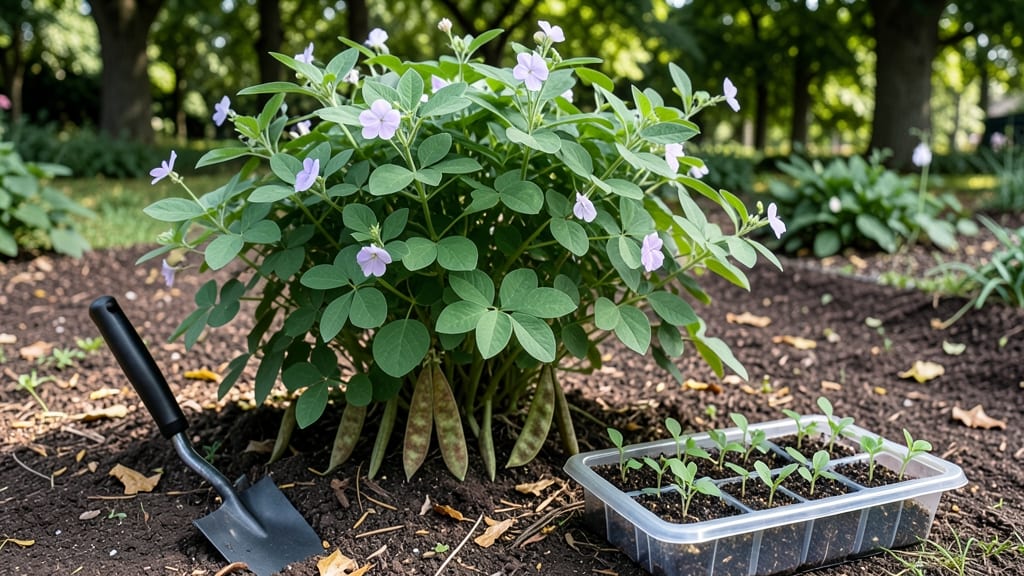
Planting adzuki beans starts with warming the soil—cold ground is their biggest enemy. I learned this the hard way when my first batch of seeds sat stubbornly underground for weeks before finally sprouting.
These beans need consistent warmth to break dormancy, and a few simple tricks can turn a slow start into reliable, even germination.
The key is timing and preparation: sow seeds after your last frost when soil reaches 60°F, using black plastic mulch or a cold frame to accelerate warming. Adzuki beans thrive in full sun (6-8 hours daily) and well-draining soil with a pH between 6.0 and 7.0.
For best results, plant seeds 1 inch deep and 3-4 inches apart in rows spaced 18 inches apart—this gives them room to climb trellises or bush out without competition.
Once sprouted, consistent moisture is critical—1 inch of water per week—but avoid soggy soil, which invites rot. Within 60-70 days, you’ll harvest tender beans perfect for soups, salads, or drying. The real reward? A garden that delivers both beauty and bounty with minimal fuss.
This method works in Zones 5-10, though northern gardeners may need to start seeds indoors 4-6 weeks before transplanting. Whether you’re a beginner or seasoned grower, these soil-warming tricks will transform your adzuki beans from finicky to foolproof.
📚 In This Guide
- What you need
- Instructions
- Tips and common mistakes
- Wrapping up and next steps
What you need
- ● Adzuki bean seeds: 1–2 lbs (or ~50–100 seeds, depending on desired yield). Choose non-GMO, heirloom varieties for best results.
- ● Growing containers: For direct sowing: 12-inch-deep pots or garden beds with well-draining soil.
- ○ For soil warming: Black plastic mulch (4–6 ft wide) or a seedling heat mat (optional but helpful).
- ● Soil: Loose, nutrient-rich mix—60% potting soil, 30% compost, and 10% perlite/sand for drainage.
- ● Watering can or spray bottle: With a fine rose nozzle to avoid disturbing seeds.
- ● Fertilizer: Balanced organic fertilizer (10-10-10) or compost tea for a gentle nutrient boost.
- ● Plant labels: To track varieties and planting dates.
- ● Soil thermometer: To monitor temperatures (ideal range: 70–85°F for germination).
- ● Row covers or cloches: For extra warmth if nights are chilly.
- ● Trellis or stakes: If growing pole varieties (adzuki beans are typically bush-type, but some climbers exist!).
- ● Mulch (straw or grass clippings): To retain moisture and regulate soil temp.
Step-by-step instructions for planting adzuki beans
Here's how to coax reliable sprouts from adzuki beans using soil-warming techniques that work in cool climates.
Prepare the Soil with Warmth-Enhancing Amendments
Adzuki beans thrive when soil temperatures exceed 60°F, so I always warm the planting area first. Mix 2 gallons of compost into the top 6 inches of soil to jumpstart microbial activity. Add 1 cup of aged manure—this isn't just fertilizer, it's a heat generator as it breaks down. Work the amendments in until the soil looks dark and crumbly, with no compacted clumps.
For extra warmth, lay down black plastic mulch two weeks before planting. The plastic absorbs sunlight and radiates heat into the soil, creating an ideal environment for germination. Secure the edges with soil or rocks to prevent wind from shifting it. If you're in a particularly chilly zone, cover the area with a cold frame during the day to trap additional heat.
Soak and Plant the Seeds Strategically
Adzuki beans germinate best when pre-soaked for 12 hours in lukewarm water. This softens the seed coat and kickstarts the sprouting process. Drain the seeds and let them sit in a mesh bag until you're ready to plant. Plant 4 seeds per hill, spacing hills 18 inches apart in rows that are 2 feet apart. Dig holes 1 inch deep—any deeper and the seeds may take too long to reach the surface.
I like to plant in small groups rather than single seeds because adzuki beans often struggle with uneven germination. If all four seeds in a hill sprout, thin to the two strongest plants. Press the soil gently around the seeds to ensure good contact, but don't compact it—you want air pockets for roots to explore.
Maintain Consistent Moisture and Warmth
Water the soil deeply immediately after planting to settle the seeds into place. Keep the soil evenly moist but not soggy—adzuki beans hate waterlogged roots. I check moisture by pushing a finger 1 inch into the soil; if it feels dry, it's time to water. Use a drip irrigation system or soaker hose to deliver water slowly and evenly, avoiding the leaves to prevent fungal diseases.
If nighttime temperatures dip below 55°F, cover the plants with row covers or a cloche. The goal is to maintain soil temperatures above 60°F for at least 10 days—this is when you'll see the first signs of sprouts. If the soil cools below 50°F, germination slows dramatically, and seeds may rot before sprouting.
Thin and Support as Plants Mature
Once seedlings reach 3 inches tall, thin to the strongest two plants per hill. Use scissors to snip weak stems at the base rather than pulling—the roots of neighboring plants will thank you. At this stage, the plants will need support as they grow taller. Install trellises or stakes near each hill, securing them with soft ties to avoid damaging the stems.
Adzuki beans are determinate, meaning they grow to a fixed height and produce pods all at once. Expect plants to reach 2-3 feet tall by mid-summer. Continue watering at the base, keeping the soil 1-2 inches deep moist throughout the growing season. Avoid overhead watering as the plants mature, as wet foliage invites powdery mildew—a common issue with adzuki beans in humid climates.
Harvest and Preserve the Crop
Adzuki beans are ready to harvest when the pods turn yellow and dry but before they split open. This usually happens 90-100 days after planting, depending on your climate. I check pods every 2-3 days during the harvest window—missing the timing means tough, shriveled beans. Pick pods in the morning when moisture levels are lowest, reducing the risk of mold.
Once harvested, spread the pods in a single layer on a tray to dry in a warm, well-ventilated area for 1-2 weeks. Store dried beans in airtight containers in a cool, dark place. Properly stored, they'll keep for up to a year, ready for cooking or planting in future seasons. If you're growing for fresh eating, harvest pods when they're firm and green—these beans are best used within a few days.
Tips & tricks for perfect adzuki bean planting
These soil-warming secrets will help you overcome cool-climate challenges and achieve reliable germination every time.
Soil Temperature is Non-Negotiable: The 60°F threshold isn't just a suggestion—it's the biological minimum for adzuki beans to germinate. Use a soil thermometer to verify temperatures before planting, especially in mornings when soil cools fastest. If your soil hovers around 55°F, consider planting in a raised bed with black plastic mulch two weeks ahead to create a microclimate that stays consistently warm. The 10-day window at optimal temperatures is when you'll see sprouts appear, so don't rush this preparation.
Seed Preparation Makes All the Difference: That 12-hour soak in lukewarm water isn't just about hydration—it's about breaking dormancy. I've found that adding 1 teaspoon of molasses to the soaking water (optional) can further stimulate germination by feeding beneficial microbes that coat the seeds. After soaking, drain them thoroughly and let them air-dry slightly before planting. This prevents waterlogged seeds that might rot in cold soil.
Planting Depth and Spacing Strategy: The 1-inch depth recommendation isn't arbitrary—it balances protection from soil temperature fluctuations with the need for quick emergence. Planting deeper risks seeds taking too long to reach warm zones, while shallower planting exposes them to temperature swings. The 18-inch spacing between hills allows for adequate airflow, which is crucial for preventing fungal diseases that thrive in humid conditions. I've found that planting in small groups of four seeds per hill gives you insurance against uneven germination rates that are common with adzuki beans.
Harvest Timing is Everything: The 2-3 day window between when pods turn yellow and when they split open is incredibly narrow. I mark my calendar with the 90-100 day estimate from planting and check pods every morning during this critical period. Harvesting at the right stage ensures tender beans with maximum sweetness. For fresh eating, harvest when pods are still firm and green—these beans are best used within days, as they lose quality quickly once picked.
Pro Tips for Planting Adzuki Beans
- These soil-warming secrets will help you overcome cool-climate challenges and achieve reliable germination every time.
- Soil Temperature is Non-Negotiable: The 60°F threshold isn't just a suggestion—it's the biological minimum for adzuki beans to germinate.
- Seed Preparation Makes All the Difference: That 12-hour soak in lukewarm water isn't just about hydration—it's about breaking dormancy.
Frequently asked questions
about planting adzuki beans—because even seasoned gardeners need a little extra help! Here are answers to the most common queries to set you up for success.When is the best time to plant adzuki beans?
Adzuki beans thrive in warm soil—aim to plant them 2–3 weeks after your last frost date when soil temps reach at least 60°F (15°C). In cooler climates, use soil-warming tricks (like black plastic mulch) to jumpstart growth. If you’re in a short season, opt for early-maturing varieties (like 'Scarlet O’Hara') for a harvest before fall.
How close together should I plant adzuki beans?
Space seeds 4–6 inches apart in rows 18–24 inches apart to allow airflow and prevent disease. If growing in containers, plant 2–3 seeds per 5-gallon pot with trellising for support. Pro tip: Thin seedlings to the strongest plants once they’re 3–4 inches tall—this boosts yield!
What should I do if my adzuki bean seeds aren’t sprouting?
First, check for moisture and warmth—seeds need consistent dampness (not soggy) and soil temps above 60°F (15°C). If planted too early, try soaking seeds overnight or using a seedling heat mat. If mold appears, improve drainage or replant in fresh soil. Patience is key! Some varieties take 7–14 days to sprout.
Can I grow adzuki beans in containers or small spaces?
Adzuki beans are compact and bushy, making them perfect for containers, balconies, or even hanging baskets with trellises. Use pots at least 12 inches deep and fill with well-draining potting mix. For urban gardens, try vertical growing—they’ll climb 2–3 feet with support, saving space!
Are adzuki beans easy to grow for beginners?
Yes! They’re low-maintenance and forgiving compared to other legumes. Just ensure full sun (6+ hours/day), regular watering (1–1.5 inches per week), and occasional weeding. Avoid overwatering—consistent moisture is better than soggy soil. With these basics, even first-timers can enjoy a bountiful harvest!
What can I do if pests or diseases attack my adzuki beans?
Common issues include aphids, bean beetles, or powdery mildew. For pests, spray with neem oil or introduce ladybugs. Improve airflow by spacing plants properly to prevent mildew. Prevention tip: Rotate crops yearly and avoid overhead watering to keep plants healthy.
Wrapping up and next steps
Planting adzuki beans is a rewarding journey that combines tradition with modern soil-warming techniques to ensure fast, healthy sprouts. By following these steps—whether you’re using heat mats, compost piles, or simple mulching—you’ll unlock a bountiful harvest of these nutritious legumes.
Now that you’re equipped with the know-how, why not start small this season? Try a few pots on your balcony or a small garden bed, and watch your confidence (and crop!) grow. 🌱
🌟 Ready to Grow?
Take the next step: sketch a planting plan based on your space and climate. Need inspiration? Check out our guide to companion planting for adzuki beans—or tag us in your first harvest! 📸