
Size
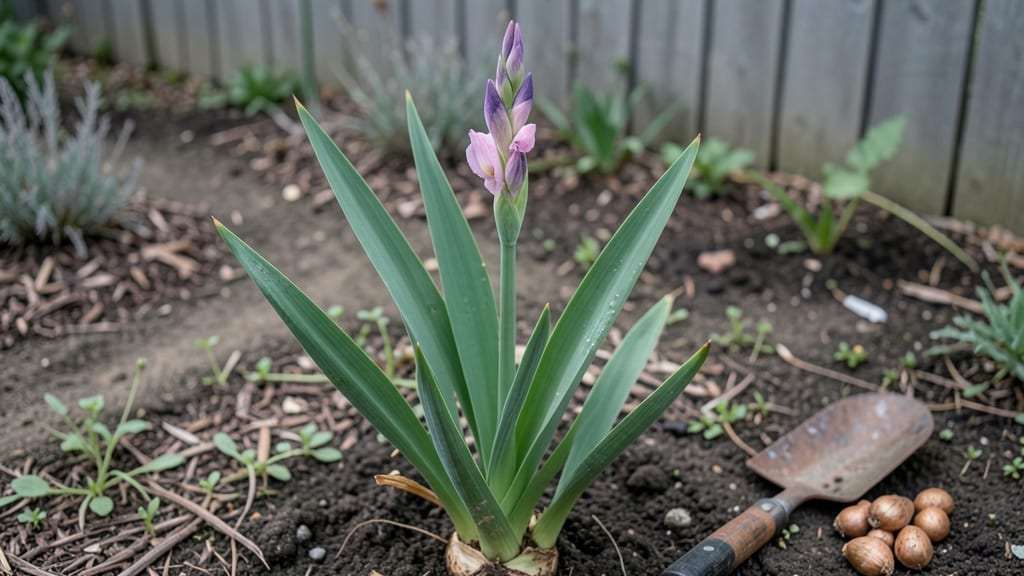
Here are the grow gladiolus planting tips you need to turn your garden into a summer spectacle of towering blooms—because, trust me, these picky beauties won’t forgive mistakes. up with spindly stems and fewer blooms than you hoped for.
The secret lies in mimicking their natural habitat: well-drained soil, full sun, and a little extra care during their first growing season.
Start with fertile, loose soil mixed with compost to give those bulbs room to settle at 6 inches deep, with 6 inches between each bulb in rows spaced 12 inches apart.
Gladiolus thrive in full sun (6+ hours daily), so pick a spot where they won’t compete with shade-loving neighbors. Plant them in spring after the last frost—typically April or May in most zones—or in early fall for a late-summer bloom the following year.
Water deeply after planting, then keep the soil evenly moist but not soggy—these bulbs rot faster than they grow if left waterlogged. A 2-inch layer of mulch preserves moisture and keeps roots cool, while staking taller varieties prevents them from flopping in wind or rain.
By mid-summer, you’ll be rewarded with 3- to 5-foot stems bursting with blooms that last 2 weeks in a vase—worth every bit of patience.
Here’s where most gardeners trip up: overcrowding bulbs or planting them too shallow. Space them properly, and you’ll avoid competition for nutrients and water. Divide clumps every 3-4 years to rejuvenate growth, and fertilize lightly with balanced 10-10-10 when foliage reaches 6 inches tall.
The payoff? A garden centerpiece that turns heads—and fills your home with cut flowers all season long.
📚 In This Guide
- What you need
- Instructions
- Tips and common mistakes
- Wrapping up and next steps
What you need
- ● Gladiolus corms: 10–20 healthy, firm corms (size: 2–3 inches in diameter). Choose varieties based on your preferred height and color!
- ● Well-draining potting mix or garden soil: A blend of 60% garden soil, 30% compost, and 10% perlite or sand (for containers). For in-ground planting, amend clay soil with compost.
- ● Organic fertilizer: A balanced 10-10-10 or slow-release bulb fertilizer (e.g., 1 tbsp per corm at planting).
- ● Watering can or hose with a gentle spray nozzle.
- ● Garden trowel or bulb planter: For digging holes (depth: 4–6 inches, spacing: 6–8 inches apart).
- ● Measuring tape or ruler: To ensure proper spacing and depth.
- ● Garden stakes or trellis: 1–2 stakes per corm (height: 18–24 inches) to support tall stems.
- ○ Mulch (optional): Straw or shredded leaves (2–3 inches thick) to retain moisture and suppress weeds.
- ● Pruners or sharp scissors: For trimming spent blooms and foliage.
- ● A sunny spot with at least 6–8 hours of direct sunlight daily.
- ● Access to water for consistent (but not soggy!) moisture.
- ● Patience! Gladiolus take 80–100 days to bloom from planting.
Step-by-Step instructions for planting gladiolus bulbs
Here's my foolproof method for coaxing those dramatic, towering stems from gladiolus corms—no guesswork, just reliable blooms.
Choose and Prepare Your Planting Site
Gladiolus thrive in full sun, so pick a spot that gets at least 6-8 hours of direct sunlight daily. The soil should drain exceptionally well—these bulbs rot quickly in soggy conditions. Before planting, loosen the soil to a depth of 12 inches with a garden fork, breaking up any compacted layers. Amend heavy clay with 2-3 inches of coarse sand or perlite to improve drainage.
I always test the soil pH first—gladiolus prefer a slightly acidic to neutral range of 6.0-7.0. If your soil runs alkaline, mix in sulfur or peat moss to adjust it gradually. Avoid fresh manure or high-nitrogen fertilizers at planting time; instead, work in 2-3 inches of compost to provide organic matter without burning the corms.
Plant Corms at the Right Depth and Spacing
Timing matters: plant gladiolus corms 2-3 weeks after your last frost date, when soil temperatures reach 60°F. Dig holes 4-6 inches deep—deeper for heavier soils, shallower for sandy mixes—and space them 6 inches apart in rows. The corm should sit with its pointy end up and flat side down—this ensures proper growth orientation.
I like to plant in double rows, spacing the rows 18 inches apart for easier access and better air circulation. This prevents fungal diseases from spreading if plants get wet. Cover the corm with soil but leave the neck exposed—it should protrude slightly above the surface. Water lightly after planting to settle the soil around the corms.
Water and Fertilize for Strong Stems
Keep the soil evenly moist but never soggy for the first 4-6 weeks after planting. Gladiolus corms need consistent moisture to establish roots, but they’ll rot if waterlogged. I use a drip irrigation system set to deliver ½ inch of water per week, adjusting for rainfall. Once shoots emerge—usually in 2-3 weeks—reduce watering slightly to encourage deeper root growth.
Wait 6-8 weeks after planting before fertilizing. At that point, apply a balanced, low-nitrogen fertilizer (like 10-10-10) at half strength. Gladiolus are heavy feeders but sensitive to excess nitrogen, which promotes leafy growth at the expense of blooms. Side-dress with another application 4 weeks later, then switch to a phosphorus-heavy fertilizer (like 5-10-10) to boost flower production.
Stake and Support for Towering Blooms
Gladiolus stems can reach 4-5 feet tall, but they’re top-heavy and prone to flopping. Install 6-foot stakes or bamboo supports at planting time—3-4 stakes per row works well. Drive them 6 inches deep so they don’t topple when the stems grow. As the foliage reaches 12-18 inches tall, gently tie the main stems to the stakes with soft plant ties or twine, leaving room for growth.
Here’s the thing—don’t rush to stake. Wait until the first true leaves appear and the corm has rooted firmly. If you stake too early, the stems may grow around the ties and damage as they thicken. I also avoid over-tightening; the goal is support, not restriction. You’ll see the difference in straight, sturdy stems ready to hold those dramatic blooms.
Deadhead and Care for Next Year’s Corms
Once the flowers fade, cut the spent blooms off but leave the foliage intact. The leaves photosynthesize for 6-8 more weeks, storing energy in the corm for next year’s growth. Stop fertilizing after the first bloom cycle—additional nutrients now can encourage weak, late-season growth that won’t survive winter.
After the first hard frost blackens the foliage, dig up the corms before the ground freezes. Brush off excess soil and let them dry in a cool, dark, well-ventilated space for 2-3 weeks. Store them in paper bags or mesh sacks (never plastic) in a dry place at 50-60°F. I label each sack with the variety—gladiolus corms multiply over time, and you’ll want to keep track of your favorites for replanting.
Tips & tricks for perfect gladiolus planting
These proven strategies will help you cultivate show-stopping gladiolus that rival the pros—without the guesswork.
Soil Preparation Secret: In Step 1, when loosening soil to 12 inches deep, I go the extra mile by adding a handful of perlite or coarse sand directly to each planting hole. This creates micro-channels for drainage right where the corms will sit, preventing that dreaded rot that can happen even in well-amended soil. Think of it as creating a personal drainage system for each bulb.
Timing is Everything: The 60°F soil temperature threshold in Step 2 is non-negotiable—corms won't sprout reliably below this. I check soil temps with a simple digital thermometer buried 4 inches deep. If you're in doubt, plant a test corm a week early in a protected microclimate (like near a south-facing wall) to gauge your zone's true readiness.
Fertilizer Strategy: When you apply that first balanced fertilizer at 6-8 weeks, I recommend mixing it with a ¼ cup of bone meal per 10 feet of row. The phosphorus boost encourages stronger root development, which translates to more robust stems later. This is particularly important if your soil tests low in phosphorus—gladiolus are notorious for needing this nutrient for their towering growth.
Staking Hack: For Step 4's 6-foot stakes, I use bamboo stakes with a split base that I bury 6 inches deep. The split allows roots to grow into the stake itself, providing additional structural support. If you're planting in windy areas, drive stakes at a 15-degree angle toward the prevailing wind for extra stability.
Pro Tips for Grow Gladiolus Planting Tips
- These proven strategies will help you cultivate show-stopping gladiolus that rival the pros—without the guesswork.
- Soil Preparation Secret: In Step 1, when loosening soil to 12 inches deep, I go the extra mile by adding a handful of perlite or coarse sand directly to each planting hole.
- Timing is Everything: The 60°F soil temperature threshold in Step 2 is non-negotiable—corms won't sprout reliably below this.
Frequently asked questions
Got questions about growing gladiolus? You’re not alone! Here are answers to the most common concerns—from timing to troubleshooting—so you can cultivate stunning, towering blooms with confidence.
When is the best time to plant gladiolus bulbs?
Plant gladiolus bulbs in early spring (after the last frost) or late summer (6–8 weeks before your first fall frost). In warm climates, fall planting works too! Bulbs need 60–90 days to mature, so adjust timing based on your zone. Check a frost chart for precision.
How deep and far apart should I space gladiolus bulbs?
Plant bulbs 6 inches deep (twice their height) and 6 inches apart in rows. For clusters, space bulbs 3–4 inches apart in a group. Use a trowel to dig holes—this prevents overcrowding and ensures strong stems. Pro tip: Add a handful of bone meal to each hole for extra phosphorus!
Why aren’t my gladiolus stems growing tall or blooming?
Stunted growth usually means poor soil, lack of sunlight, or overcrowding. Ensure bulbs get full sun (6+ hours/day) and well-draining soil. Check for:
- Nutrient deficiency: Test soil pH (ideal: 6.0–6.8) and amend with compost.
- Pests: Slugs or wireworms can chew bulbs—use diatomaceous earth as a barrier.
- Improper planting: Bulbs planted too shallow may rot; too deep = weak stems.
Can I grow gladiolus in containers or small gardens?
Use deep pots (12+ inches) with drainage holes and plant 1–2 bulbs per container. Choose compact varieties like ‘Picasso’ or ‘Green Star’. Bonus: Containers let you move plants to sunny spots or protect them from frost. Just ensure pots don’t dry out—water when the top inch of soil is dry.
How do I save gladiolus bulbs for next year?
After blooming, cut stems but leave foliage until it yellows (6–8 weeks). Dig up bulbs before frost, trim stems to 2 inches, and cure in a cool, dry place for 2 weeks. Store in paper bags (not plastic) with peat moss or sawdust. Pro tip: Label bulbs—some varieties don’t store as well!
Are gladiolus bulbs toxic to pets or kids?
Yes! All parts of gladiolus—bulbs, leaves, and flowers—contain alkaloids that can irritate pets’ mouths or cause mild stomach upset if ingested. Keep plants out of reach of curious pets or children. If concerned, opt for pet-safe alternatives like dahlias or canna lilies.
Wrapping up and next steps
Growing gladiolus is a rewarding journey that brings bold, towering blooms to your garden with just a little patience and care. Remember, healthy soil, proper spacing, and consistent watering are your best friends—plus, don’t forget to stake those stems for dramatic, wobble-free displays! 🌱
Now that you’re armed with these bulb-by-bulb tips, why not plant your first row this weekend? Watch your garden transform into a vibrant, eye-catching masterpiece—one stem at a time. Happy growing! 🌸