
Fertilization
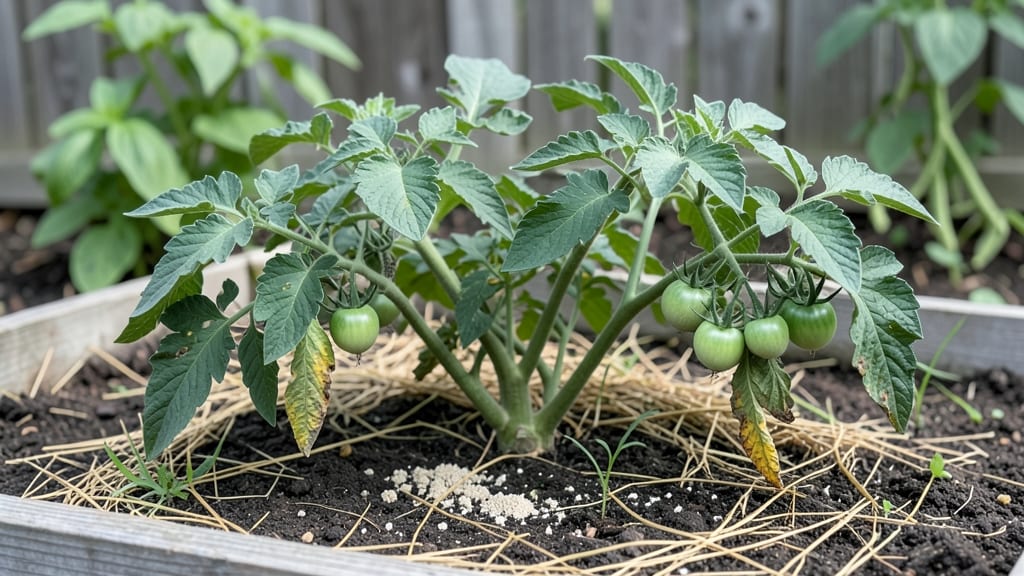
Fertilizing garden plants isn't just about throwing down random granules—it's the difference between wilted disappointment and shockingly lush growth. 🌱 I learned the hard way when my tomatoes produced sad little fruits after years of heavy feeding with the same old stuff.
The science isn't complicated, but the right approach saves you money, time, and the heartbreak of underperforming plants.
Start with a simple soil test—most garden centers sell kits for under $20—and you'll know exactly what your plants are missing. Organic options like compost or fish emulsion work wonders for vegetables, while slow-release granules keep flowers blooming all season.
The key is matching the fertilizer to your plants' needs: nitrogen for leafy greens, phosphorus for blooms, and potassium for root strength. I now keep three basic fertilizers on hand and rotate them based on what's growing.
Timing matters more than most gardeners realize. Feed vegetables every 4-6 weeks during active growth, but cut back in late summer to avoid tender new growth before frost. Flowers often need a phosphorus boost when buds form, and lawns thrive with a light nitrogen application every 6-8 weeks.
The goal is steady, balanced feeding—not overdoing it. I've burned more than one plant with too much nitrogen, so start light and adjust as you go.
Seasonal adjustments are where the magic happens. Spring feeds kickstart growth, summer applications maintain it, and fall fertilizers prep plants for winter resilience. Even houseplants benefit from a diluted feed every 6-8 weeks.
The payoff? Plants that look like they've been pampered by a master gardener—without the years of trial and error. Let's get those roots growing strong.
📚 In This Guide
- What you need
- Instructions
- Tips and common mistakes
- Wrapping up and next steps
What you need
- ● Fertilizer: Granular fertilizer (e.g., 10-10-10 or 20-20-20 NPK ratio) – 1-2 lbs per 100 sq ft
- ● Slow-release organic fertilizer (e.g., compost, worm castings, or fish emulsion) – 2-3 cups per plant
- ● Liquid fertilizer (e.g., seaweed extract or tomato feed) – 1-2 tbsp per gallon of water
- ● Tools: Garden gloves (nitrile or leather for durability)
- ● Hand trowel or small spade (for soil mixing)
- ● Watering can or hose with a spray nozzle (for liquid fertilizers)
- ● Measuring cup or scale (for precise fertilizer amounts)
- ● Pruners (for trimming dead foliage before fertilizing)
- ● pH testing kit (to check soil acidity/alkalinity before fertilizing)
- ● Soil conditioner (e.g., peat moss or perlite for improving texture)
- ● Mulch (straw, wood chips, or compost to retain moisture)
- ● Epsom salt (for magnesium-deficient plants, like tomatoes)
- ● Label maker (to track fertilizer types and application dates)
- ● Know your plants: Research their specific needs (e.g., nitrogen-loving veggies vs. phosphorus-heavy bloomers).
- ● Healthy soil: Amend compacted or poor soil with compost before fertilizing.
- ● Timing: Fertilize in the morning or evening to avoid burning plants in direct sunlight.
- ● Weather check: Avoid fertilizing before heavy rain (it’ll wash away nutrients!).
Step-by-step guide to fertilizing garden plants
Here's how to feed your plants for vibrant growth without burning their roots.
🌱 Step 1: Test Your Soil First
Before adding any fertilizer, grab a small soil sample from 6 inches deep and send it to your local extension office for a test. This tells you exactly what nutrients your soil lacks—whether it's nitrogen for leafy growth, phosphorus for roots, or potassium for disease resistance. I always test in early spring, because results take 2-3 weeks to come back, and you want to adjust your plan before planting season kicks off.
If you can't test, do a quick visual check: yellowing leaves often mean nitrogen deficiency, while purple stems signal phosphorus needs. Healthy soil smells earthy, not sour or chemical. This step saves you money by avoiding over-fertilizing, which can leach into groundwater and harm local ecosystems.
💧 Step 2: Choose the Right Fertilizer Type
Select a fertilizer based on your soil test results. For general garden use, I recommend a balanced 10-10-10 formula (equal parts nitrogen, phosphorus, potassium) unless your test shows specific deficiencies. Organic options like compost or fish emulsion work slowly but improve soil structure over time, while synthetic granules provide quick, measurable results. Always check the label for application rates—overdoing it can scorch roots.
For flowering plants, opt for a 5-10-10 blend to boost phosphorus, which encourages blooms. Vegetables and leafy greens thrive on 12-12-12 for steady growth. Spread granules evenly over the soil surface, avoiding direct contact with stems. Water lightly immediately after application to help nutrients penetrate the top layer.
☀️ Step 3: Apply Fertilizer at Key Growth Stages
Feed your plants at three critical times: when you first plant, 4-6 weeks later, and again 8-10 weeks after that. For example, tomatoes need extra nitrogen when they're young and phosphorus when they flower. Always water deeply 24 hours before and after fertilizing—this prevents root burn and helps nutrients reach deeper soil layers.
Watch for signs of over-fertilizing: crispy leaf edges, yellowing between veins, or white crust on soil. If you see these, flush the soil with 2-3 gallons of water per plant to leach out excess salts. I like to fertilize in the morning so plants have all day to absorb nutrients before evening coolness sets in.
✂️ Step 4: Maintain Soil Health Between Feedings
Between fertilizer applications, keep soil healthy by adding a 1-inch layer of compost around plants (but not touching stems). This improves microbial activity, which naturally breaks down nutrients into forms plants can absorb. Mulch with straw or shredded leaves to retain moisture and regulate soil temperature—ideal conditions for root growth.
Rotate crops yearly to prevent nutrient depletion in specific areas. For example, if you planted tomatoes in one spot this year, avoid heavy feeders like corn next season. Instead, plant peas or beans, which add nitrogen to the soil through their roots. This natural cycle reduces your need for synthetic fertilizers over time.
🪴 Step 5: Adjust for Seasonal Needs
In summer, when plants grow fastest, increase fertilizer frequency to every 3-4 weeks. In fall, reduce feedings as growth slows. Evergreens and perennials need a light feeding in early spring to break dormancy, while annuals benefit from a final boost in late summer to prepare for blooming next year.
Pay attention to weather: after heavy rains, nutrients wash away, so reapply fertilizer within 1-2 weeks of storms. In drought conditions, reduce fertilizer use—stressed plants can't absorb nutrients efficiently. Always store fertilizers in a cool, dry place to maintain potency.
Tips & tricks for perfect plant fertilizing
Real talk: Fertilizing isn't just about dumping nutrients on your plants—it's about precision timing and smart techniques that actually work. Here's what nobody tells you about getting it right the first time.
Timing Secret: That 24-hour watering rule before fertilizing is non-negotiable. Wet soil helps nutrients penetrate deeper, but don't overdo it—soggy soil can suffocate roots. I always water in the morning so plants have all day to absorb nutrients before evening. For container plants, water until you see drainage at the bottom—this ensures the fertilizer moves through the entire root zone.
The Soil Test Payoff: Don't skip that 2-3 week soil test! Many gardeners guess and end up over-fertilizing, which burns roots and wastes money. I've seen people add extra nitrogen just because their leaves are green, only to discover their soil was actually phosphorus-deficient. The test reveals exactly what your plants need—whether it's nitrogen for leaves, phosphorus for roots, or potassium for disease resistance.
Seasonal Strategy: Summer's the heavy feeding season, but don't follow the same schedule year-round. Evergreens and perennials only need that light early spring feeding to break dormancy. Annuals get their final boost in late summer to prep for next year's blooms. And here's the thing: after heavy rains, nutrients wash away—so reapply within 1-2 weeks to maintain that nutrient balance.
Over-Fertilizing Rescue: If you see crispy leaf edges or that white crust on soil, you've overdone it. Don't panic—flush the soil immediately with 2-3 gallons of water per plant. This leaches out excess salts before they damage roots. I've saved many plants this way, including a prized rose bush that would've died without this quick fix.
Pro Tips for Fertilizing Garden Plants
- Real talk: Fertilizing isn't just about dumping nutrients on your plants—it's about precision timing and smart techniques that actually work.
- Timing Secret: That 24-hour watering rule before fertilizing is non-negotiable.
- The Soil Test Payoff: Don't skip that 2-3 week soil test!
Frequently asked questions
When is the best time to fertilize garden plants?
The ideal time depends on your plants, but spring (early growth) and mid-summer (after harvest) are golden. For perennials, fertilize in early spring before new growth. Annuals and vegetables? Feed them every 4-6 weeks during the growing season. Always check soil moisture—never fertilize dry soil!
How often should I fertilize my garden?
Frequency varies by plant type and fertilizer type. Slow-release granules (like organic compost) last 6-12 weeks, while liquid fertilizers need reapplications every 2-4 weeks. Over-fertilizing harms plants—stick to the label’s schedule and adjust based on leaf color (yellow = hungry; brown = too much).
What’s the difference between organic and synthetic fertilizers?
Organic fertilizers (compost, manure, bone meal) feed soil long-term, improving texture and microbial life. Synthetic fertilizers (like 10-10-10) deliver immediate, precise nutrients but can deplete soil health over time. For best results, combine both—use organic as a base and synthetic for quick fixes (e.g., flowering boosts).
What do I do if my plants look burned after fertilizing?
Fertilizer burn is common but fixable! Flush the soil with water immediately to dilute excess salts. Reduce future applications by half the recommended dose and water thoroughly before applying fertilizer next time. For severe damage, trim dead leaves and repot (if potted) with fresh soil.
Are homemade fertilizers as effective as store-bought ones?
Homemade options like compost tea, banana peels (potassium), or eggshells (calcium) work wonders for specific needs. While they may not match synthetic precision, they’re cheaper, eco-friendly, and safer for kids/pets. For heavy feeders (tomatoes, peppers), supplement with store-bought for balanced results.
How do I know if my garden needs fertilizer?
Watch for these signs:
- Pale or yellow leaves = nutrient deficiency (especially nitrogen).
- Stunted growth = lack of phosphorus or potassium.
- Healthy green plants with slow growth = they’re fine—no need to fertilize!
For a DIY test, dig a soil sample and check its texture. Sandy soil drains fast (needs organic matter), while clay holds nutrients but may need aeration.
Wrapping up and next steps
Fertilizing your garden isn’t just guesswork—it’s a science-backed way to unlock vibrant blooms, bountiful harvests, and healthier plants! 🌱 By understanding your soil’s needs, choosing the right fertilizers, and applying them strategically, you’re giving your garden the best possible start.
Whether you’re a beginner or a seasoned green thumb, small adjustments make a big difference.
Ready to see your garden thrive? Start with a simple soil test, then pick a fertilizer that matches your plants’ needs. Next up: Plan your feeding schedule and watch your garden flourish in no time!