
Planting
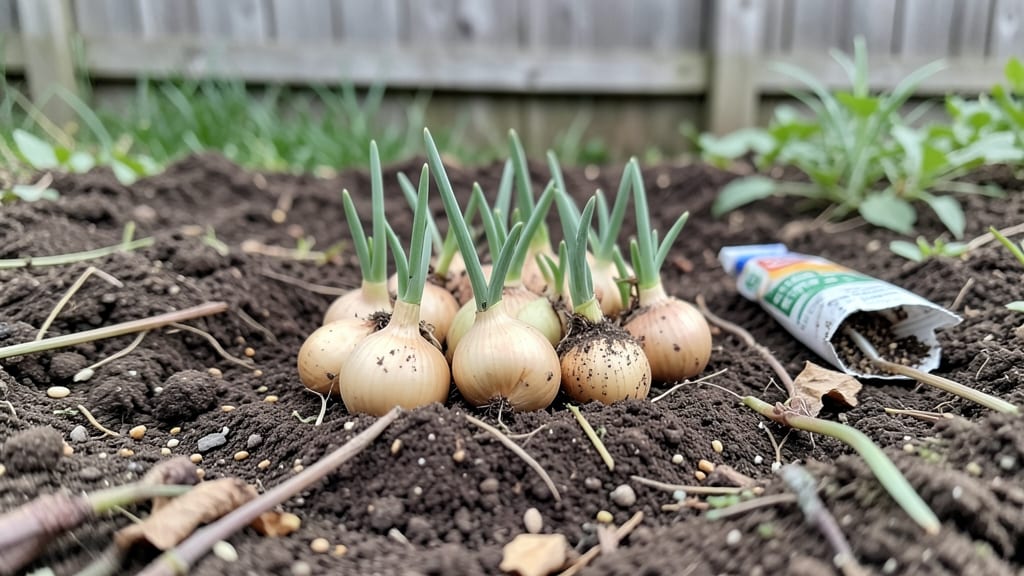
Planting ranunculus in the fall unlocks a secret weapon for early spring color—those velvety, layered blooms that make your garden pop before tulips even think about waking up. 🌸 I learned the hard way that skipping fall planting means waiting weeks longer for the same showy results, and honestly, who has that kind of patience?
The key is timing: aim for 6-8 weeks before your first hard frost, when soil stays workable but nights get crisp enough to trigger dormancy.
You’ll need just three things: ranunculus corms (not bulbs—these are different!), loose, well-draining soil, and a sunny spot that gets at least 6 hours of light daily.
The soil prep is simple: mix in compost to feed those corms through winter, and avoid heavy clay or soggy spots where they’ll rot. In colder zones, a 2-3 inch layer of mulch after planting keeps them cozy until spring.
By spring, you’ll have stems shooting up like clockwork, often 2-3 weeks earlier than spring-planted ranunculus. The blooms? Bold, papery layers in every color from blush pink to deep burgundy, and they last longer in vases too.
The best part? These corms multiply over time, so your first planting could feed your garden for years—just divide them every 3-4 years to keep them vigorous.
This method works from Zone 3 to Zone 9, though timing shifts north to south. In warmer climates, plant later (even December) to avoid winter rains. And if you’re new to corms, don’t worry—they’re forgiving.
Just plant them 3-4 inches deep, pointy end up, and let nature handle the rest. Your garden will thank you when those first blooms peek through the snow.
📚 In This Guide
- What you need
- Instructions
- Tips and common mistakes
- Wrapping up and next steps
What you need
- ● Ranunculus corms – 10–50 corms per square foot (choose vibrant colors like red, pink, or white for maximum impact).
- ● Well-draining potting mix – 6–8 inches deep in containers or garden beds (avoid heavy clay soil).
- ● Organic compost – 1–2 cups per square foot to enrich soil fertility.
- ● Slow-release fertilizer (e.g., 10-10-10 or bulb-specific formula) – Follow package rates for feeding.
- ● Watering can or hose with gentle spray – Keep moisture consistent but avoid soggy soil.
- ○ Garden twine or stakes (optional but helpful) – For tall varieties to support stems as they grow.
- ● Gloves – Protect your hands from sharp corm edges.
- ● Trowel or small shovel – For planting and soil prep.
- ● Measuring tape or ruler – Ensure proper 2–3 inch spacing between corms.
- ● Sunny location – 6+ hours of sunlight daily (partial shade in hot climates).
- ● Cold-hardy zone awareness – Plant 8–10 weeks before first frost (typically September–October in most regions).
- ● Mulch – Straw or shredded leaves to insulate roots in winter.
- ● Grow lights – For indoor overwintering in colder climates.
- ● Floral preservative – Extend vase life of cut stems with 1 tsp sugar + 2 drops bleach per quart of water.
- ● Child-safe gloves – If involving kids in planting!
Step-by-Step instructions for planting ranunculus in fall
Here’s how to get vibrant ranunculus blooms by spring—just plant now.
🌱 Step 1: Choose the Right Tubers and Prepare the Soil
Ranunculus tubers are tiny, papery bulbs that need loose, well-draining soil to thrive. I always buy certified disease-free tubers from a reputable supplier—they’re usually sold in small mesh bags. Plant them in a spot with full sun (at least 6 hours daily) or light shade in hotter climates.
Before planting, loosen the soil to a depth of 12 inches with a garden fork. Mix in 2-3 inches of compost to enrich the soil without making it too dense. Ranunculus hates soggy roots, so if your soil drains poorly, add a handful of perlite or coarse sand to improve aeration. Work the amendments into the top 6 inches of soil.
🪴 Step 2: Plant Tubers at the Correct Depth and Spacing
Ranunculus tubers are delicate, so handle them gently—no squeezing or rough treatment. Plant them 2 inches deep, with the pointed end facing upward. This ensures the roots grow downward and the shoots emerge properly. Space tubers 3-4 inches apart in rows 6 inches apart for easy maintenance and airflow.
I like to plant them in clusters of 5-7 tubers for a fuller look later. Cover the tubers with soil and water gently but thoroughly to settle the soil around them. Avoid overwatering now—just enough to moisten the soil without creating puddles. Mulch lightly with 1 inch of straw or shredded leaves to protect the tubers over winter.
💧 Step 3: Water and Protect Through Winter
After planting, water lightly every 2-3 weeks until the ground freezes—just enough to keep the soil slightly moist but not soggy. Ranunculus tubers need a period of cold dormancy to bloom well in spring, so don’t fertilize yet. In areas with harsh winters, add 2-3 inches of mulch after the first frost to insulate the tubers and prevent heaving.
Watch for signs of frost heave—if the soil pushes up around the tubers, gently press it back down and add more mulch. You’ll know you’re on track when the mulch stays intact and the soil remains cool to the touch. Avoid disturbing the tubers until spring, even if they look dormant.
☀️ Step 4: Resume Watering and Fertilize in Early Spring
When you see new growth in early spring—usually 4-6 weeks before your last frost date—remove the mulch and water lightly to encourage shoots. Increase watering gradually as the shoots grow taller, aiming for 1 inch of water per week. Once the foliage reaches 3-4 inches tall, apply a balanced 10-10-10 fertilizer at half strength to promote strong root and stem development.
This is the moment that matters: fertilizing too early can burn tender new growth, while waiting too long delays blooming. You’ll see the first true leaves emerge in 2-3 weeks—that’s your signal to keep the soil consistently moist but not waterlogged. Stake taller varieties now to prevent flopping later.
✂️ Step 5: Deadhead and Maintain for Continuous Blooms
Once flowers appear—usually 8-10 weeks after planting in fall—deadhead spent blooms regularly to encourage more flowers. Cut back stems to just above the next set of leaves, but never remove more than ⅓ of the plant at once. This keeps the ranunculus bushy and flowering for weeks.
Water deeply once a week during dry spells, focusing on the base of the plant to avoid wetting the foliage, which can invite fungal diseases. If the soil feels dry 1 inch below the surface, it’s time to water. Stop fertilizing after the first flush of blooms to prevent leggy growth—your ranunculus will reward you with bold, long-lasting color without extra coaxing.
Tips & tricks for perfect fall-planted ranunculus
These simple strategies will help you avoid common pitfalls and get the most vibrant blooms possible from your fall planting.
Soil Preparation Secret: The key to successful ranunculus growth starts with soil that drains like a dream. In Step 1, when you're loosening that soil to 12 inches, take an extra moment to break up any compacted layers—ranunculus roots need room to breathe. If your soil feels heavy or clay-like, mix in a handful of perlite or coarse sand for every square foot. This prevents soggy roots, which can rot tubers before they even sprout. Think of it like giving your plants a cozy, well-ventilated bedroom instead of a damp basement!
Planting Precision: In Step 2, that 2-inch planting depth is critical—any deeper and they might rot, any shallower and they won't root properly. Here's a trick I learned: use a pencil to mark the 2-inch depth in your planting hole before adding each tuber. For the pointed end, imagine a tiny arrow pointing toward the sky—that's how they should be oriented. And when planting clusters of 5-7 tubers, space them in a loose circle rather than a straight line for a more natural, fuller look when they bloom.
Winter Protection Strategy: That 1-inch mulch in Step 2 is just the beginning. In Step 3, when you add 2-3 inches of mulch after frost, use straw rather than leaves—leaves can compact and hold moisture against the tubers. I've found that spreading a thin layer of bubble wrap over the mulch before adding more straw creates an extra insulating layer in extremely cold climates. This little trick has saved my ranunculus from frost heave in winters where temperatures dip below zero.
Spring Awakening Timing: The 4-6 week window before your last frost date in Step 4 is your target for removing mulch, but don't rush it! I wait until I see green shoots poking through the soil before removing any mulch. This natural signal tells me the tubers are ready to wake up. Once you start seeing those first true leaves (about 2-3 weeks after removing mulch), that's your cue to begin the gradual watering increase to 1 inch per week. The key is consistency—ranunculus hate having their roots dry out once they start growing.
Pro Tips for Fall Planted Ranunculus
- These simple strategies will help you avoid common pitfalls and get the most vibrant blooms possible from your fall planting.
- Soil Preparation Secret: The key to successful ranunculus growth starts with soil that drains like a dream.
- Planting Precision: In Step 2, that 2-inch planting depth is critical—any deeper and they might rot, any shallower and they won't root properly.
Frequently asked questions
Got questions about growing fall-planted ranunculus? You’re not alone! Here are answers to the most common queries to help you cultivate stunning blooms with confidence.
When is the best time to plant ranunculus in fall?
For most climates, aim to plant 6–8 weeks before the first hard frost—typically September to early November. This timing ensures roots establish before winter dormancy. In warmer zones (Zones 8–10), plant in late fall (October–December) for spring blooms. Check your local frost dates for precision!
Do fall-planted ranunculus survive winter?
Yes! Ranunculus are hardy perennials in mild winters (Zones 7–10), but they’ll die back in colder areas. In frost-prone zones, treat them as annuals—they’ll regrow from bulbs in spring. Mulch lightly (1–2 inches) to protect roots without smothering them. No extra fuss needed!
Can I plant ranunculus bulbs too deep or shallow?
Plant bulbs 3–4 inches deep (about 3x their height) with 2–3 inches of soil on top. Too shallow? They’ll flop. Too deep? They may struggle to emerge. Space them 3–4 inches apart for full, lush clusters. Pro tip: Use a dibber or pencil to mark planting spots if your soil is loose!
Why aren’t my ranunculus blooming in spring?
Common culprits: not enough light (they need full sun), overcrowding, or poor drainage. Check for rotten bulbs (squishy texture = bad). Try dividing clumps every 2–3 years and fertilize lightly in early spring with a balanced 10-10-10 mix. Patience pays off—they often bloom late spring to early summer!
What’s a good alternative if ranunculus don’t thrive in my climate?
Try these low-maintenance, cold-hardy alternatives for fall planting:
- Daffodils (Narcissus): Bloom early spring, pest-resistant.
- Crocus: Tiny but bold, naturalize easily.
- Tulips (Darwin hybrids): More reliable than ranunculus in cold zones.
- Anemones: Similar papery blooms, thrive in shade.
Wrapping up and next steps
Fall-planted ranunculus isn’t just a clever gardening hack—it’s your ticket to stunning, early-season blooms that steal the show before spring rivals even wake up! 🌸 With the right soil prep, timing, and care, these vibrant flowers prove that patience (and a little autumn effort) pays off in big, bold colors.
Whether you’re a seasoned gardener or a curious beginner, this method opens the door to low-maintenance, high-impact beauty that brightens winter landscapes.
Ready to transform your garden’s timeline? Start by marking your calendar for late September to early November—then grab those bulbs and get planting!
For extra confidence, jot down your notes (like soil mix ratios or frost dates) and share your progress with fellow gardeners. Your future self—and your neighbors—will thank you!