
Watering
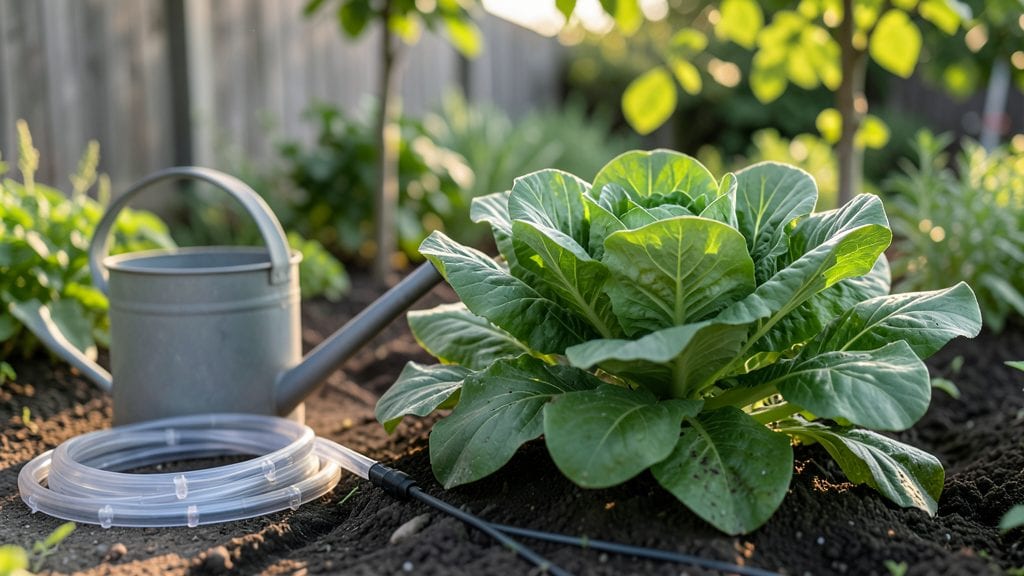
Automating watering plants doesn't mean sacrificing control—it means gaining time while keeping your garden lush and consistent. 🌱 I used to forget watering days, only to find wilted seedlings or crispy herbs by midweek.
Now, my garden thrives with minimal effort, and the system works for everything from delicate seedlings to hardy vegetables.
The beauty of automated systems is their flexibility—drip irrigation for raised beds, simple timers for containers, or self-watering pots for travel. You’ll spend less time hauling hoses and more time enjoying your garden’s growth.
Most setups cost under $50 and take less than an hour to install, with payoffs in healthier plants and fewer headaches.
Imagine stepping outside to find vibrant green basil instead of sad, browned leaves. That’s the difference automation makes—steady moisture without overwatering, even when you’re away. The key is matching the system to your plants’ needs, and I’ll walk you through the simplest, most effective options.
Whether you’re dealing with finicky herbs or sprawling tomato vines, these systems adapt. Let’s get your garden on autopilot the right way—no guesswork, just growth.
📚 In This Guide
- What you need
- Instructions
- Tips and common mistakes
- Wrapping up and next steps
What you need
- ● Automated watering system: 1x Drip irrigation kit (e.g., Rain Bird, Orbit, or DIY tubing + emitters)
- ● OR 1x smart sprinkler controller (Wi-Fi-enabled, like Rachio or Orbit B-Hyve)
- ● Water source: 1x Garden hose (½” diameter, 25–50 ft long)
- ● OR 1x rainwater collection barrel (5–20 gallons, with a spigot)
- ● Tubing & connectors: 50–100 ft of ½” poly tubing (for DIY setups)
- ● 10–20 drip emitters (adjustable flow rate, 1–4 GPH)
- ● 2–4 T-connectors and end caps
- ● Power supply: 1x 12V solar panel (for off-grid systems) OR 1x outlet near your garden
- ○ 1x battery backup (optional, for power outages)
- ● Timer/controller: 1x mechanical timer (e.g., Orbit 8-Station) OR 1x smart app-controlled timer
- ● 1x hose clamp (to secure connections)
- ● 1x scissors or tubing cutter (for clean cuts)
- ● 1x drill + small bits (if burying tubing or mounting components)
- ● 1x measuring tape (for precise tubing layout)
- ○ 1x multimeter (optional, for testing electrical setups)
- ● 1x soil moisture sensor (e.g., Bluetooth-enabled for real-time alerts)
- ● 1x water filter (to prevent clogs in emitters)
- ● 1x fertilizer injector (for automated nutrient delivery)
- ● 1x weatherproof enclosure (to protect timers/sensors)
- ● 1x solar charge controller (if using solar power)
Step-by-Step guide to building a reliable automated watering system
Transform your garden into a low-maintenance oasis with this hands-off approach.
💧 Step 1: Choose the Right Watering Method for Your Plants
Automated systems fall into two main categories: drip irrigation for precise delivery and soaker hoses for broad coverage. For container gardens, I recommend drip emitters—they deliver water directly to the root zone without waste. For in-ground beds, a soaker hose laid along the base of plants works beautifully. Test your water pressure first; most systems need 20-30 PSI to function properly.
If you're working with 4 plants, a simple 4-port manifold will distribute water evenly. Connect each port to a drip emitter or micro-sprayer based on plant type. Succulents and herbs need smaller emitters (0.5-1 GPH), while thirsty plants like tomatoes require larger ones (2-4 GPH). Always bury emitters 1-2 inches deep to prevent evaporation and direct water to roots.
🪴 Step 2: Install the Water Source and Timer
Start by connecting your system to a dedicated outdoor faucet—never use an indoor one, as the pressure fluctuations will damage the timer. Install a backflow preventer first to protect your plumbing. Next, attach a smart water timer (like the Orbit B-Hyve or Rain Bird) to control cycles. Set the timer to run early morning (5-8 AM) to minimize evaporation and fungal risks.
For 4 plants, a 15-minute cycle every 2-3 days works for most gardens. Adjust based on weather: increase frequency during hot, dry spells and reduce during rain. I like to place the timer near an outlet for easy adjustments—no more guessing if plants need water.
🌿 Step 3: Bury and Secure the System
Dig a shallow trench (1-2 inches deep) along your garden beds or container edges to hide the tubing. Lay the drip line or soaker hose carefully, spacing emitters 6-12 inches apart depending on plant size. Secure it with landscape staples every 18-24 inches to prevent shifting. For containers, run tubing along the base or thread it through the drainage holes.
Test the system before burying by turning it on for 5 minutes. Watch for even water flow—no drips or leaks. If you see uneven output, adjust emitter spacing or check for clogs. Mulch heavily (2-3 inches) after installation to retain moisture and protect tubing from UV damage.
⏰ Step 4: Calibrate for Plant-Specific Needs
Not all plants drink the same. Group similar thirst levels together: succulents and herbs on one line, tomatoes and peppers on another. Use adjustable emitters to fine-tune flow rates. For example, a 0.5 GPH emitter works for basil, while a 2 GPH emitter keeps tomato roots hydrated. Monitor soil moisture weekly—stick your finger 1 inch deep; if dry, increase cycle time by 5 minutes.
Real talk: overwatering kills faster than underwatering. If leaves yellow or soil feels soggy, reduce cycles. A moisture sensor (like the Blossom Smart Plug) can auto-adjust based on soil conditions—worth the investment for high-value plants.
✂️ Step 5: Maintain and Winterize the System
Flush the system monthly by running water through it for 10 minutes to prevent clogs. In late fall, drain all water and disconnect hoses before freezing temps hit. Store tubing in a dry, shaded spot and coil it loosely to avoid cracks. For 4 plants, this takes less than 10 minutes—easy cleanup for a year-round solution.
Here's the thing—automated doesn't mean hands-off. Check emitters seasonally for wear or debris. Replace cracked tubing immediately; a single leak can waste gallons. With this setup, you’ll water consistently, reduce stress on plants, and free up weekends for actual gardening—not just chores.
Tips & tricks for perfect automated plant watering systems
A few strategic moves will turn your automated watering setup from functional to foolproof. The details here make all the difference between a system that just "works" and one that delivers consistent, thriving plants.
Pressure Matters: Never skip the pressure test in Step 1—most automated systems require 20-30 PSI to function properly. If your pressure is too low, you'll get weak water flow that barely reaches the roots. I've seen systems fail completely because someone assumed their outdoor faucet had adequate pressure. Test it with a pressure gauge before purchasing components, and consider installing a pressure regulator if needed. This small step prevents frustration later when your emitters barely drip.
Emitter Placement Precision: When burying emitters 1-2 inches deep in Step 3, resist the urge to eyeball it—depth matters. Too shallow and you risk evaporation; too deep and you might hit roots or compact soil. Use a small trowel to create precise pockets for each emitter. For container gardens, thread emitters through drainage holes before adding soil—this ensures they're positioned exactly where roots will develop. I've seen plants struggle because emitters were placed too close to the surface, causing water to evaporate before reaching the roots.
Cycle Timing Strategy: The 15-minute cycle every 2-3 days in Step 2 is a great starting point, but don't treat it as gospel. Use the finger test mentioned in Step 4: stick your finger 1 inch deep into the soil. If it's dry at that depth, your current cycle isn't sufficient. For sandy soils, you might need 10-minute cycles every 2 days—water drains too quickly. For clay soils, 20-minute cycles every 3 days often work better. Adjust incrementally to avoid shocking plants with sudden changes.
Winterization Wisdom: When winterizing in Step 5, don't just disconnect the hoses—drain ALL water from the system. Even small pockets of water can freeze and cause tubing to crack. I've had to replace entire systems because someone skipped this critical step. After disconnecting, run the system for 10 minutes (as mentioned) while holding hoses upward to ensure complete drainage. Store tubing in a cool, dry place—never leave it coiled in direct sunlight, which can degrade the material over time. A little extra effort now saves you from expensive replacements in spring.
Pro Tips for Automate Watering Plants
- A few strategic moves will turn your automated watering setup from functional to foolproof.
- Pressure Matters: Never skip the pressure test in Step 1—most automated systems require 20-30 PSI to function properly.
- Emitter Placement Precision: When burying emitters 1-2 inches deep in Step 3, resist the urge to eyeball it—depth matters.
Frequently asked questions
Got questions about automating your plant watering? You’re not alone—here are some of the most common ones, answered in plain language to help you get started with confidence!
How often should I set my automated watering system to run?
This depends on your plants, climate, and soil type. As a general rule, most gardeners run their systems every 1–3 days during warm months and every 3–7 days in cooler weather. Start with shorter intervals (like 2–3 days) and adjust based on soil moisture—stick your finger an inch deep; if it’s dry, increase frequency.
Can I automate watering for both indoor and outdoor plants?
While outdoor systems (like drip irrigation or soaker hoses) are ideal for gardens, you can also automate indoor plants using smart pots with built-in moisture sensors or DIY setups with timers and self-watering planters. Just ensure your system is weatherproof for outdoor use and safe for indoor electrical setups.
What should I do if my plants look wilted even with automated watering?
Wilting can mean overwatering, underwatering, or poor drainage. First, check the soil—if it’s soggy, reduce watering frequency. If dry, increase it slightly. Ensure your system isn’t clogged (clean nozzles/filters) and that water is reaching the roots. For container plants, consider adding perforated drainage holes if missing.
Are DIY automated watering systems cheaper than buying pre-made kits?
Yes! DIY systems (using timers, PVC pipes, and garden hoses) can cost $20–$50, while pre-made kits (like Blumat or Orbit) range from $50–$200+. DIY is great for small gardens, but pre-made kits offer more precision, durability, and smart features (like weather sensors or app control). Weigh your needs and budget!
Do automated systems work in freezing temperatures?
Most standard automated systems aren’t frost-proof, so they should be turned off or drained in winter. For cold climates, opt for frost-resistant timers or insulated hoses, or use self-watering pots indoors during freezing months. Always check your system’s minimum temperature rating before winterizing.
Can I automate watering for seedlings or delicate plants?
Yes, but with caution! Seedlings need gentle, frequent moisture—use a fine mist or drip system to avoid disturbing roots. For delicate plants (like orchids or succulents), manual override is key: automate a light schedule (e.g., 5 minutes every other day) and monitor closely. Avoid over-saturating soil, which can cause root rot.
Wrapping up and next steps
Automating your plant watering isn’t just about convenience—it’s about giving your garden the consistent care it deserves, even when life gets busy. 🌱 With the right system, you’ll enjoy lush, healthy plants while saving time and water.
Whether you’re a beginner or a seasoned gardener, the key is to start small, test your setup, and let your plants thrive on their own terms.
Ready to take the next step? Pick your favorite method—from DIY timers to smart irrigation—and watch your garden flourish with minimal effort. Happy growing! 🌿