Planting
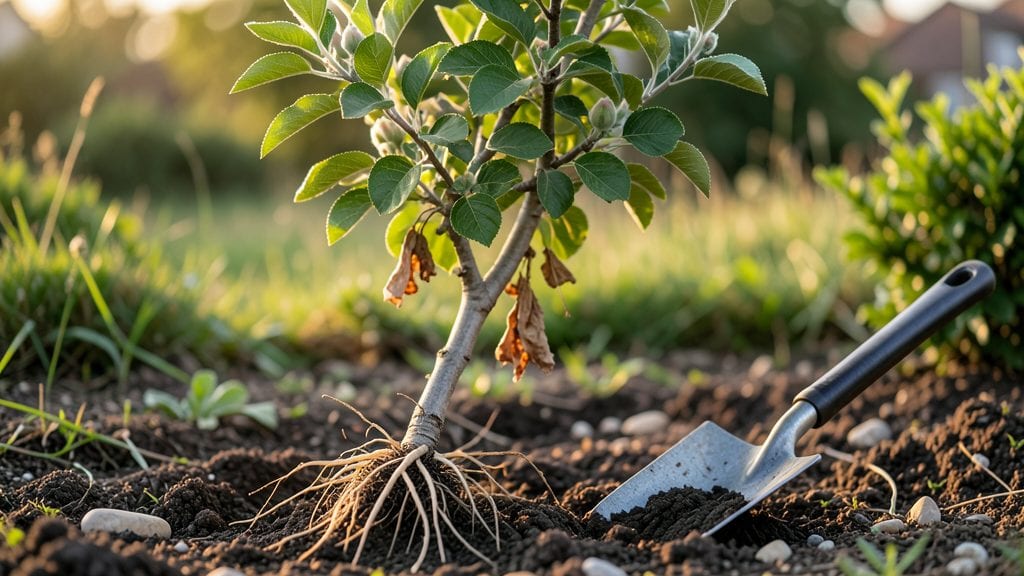
This apple planting guide reveals the secrets to success—knowing your zone and timing (late fall or early spring) is key to growing fruit trees that thrive for decades. 🌱 I’ve watched bare-root saplings turn into towering trees, and the secret isn’t... just the variety or soil—it’s the moment you put them in the ground when the earth is cool but workable.
That first year sets the stage for everything that follows.
You’ll need the right tools—a shovel, compost, and a spot with full sun (at least 6 hours a day), plus a variety that matches your climate: dwarf trees for small spaces, standard trees for full-size orchards.
The soil prep is just as critical as the planting—amend heavy clay or sandy soil with organic matter to give roots a fighting chance. And spacing? 12–25 feet apart for standard trees, or 8–12 feet for dwarfs, to avoid future crowding and disease.
Once planted, the real magic happens in the details: deep watering every week (no shallow puddles), a 3-inch mulch ring to lock in moisture, and a single pruning cut to shape the tree right away.
Skip these, and you’ll end up with weak growth or fruit that’s too small to enjoy. But get it right, and you’re on track for your first harvest in just 3–5 years—imagine the crisp, homegrown apples you’ll be biting into by summer.
Container growing? No problem—just pick a 50-gallon pot for dwarf varieties and swap the soil every few years. And the pests? A reflective mulch disk or neem oil spray keeps them at bay without harsh chemicals.
Here’s where it gets interesting—your first tree could be the start of a backyard orchard, or just the pride of your patio. Let’s get those roots in the ground.
📚 In This Guide
- What you need
- Instructions
- Tips and common mistakes
- Wrapping up and next steps
What you need
- ● Apple tree saplings: Choose disease-resistant varieties (e.g., Honeycrisp, Fuji, or Gala). Buy 1–3 trees for cross-pollination (unless self-pollinating).
- ● Well-draining soil: Test pH (ideal: 6.0–7.0). Amend with compost or peat moss if needed.
- ● Fertilizer: Balanced 10-10-10 or organic options like bone meal or compost tea.
- ● Mulch: Wood chips or straw (2–3 inches thick) to retain moisture and suppress weeds.
- ● Watering can or hose: With a gentle spray nozzle for young trees.
- ● Pruning tools: Sharp bypass pruners and loppers (sterilized with rubbing alcohol).
- ● Tree supports: Stakes and ties for young saplings (if needed).
- ● Root stimulator: Powder or gel to boost root growth during planting.
- ● Pest control: Neem oil or copper spray for early-season pests.
- ● Drip irrigation system: For consistent watering (especially in dry climates).
- ● Tree guards: Wire mesh or plastic to protect from critters.
- ● Soil moisture meter: To monitor watering needs.
Step-by-Step instructions for planting apple trees
Here's the foolproof method I've used to grow healthy, fruit-bearing apple trees in any climate.
🌱 Step 1: Choose the Right Variety and Timing
Apple trees thrive when planted in early spring (just as buds begin to swell) or fall (at least 6 weeks before first frost). I always pick disease-resistant varieties like 'Liberty' or 'Enterprise' for my zone—check your local nursery for cold-hardy options. Young trees with 4-5 feet of bare root or container-grown plants work best.
Here's the thing—planting too early risks frost damage, while waiting too late stresses the tree. For spring planting, aim for 2-3 weeks before your last frost date. If planting in fall, do it early enough that roots can establish before winter dormancy begins.
🪴 Step 2: Prepare the Planting Site
Choose a sunny spot with at least 6 hours of direct sunlight daily—apples need full sun to produce fruit. Dig a hole twice as wide as the root ball but only as deep as the roots themselves. If planting bare-root, soak the roots in lukewarm water for 1-2 hours before handling.
Loosen the soil at the bottom of the hole with a shovel or fork—this prevents root circling. Mix in 2-3 inches of compost with the native soil to improve drainage and fertility. Avoid fresh manure, which can burn roots. The hole should be ready 24 hours before planting to let the soil settle.
☀️ Step 3: Plant at the Correct Depth
Place the tree in the hole so the graft union (the swollen area where the scion was attached) sits 2-3 inches above soil level. This ensures proper growth and prevents rot. Spread the roots outward gently, making sure none are curled or folded—straight roots grow best.
Fill the hole with soil, tamping it down lightly as you go to remove air pockets. Water deeply until the soil settles 1-2 inches—this helps eliminate gaps. The finished planting mound should be slightly higher than the surrounding ground to prevent water pooling around the trunk.
💧 Step 4: Mulch and Water for Establishment
Spread 3-4 inches of organic mulch (like wood chips or straw) in a 3-foot diameter circle around the base, keeping it 6 inches away from the trunk. Mulch retains moisture and regulates soil temperature. Water deeply once a week during the first growing season—10-15 gallons per tree—until the soil is moist 12 inches down.
Don't overwater now. You'll see new leaves emerge within 2-3 weeks—that's your signal everything is working. Stake the tree only if necessary (in windy areas), using a soft tie that won't girdle the trunk as it grows.
✂️ Step 5: Prune and Maintain Through First Year
Remove any dead, broken, or crossing branches in early spring to encourage an open canopy. Prune back last year's growth by 1/3 to promote bushier growth. Avoid heavy pruning—apples respond best to gradual shaping over time.
Fertilize lightly in early spring with a balanced 10-10-10 formula (follow package rates). Watch for signs of stress—yellowing leaves often mean too much water, while crisp edges signal underwatering. By year two, you'll see the tree's natural shape take hold, setting the stage for future harvests.
Tips & tricks for perfect apple tree planting
These seasonal timing secrets will help you avoid common mistakes and give your apple trees the best possible start.
The Timing Factor: In Step 1, when you're choosing your planting window, check your local frost dates carefully. I've planted in early spring when buds were just starting to swell, and the trees took off beautifully. The key is to avoid late frosts—watch for those last frost dates like a hawk! If you're in a windy area, spring planting gives roots more time to establish before winter winds arrive.
Root Preparation Secret: In Step 2, that 1-2 hour soak for bare-root trees isn't just about hydration—it's about waking up the roots. I like to add a splash of rooting hormone to the water for extra insurance. This helps prevent transplant shock and gets the roots ready to spread immediately. Don't skip this step if you're planting bare-root!
Depth Check: Step 3's graft union positioning is critical—this swollen area needs to stay above soil level to prevent rot. I always do a visual check: if the graft union is buried, the tree will grow two trunks instead of one strong main trunk. Use a small stake to mark the correct depth before planting if you're unsure.
Mulch Strategy: For Step 4's mulching, I recommend using wood chips rather than straw—they break down more slowly and provide better long-term moisture retention. Keep that mulch ring exactly 6 inches from the trunk to prevent rot. The mulch should look like a donut around your tree, not a volcano piled against the trunk.
Pro Tips for Apple Planting Guide
- These seasonal timing secrets will help you avoid common mistakes and give your apple trees the best possible start.
- The Timing Factor: In Step 1, when you're choosing your planting window, check your local frost dates carefully.
- Root Preparation Secret: In Step 2, that 1-2 hour soak for bare-root trees isn't just about hydration—it's about waking up the roots.
Frequently asked questions
Got questions about planting your apple trees? You’re not alone! Here are answers to the most common concerns—from timing to troubleshooting—to help you grow a thriving orchard with confidence.
When is the best time to plant apple trees?
The ideal time is late fall or early spring (before buds swell). Planting in fall gives roots time to establish before winter, while spring planting (after frost risk passes) ensures active growth. Avoid planting in extreme heat or drought—roots need moisture to settle in!
How long does it take for an apple tree to bear fruit?
Patience is key! Dwarf varieties may produce fruit in 3–5 years, while standard trees take 5–7 years or longer. Factors like variety, soil quality, and care play a role. Choose early-bearing cultivars (like ‘Honeycrisp’ or ‘Gala’) for faster rewards.
Can I grow apple trees in containers or small spaces?
Yes! Dwarf or semi-dwarf varieties thrive in 15–25 gallon containers with well-draining soil. Place them in full sun and ensure the pot has drainage holes. For small yards, espalier training (growing trees flat against a wall) saves space while maximizing fruit production.
What should I do if my apple tree leaves are yellowing or curling?
Yellowing leaves often signal nutrient deficiencies (like iron or nitrogen) or pests (aphids, mites). Test your soil and amend with compost or fertilizer. For pests, spray with neem oil or insecticidal soap. Prune affected branches to improve airflow and reduce stress.
Do apple trees need a pollinator, or can they self-pollinate?
Most apple trees benefit from a pollinator (another variety blooming at the same time) for better fruit set. However, some self-pollinating types (like ‘Liberty’ or ‘Enterprise’) can produce fruit alone. Plant two compatible varieties nearby for the best harvest!
Wrapping up and next steps
Planting apples is a rewarding journey that blends patience with nature’s bounty! 🌱 By choosing the right variety, preparing your soil, and timing your efforts just right, you’ll set the stage for a fruitful harvest.
Whether you’re a seasoned gardener or a curious beginner, every step—from selecting rootstock to pruning young shoots—matters.
Now that you’re armed with these seasonal secrets, it’s time to roll up your sleeves!
Start by marking your calendar for next year’s planting window (or get a head start with bare-root saplings in late winter). Pro tip: Keep a planting journal to track progress and celebrate those first blossoms—your future orchard awaits!