Plants
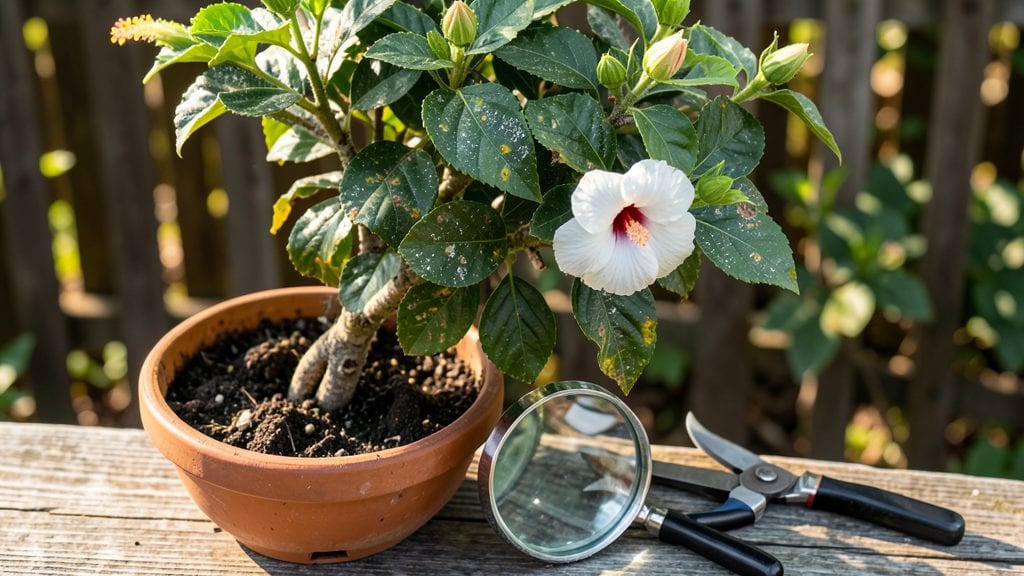
White fungus creeping across hibiscus leaves isn’t just unsightly—it’s a silent thief stealing your plant’s energy. I’ve battled this powdery menace on my own hibiscus bushes, and what I learned could save yours from looking like a sad, dusty mess by summer’s end.
The culprit is usually powdery mildew, a fungus that thrives in humid, shady conditions and leaves behind that telltale white coating. It starts small—tiny white specks on leaves—but if ignored, it spreads fast, stunting growth and dropping blooms.
The good news? You can stop it before it takes over with simple, non-toxic fixes that work in just a few days.
By the time you’re done treating it, your hibiscus will bounce back with vibrant green leaves and those showstopping blooms you planted for. The key is acting fast—once the fungus moves to stems or buds, recovery gets trickier.
I’ll walk you through the exact steps to clean it up and keep it from coming back.
This works for both outdoor and container hibiscus, and the methods are gentle enough for pets and kids. No harsh chemicals needed—just elbow grease and a few smart tricks. Let’s get your hibiscus back to its glory days.
Root Causes of Fungal Growth
When you spot that unsettling white fungus creeping across your hibiscus leaves, it’s rarely a random event—it’s usually a sign that your plant’s environment has tipped toward conditions that favor fungal proliferation.
Understanding these triggers is the first step to stopping the spread and restoring your hibiscus to its vibrant self. Let’s break down the science behind why this happens and what you can do to address it.
Fungi like Oidium (powdery mildew) and Botrytis thrive in humidity levels above 70%. Hibiscus plants, especially tropical varieties, love moisture—but when humidity stays consistently high (think: enclosed spaces, poorly ventilated greenhouses, or rainy climates), fungal spores germinate rapidly. Here’s why:
- Spores need water: Fungal spores require a thin film of moisture on leaf surfaces to activate. High humidity creates the perfect microclimate for this.
- Slow evaporation: In humid air, water droplets on leaves (from morning dew or overhead watering) linger longer, giving fungi more time to colonize.
- Reduced UV exposure: Dense humidity often accompanies cloudy days, reducing natural UV light that can inhibit fungal growth.
Actionable fix: Aim for 40–60% humidity around your hibiscus. Use a hygrometer to monitor levels and consider:
- ✅ Improved airflow: Place a fan nearby (but not too close!) to circulate air.
- ✅ Spaced watering: Water at the soil base in the morning so leaves dry by evening.
- ✅ Prune for light: Thin out crowded branches to let sunlight penetrate and dry leaves faster.
While hibiscus plants love consistent moisture, overwatering or irregular watering creates the ideal breeding ground for fungal infections. Here’s how:
- Waterlogged soil: Hibiscus roots need oxygen. When soil stays soggy, roots suffocate, weakening the plant’s defenses and creating a damp leaf environment.
- Wet foliage: Overhead watering (especially in the evening) leaves leaves damp overnight, inviting fungal spores to latch on.
- Nutrient imbalances: Overwatering flushes away essential nutrients, making plants more susceptible to stress and disease.
Actionable fix: Adjust your watering routine with these 3 golden rules:
- 🔥 Check soil moisture: Stick your finger 1–2 inches into the soil. Water only if it’s dry.
- 👨🍳 Water at the base: Use a soaker hose or watering can with a narrow spout to avoid wetting leaves.
- ⏰ Morning timing: Water between 6–10 AM so leaves dry by nightfall.
Some hibiscus varieties are naturally more resistant to fungal diseases due to their genetic makeup or leaf wax coatings. However, even resilient plants can fall victim when:
- Stress weakens defenses: Heatwaves, nutrient deficiencies, or transplant shock compromise a plant’s natural resistance.
- Older leaves are targeted: Mature leaves with thicker cuticles can still succumb if fungal pressure is high.
- Poor air circulation: Stagnant air traps spores near the plant, increasing exposure.
Actionable fix: Boost your hibiscus’s immunity with:
- 💡 Balanced fertilization: Use a low-nitrogen, high-phosphorus fertilizer (like 5-10-10) to strengthen roots and foliage.
- ✨ Neem oil spray: Apply a 1% neem oil solution weekly as a preventive fungicide.
- 🌡️ Hardening off: Gradually expose potted hibiscus to outdoor conditions to build stress tolerance.
Fungal spores are everywhere—in soil, on garden tools, and even in water. If your hibiscus is infected, the culprit might be:
- Reused tools: Pruners, shears, or stakes contaminated with spores can transfer fungi to healthy plants.
- Infested soil: Old potting mix or garden beds with residual fungal spores can reinfect new growth.
- Water sources: Recycled water (like from a rain barrel) may carry fungal contaminants.
Actionable fix: Sanitize everything with these steps:
- 🔪 Sterilize tools: Wipe pruners with 70% isopropyl alcohol or bleach water (1 part bleach to 9 parts water) between uses.
- 🌱 Refresh soil: Replace old potting mix with sterile, fungicide-treated soil or a cactus/succulent mix (less prone to fungal issues).
- 💧 Use filtered water: If using tap water, let it sit out for 24 hours to evaporate chlorine, or use rainwater collected in a clean container.
By tackling these root causes, you’ll not only stop the white fungus in its tracks but also create an environment where your hibiscus can thrive—not just survive. Next up: How to Safely Remove It without harming your plant.
How to Fix Fungal Issues Safely
White fungus on hibiscus plants can feel like a nightmare, but the good news is that most cases are treatable with simple, non-toxic solutions. The key is identifying the root cause—whether it’s powdery mildew, downy mildew, or white mold—and applying the right fix.
Below, we break down targeted steps for each common culprit, plus prevention tips to keep your hibiscus thriving.
If the white fungus looks like dust or cobwebs on leaves, it’s likely powdery mildew. This fungus thrives in humid, low-airflow conditions and spreads quickly if ignored.
🔥 Step 1: Prune Infected Areas
- Use clean, sharp pruners to remove severely infected leaves or stems. Do not compost them—dispose of them in the trash to prevent reinfection.
- Focus on inner foliage where airflow is poor, as this is where powdery mildew loves to hide.
🍳 Step 2: Clean Leaves with Soapy Water
- Mix 1 tablespoon of mild dish soap (like Castile soap) with 1 quart of water in a spray bottle.
- Lightly spray the solution on both sides of the leaves and stems. Avoid oversaturating the soil.
- Let the leaves dry in sunlight—UV rays help kill fungal spores.
👨🍳 Step 3: Apply a Fungicide Spray (Non-Toxic Options)
- Neem oil spray: Mix 1 teaspoon neem oil, 1 teaspoon baking soda, and 1 quart of water. Add a drop of dish soap as a surfactant. Spray every 7–10 days until the fungus clears.
- Baking soda spray: Combine 1 teaspoon baking soda, 1 quart of water, and a few drops of soap. Spray directly on infected areas.
- Hydrogen peroxide (3%): Dilute 1 part hydrogen peroxide with 3 parts water and spray on leaves. Test on a small area first to avoid leaf burn.
⏰ Step 4: Improve Air Circulation
- Thin out overcrowded branches to allow airflow.
- Space hibiscus plants 3–4 feet apart to reduce humidity buildup.
If the white fungus appears fuzzy or downy on the undersides of leaves and causes yellowing, it’s likely downy mildew. This aggressive fungus spreads via water droplets, so quick action is critical.
🔪 Step 1: Remove & Destroy Infected Leaves
- Cut off all affected leaves and stems immediately. Downy mildew spreads rapidly, so don’t delay.
- Sterilize pruners with rubbing alcohol between cuts to prevent cross-contamination.
🌡️ Step 2: Use Copper Fungicide or Potassium Bicarbonate
- Copper fungicide: Follow label instructions for a preventative spray (e.g., Bonide Copper Fungicide). Reapply every 7–14 days.
- Potassium bicarbonate spray: Mix 1 tablespoon potassium bicarbonate, 1 teaspoon horticultural oil, and 1 gallon of water. Spray early in the morning to avoid leaf burn.
🎯 Step 3: Adjust Watering Practices
- Water at the base (not overhead) to keep leaves dry.
- Water early in the day so foliage has time to dry before nighttime humidity sets in.
- Avoid mulching too close to the stem—keep mulch 2–3 inches away to improve drainage.
If the white fungus appears as cottony growth on the soil surface or at the base of stems, it’s likely white mold (Sclerotium rolfsii). This soil-borne fungus thrives in wet, compacted soil.
✨ Step 1: Remove Infected Plants & Soil
- Dig up and dispose of infected plants (do not compost).
- Scoop out 2–3 inches of topsoil around the plant and replace it with fresh, sterile potting mix.
💡 Step 2: Improve Drainage & Reduce Moisture
- Amend the soil with perlite or coarse sand to improve aeration.
- Ensure pots have drainage holes and saucers are emptied after watering.
- Space plants farther apart to reduce humidity.
🌱 Step 3: Apply Organic Fungicides
- Trichoderma harzianum: A beneficial fungus that outcompetes white mold. Mix into soil or use as a spray.
- Chlorothalonil (organic-certified): A chemical-free option for severe cases (follow label rates).
Once your hibiscus is fungus-free, keep it that way with these proactive steps:
- 💡 Rotate plants to ensure even sunlight exposure (fungi love shady, damp spots).
- 🌡️ Monitor humidity—aim for 40–60% with a hygrometer. Use a fan in humid climates.
- 🍃 Prune regularly to improve airflow and remove debris where spores hide.
- 🌱 Sterilize tools after each use with rubbing alcohol or bleach solution (1:10 ratio).
- 🌱 Use resistant varieties like Hibiscus rosa-sinensis ‘Lopaka Yellow’ if fungal issues are recurrent.
With consistent care, your hibiscus can bounce back from white fungus—and stay healthy for years. The key is acting fast, improving airflow, and keeping leaves dry. Your blooming beauties will thank you! 🌸
Frequently asked questions
What does white fungus on hibiscus leaves actually look like?
It typically appears as a powdery, white coating (like dust) on the tops of leaves for powdery mildew, or fuzzy white patches on undersides for downy mildew. In severe cases, it may look like cottony growth at the base of stems for white mold. The key difference? Powdery mildew stays on leaf surfaces, while downy mildew spreads aggressively in moist conditions.
Is white fungus on hibiscus harmful to my other plants?
Yes, fungal spores can easily spread to nearby plants through wind, water splashes, or contaminated tools. Hibiscus varieties are particularly susceptible, but roses, impatiens, and other tropical plants can also catch powdery mildew. Always sterilize pruners and avoid overhead watering to prevent cross-contamination.
Can I still save my hibiscus if the fungus has spread to the stems?
It depends on severity. For powdery mildew on stems, prune infected areas immediately and treat with neem oil. If white mold (cottony growth) has reached stems, the plant may not recover—remove it completely to prevent soil contamination. Always replace affected soil with sterile mix and improve drainage to prevent recurrence.
How often should I apply fungicide sprays to prevent regrowth?
For powdery mildew, apply neem oil or baking soda sprays every 7-10 days during humid seasons. For downy mildew, use copper fungicide every 10-14 days until new growth appears. Always spray in the morning so leaves dry quickly. Stop treatments once the plant shows clear signs of recovery (typically 4-6 weeks).
Will my hibiscus bloom again after treating white fungus?
Yes, but it may take 4-8 weeks for new blooms to appear after removing severe infections. Focus on improving airflow, reducing humidity, and fertilizing with phosphorus to encourage flowering. Prune back dead stems to redirect energy to healthy growth. With proper care, your hibiscus should rebound and produce vibrant blooms again.