Watering
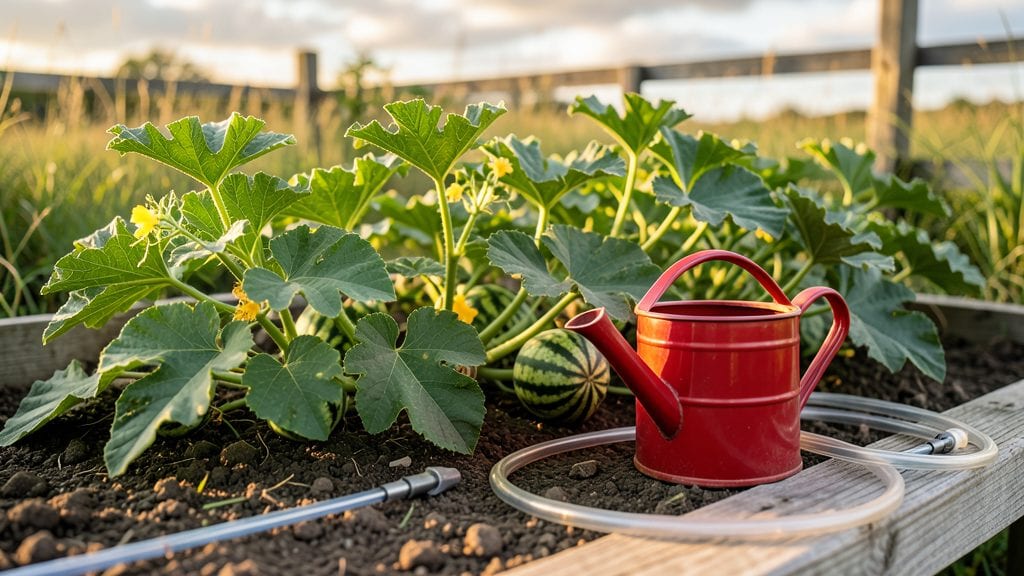
Watering watermelon plants is the secret weapon behind those explosively juicy fruits you’ve always dreamed of growing. 🌱 Last summer, I turned a patch of struggling vines into a harvest of 15-pound melons by adjusting just one thing: how and when I watered them.
The difference between mealy, bland fruit and the kind that makes your neighbors jealous? Consistent moisture that mimics the deep, steady rains watermelons crave in their native soil.
Here’s the thing—watermelons hate extremes. Too little water and the vines wilt, the fruit cracks, or the flesh turns spongy. Too much, and you’re inviting root rot or blossom-end rot, which turns the bottom of your melons into a mushy mess.
The trick is deep, infrequent watering that keeps the soil 2-3 inches moist at all times, especially during fruit development. I use drip irrigation on a timer set for early morning, but even a soaker hose works if you’re diligent about checking soil moisture before each watering.
By week three of proper watering, you’ll see the vines thicken, leaves stay glossy and upright, and those first baby melons swell with weight.
The real payoff comes at harvest: fruit that’s bursting with juice, sweetness that rivals store-bought (but way better), and a harvest that keeps coming until frost. The key is staying consistent—no skipping watering when it’s hot, no drowning the plants when it rains.
This method works whether you’re growing in raised beds, containers, or open ground, and it’s just as effective in hot climates as it is in warmer zones. The only variable is adjusting for rain—skip watering if the ground’s already soaked.
Ready to turn your watermelon patch into a juicy goldmine? Let’s get those roots drinking deep.
📚 In This Guide
- What you need
- Instructions
- Tips and common mistakes
- Wrapping up and next steps
What you need
- ● Watermelon seeds or seedlings: 2–4 plants per person (or 1–2 per 10 sq ft of space). Choose fast-maturing varieties like 'Sugar Baby' or 'Crimson Sweet' for quicker harvests.
- ● Well-draining potting mix or garden soil: 1–2 cubic yards (for in-ground planting) or 5–10 gallons (for containers). Amend with compost for nutrients.
- ● Watering can or hose with adjustable nozzle: A 1–2 gallon watering can (for pots) or a soaker hose (for in-ground plants) to deliver deep, even moisture.
- ○ Mulch (optional but recommended): Straw, black plastic, or wood chips (2–3 inches thick) to retain moisture and suppress weeds.
- ○ Drip irrigation system (optional for large gardens): A low-volume system with emitters (1–2 per plant) for precision watering.
- ● Sunlight: Full sun (6–8+ hours daily). Watermelons are sun-worshippers!
- ● Warmth: Soil temps above 70°F (21°C)—use row covers if needed in cooler climates.
- ● Space: 3–6 feet between plants (or vines if trellising). Crowding = unhappy melons!
- ● Water source: Access to consistent water (rain barrels or municipal supply work).
Step-by-Step guide to watering watermelon plants for maximum juiciness
Watermelons thrive with the right watering rhythm—too little and they shrivel, too much and they rot. Here’s how to balance it for sweet, plump fruits.
💧 Step 1: Water Deeply at Planting to Establish Roots
When you transplant watermelon seedlings, give them a deep soak right away—1-2 gallons per plant—to encourage roots to grow downward. Shallow watering keeps roots near the surface, where they’ll dry out faster and leave your melons thirsty. Use a garden hose with a gentle stream or a watering wand to saturate the soil 6-8 inches deep. You’ll know you’ve done it right when water pools slightly at the surface before draining away.
This initial deep watering is critical because watermelon roots need 12-18 inches of moist soil to support heavy vines and fruit. If your soil drains too fast (like sandy loam), split the watering into two sessions: first half in the morning, second half in the evening. Avoid wetting the leaves—water at the base to prevent fungal diseases like powdery mildew, which can ruin your harvest.
☀️ Step 2: Maintain Consistent Moisture During Fruit Development
Once watermelons start flowering, they need 1-2 inches of water per week, delivered evenly. I use a drip irrigation system set to run for 30-45 minutes every 2-3 days, adjusting for heat. If you water by hand, check soil moisture by pushing your finger 2 inches deep—if it feels dry, it’s time to water. Watermelons are sensitive to moisture fluctuations: too little causes bitter fruit, while sudden droughts can split rinds.
Here’s the trick: water in the morning so excess moisture evaporates during the day. If you must water in the evening, do it at least 4 hours before sunset to avoid fungal issues. Mulch with 2-3 inches of straw or black plastic (as mentioned in your materials) to lock in moisture and keep roots cool. You’ll notice fewer cracked fruits and sweeter flavor when the soil stays consistently damp but never soggy.
🌱 Step 3: Adjust for Heat and Humidity in the Final 3 Weeks
When watermelons are half their mature size (about 3 weeks before harvest), reduce watering slightly to concentrate sugars. Cut back to ½ inch per week unless the weather is extremely hot (above 90°F), where you’ll need to maintain 1 inch weekly. Overwatering now dilutes flavor and can cause the fruit to burst. I test ripeness by tapping the melon—a deep, hollow sound means it’s ready, not the thud of an underripe one.
Watch for yellowing leaves or wilted vines during this stage—these are signs of stress. If you see them, give the plant ½ gallon of water immediately and check for pests like cucumber beetles, which can chew on stems. A healthy watermelon vine will bounce back within a day if the roots are properly hydrated. Avoid watering the vines themselves; always direct the stream to the soil at the base.
⏰ Step 4: Harvest with Proper Post-Watering Care
Harvest watermelons in the morning after a light watering (no deep soak) to ensure the rind is firm but the flesh stays juicy. Cut the stem with a clean, sharp knife, leaving 1-2 inches of stem attached—this prevents rot. After harvest, water the plant one last time to encourage any remaining flowers to set fruit for next season. If you’re saving seeds, let the melon sit in a dry, shaded spot for 3-5 days before cleaning them.
Here’s the thing—juicy watermelons depend on consistent moisture, not drowning. Overwatering in the final weeks is the fastest way to ruin your harvest. Stick to the 1-2 inches weekly rule, adjust for heat, and always water at the base. Your melons will thank you with deep red flesh and that signature sweetness you’re after.
Tips & tricks for perfect watermelon watering
Mastering watermelon irrigation transforms bland harvests into sweet, juicy rewards—here’s how to perfect the process.
Soil Depth Matters: In Step 1, when giving that initial deep soak, aim to saturate soil 12-18 inches deep—not just the top layer. Use a soil probe or long screwdriver to verify moisture reaches these depths. Sandy soils may need 2-3 gallons per plant split into morning/evening sessions, while clay soils might only require 1 gallon. The goal is to encourage roots to grow downward where they’ll find stable moisture.
Morning Watering Strategy: The instructions emphasize morning watering, but here’s why it works: daytime temperatures evaporate excess moisture, preventing fungal growth while maintaining consistent soil dampness. If you must water in the evening, do it 4 hours before sunset—this gives foliage time to dry. I’ve seen powdery mildew appear within 48 hours when evening watering was done too close to nightfall. A simple rain gauge can help track your weekly 1-2 inch target during fruit development.
Heat Adjustments: During those final 3 weeks when you reduce to ½ inch weekly, watch for 90°F+ temperatures—the threshold where you need to increase to 1 inch weekly. I test heat stress by checking leaf temperature: if leaves feel warm to the touch (like a hot sidewalk), increase water slightly. Also, mulch with 2-3 inches of straw creates a cooling microclimate that reduces evaporation and stress cracks.
Harvest Timing: That morning-after-light-watering harvest tip is golden—here’s the science: A light watering 4 hours before harvest firms up the rind while keeping flesh hydrated. The 1-2 inch stem attachment prevents rot by sealing the wound. For seed saving, let melons sit 3-5 days in shade to complete ripening—this final drying period concentrates sugars even further, giving you that signature watermelon sweetness.
Pro Tips for Watering Watermelon Plants
- Mastering watermelon irrigation transforms bland harvests into sweet, juicy rewards—here’s how to perfect the process.
- Soil Depth Matters: In Step 1, when giving that initial deep soak, aim to saturate soil 12-18 inches deep—not just the top layer.
- Morning Watering Strategy: The instructions emphasize morning watering, but here’s why it works: daytime temperatures evaporate excess moisture, preventing fungal growth while maintaining consistent soil dampness.
Frequently asked questions
about watering watermelon plants—because even the best gardeners need a little help!How often should I water watermelon plants?
Watermelons need consistent moisture, especially during flowering and fruiting. Water deeply 1-2 times per week (or daily in extreme heat), ensuring the soil stays evenly damp but not soggy. Drip irrigation or soaker hoses work best to avoid wetting leaves, which can cause disease.
What’s the best time of day to water watermelon plants?
Water in the early morning (6–9 AM) to reduce evaporation and fungal risks. Avoid evening watering, as damp leaves overnight can lead to powdery mildew. If you must water later, aim for the soil—not the foliage—and let leaves dry quickly.
Can I use rainwater or tap water for watermelons?
Both work, but rainwater is ideal—it’s naturally soft and free of chlorine/fluoride. If using tap water, let it sit for 24 hours to dissipate chemicals. Avoid salty or heavily treated water, which can harm roots over time. Test your soil’s pH (6.0–6.8 is perfect for watermelons!).
What should I do if my watermelon leaves look wilted or yellow?
Wilted leaves often mean underwatering or overwatering. Check the soil: if it’s dry 1–2 inches down, water deeply. Yellowing leaves (especially lower ones) could signal overwatering or poor drainage. Adjust your routine—watermelons hate soggy roots! Also, check for pests or nutrient deficiencies (like nitrogen).
How does heat affect watermelon watering needs?
In 90°F+ temperatures, watermelons need more frequent watering (daily if soil dries quickly). Use mulch (straw or black plastic) to retain moisture and cool roots. Monitor for blossom-end rot (caused by uneven water) and adjust as needed. Morning watering + afternoon shade cloth = happy plants!
Still stumped? Drop your question in the comments—we’ve got you covered!
Wrapping up and next steps
Mastering the art of watering watermelon plants is your ticket to a bursting, sweet harvest in just three weeks! 🌱 With the right techniques—like deep, consistent watering and smart mulching—you’re already on the path to success. Stay patient, keep those roots happy, and soon, you’ll be savoring homegrown watermelon slices on a sunny afternoon.
Now, grab those gloves and get ready to watch your plants thrive! Next up? Monitor growth progress and adjust watering as needed—your juiciest reward is just around the corner. 🍉✨