Watering
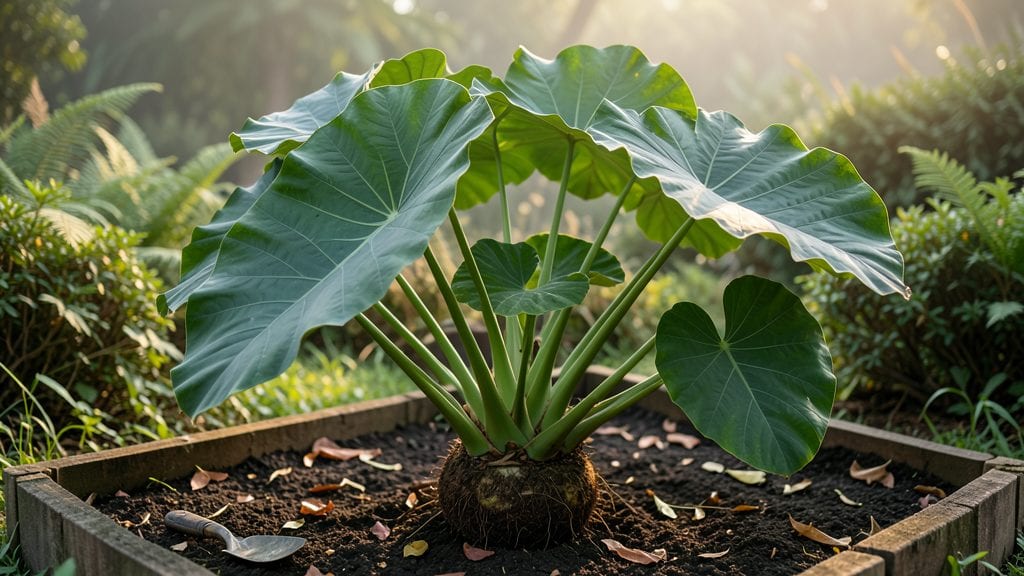
The water taro plant thrives in swampy soil, transforming your yard into a lush, edible wetland—just watch it spread like a green carpet, yielding arrowroot and corms that taste like potato-meets-chestnut. 🌿 The key? Mimicking its natural habitat—shallow, still water and rich, mucky soil.
You’ll need a container at least 12 inches deep or a sunny pond edge with 3–6 inches of standing water. Water taro thrives in full sun but tolerates partial shade, making it perfect for shady corners too.
Start with divisions or corms in spring, and watch roots take hold within 2–3 weeks.
By midsummer, you’ll harvest crunchy young shoots for stir-fries or let the corms mature for baking. The plants self-propagate aggressively—contain them with barriers if you don’t want them taking over. Just don’t let the water dry out, or the leaves turn crispy.
This plant handles pests like a champ (slugs rarely bother it) and forgives occasional neglect. Perfect for beginners who want low-maintenance, high-reward gardening. Let’s get those corms planted!
📚 In This Guide
- What you need
- Instructions
- Tips and common mistakes
- Wrapping up and next steps
What you need
- ● Water taro corms or tubers: 3–5 healthy, disease-free corms (choose organic or heirloom varieties for best results).
- ● Swampy or waterlogged soil: Clay-heavy, poorly draining soil (or mimic it with a mix of 50% topsoil + 50% peat moss/sand).
- ● Water source: A shallow pond, bog garden, or container with 2–4 inches of standing water (adjust based on climate).
- ● Fertilizer: Balanced organic fertilizer (10-10-10) – 1 cup per 10 sq. ft. at planting.
- ● Compost or worm castings – 2–3 gallons per plant for nutrient-rich soil.
- ● Mulch: Straw or leaves (3–4 inches thick) to retain moisture and suppress weeds.
- ● Basic gardening tools: Trowel or small shovel
- ● Gloves (water taro can be toxic if ingested—handle with care!)
- ● Pruners (for harvesting or trimming leaves)
- ● Drip irrigation system – For consistent moisture in drier climates.
- ● Water testing kit – To monitor pH (ideal: 5.5–6.5) and nutrient levels.
- ● Shade cloth (30–50%) – Protects young plants from harsh sun in hot regions.
- ● Container setup – A large pot (12"+ deep) with drainage holes and a water reservoir.
- ● Neem oil or copper fungicide – Preemptive treatment for pests/diseases in humid areas.
Step-by-Step instructions for watering taro plants
Taro thrives in conditions that mimic its swampy origins—here’s how to keep the soil consistently moist without drowning the roots.
💧 Step 1: Establish a Watering Routine for Consistency
Taro demands constant moisture—think of it as a living bog. Water deeply every 2-3 days until the top 2 inches of soil feel damp to the touch. The key is to mimic the high humidity of its natural habitat, so avoid letting the soil dry out completely. I use a watering can with a rose attachment to distribute water evenly without disturbing the tender leaves.
Here’s the thing—taro roots are sensitive. If you let the soil dry out, the plant will wilt, and the corms (the edible part) may crack or become tough. Instead, maintain a shallow water level—just enough to keep the soil saturated but not submerged. You’ll know you’re doing it right when the soil stays evenly moist at all times, with no crust forming on the surface.
☀️ Step 2: Adjust Watering Based on Light and Temperature
Taro grows best in bright, indirect light—think morning sun with afternoon shade. In hotter climates (above 85°F), you’ll need to water daily to compensate for rapid evaporation. If your taro is in a cooler environment (60-75°F), you can stretch watering to every 3-4 days, but always check the soil first.
Watch for yellowing leaves—this is your first sign of overwatering or poor drainage. If the soil feels soggy or smells musty, reduce watering immediately. On the flip side, wilting or crispy edges mean the soil is too dry. Taro is forgiving, but it won’t recover quickly from extreme conditions, so stay vigilant.
🌱 Step 3: Mulch to Retain Moisture and Regulate Temperature
Spread a 2-inch layer of organic mulch (like straw or shredded leaves) around the base of the plant, keeping it 2 inches away from the stem. This helps lock in moisture, reduces evaporation, and keeps the soil cool and stable. I’ve found that mulching also suppresses weeds, which compete for water and nutrients.
Real talk: mulch is non-negotiable for taro. Without it, the soil dries out faster, and the plant struggles to maintain the consistent humidity it craves. Replenish the mulch layer every 4-6 weeks or whenever it breaks down. You’ll notice the soil stays damp longer, and the plant grows more vigorously with fewer signs of stress.
⏰ Step 4: Monitor and Adapt During Growth Phases
Young taro plants (under 6 inches tall) need frequent, light watering—think every 1-2 days—to encourage strong root development. Once the plant matures (after 8-10 weeks), you can reduce frequency slightly but increase volume to support the larger corms. The goal is to keep the soil uniformly moist at all depths, not just the surface.
This is the moment that matters: harvest time. When you’re ready to dig up the corms (usually after 4-6 months), the soil should be slightly damp but not waterlogged. If it’s too wet, the corms may rot during harvest. Water lightly the day before digging to make the soil workable, but don’t overdo it—you want the corms to stay intact.
Tips & tricks for perfect taro plant care
Mastering taro's watering needs transforms your garden from a guessing game to a thriving swampy oasis. Here's how to get it right every time.
The Soil Check Secret: Before watering, always test the top 2 inches of soil with your finger. In Step 1, when establishing your routine, aim for soil that feels like a wrung-out sponge—not bone-dry or soggy. I've learned this the hard way: taro roots can't recover from drought stress, but they also suffocate in waterlogged conditions. The key is that consistent dampness where the roots thrive.
Temperature Adaptation: Those temperature thresholds in Step 2 aren't just suggestions—they're critical. At 85°F+, evaporation happens at warp speed, so your daily watering becomes non-negotiable. In cooler 60-75°F ranges, you can relax slightly to every 3-4 days, but never skip the soil check. I've seen taro plants recover from brief dry spells in cooler weather, but they never bounce back from heatwave dehydration.
Mulch Maintenance Mastery: That 2-inch mulch layer in Step 3 isn't just decorative—it's your moisture insurance policy. Refresh it every 4-6 weeks or when it breaks down to 1 inch or less. I've noticed a dramatic difference in soil retention: plants with fresh mulch stay damp for nearly double the time between waterings. The secret is keeping that mulch layer intact right up to the stem's base while maintaining that 2-inch clearance.
Growth Phase Transition: When your taro hits that 6-inch milestone in Step 4, you're entering the critical transition phase. This is when many growers make the mistake of maintaining youthful watering habits. The plant's needs shift dramatically—reduce frequency slightly but increase volume to support those expanding corms. Think of it as upgrading from a sports car to a family SUV: you're carrying more weight but need to maintain the same speed.
Pro Tips for Water Taro Plant
- Mastering taro's watering needs transforms your garden from a guessing game to a thriving swampy oasis.
- The Soil Check Secret: Before watering, always test the top 2 inches of soil with your finger.
- Temperature Adaptation: Those temperature thresholds in Step 2 aren't just suggestions—they're critical.
Frequently asked questions
Got questions about growing water taro? You’re not alone!
Here are some of the most common concerns—plus quick, no-nonsense answers to keep your swampy garden thriving.
How often should I water water taro plants?
Water taro lives in water—keep the soil consistently moist but not soggy. Flood the area to 2–4 inches deep during the growing season (spring to fall), then reduce to shallow standing water in winter. Drain excess water to prevent root rot. Pro tip: Use a shallow tray or pond liner for easy water control!
How long does it take for water taro to grow?
Patience is key! From planting corms (or slips), expect 3–6 months for edible corms to form in warm climates. Leaves may appear in 2–4 weeks, but harvest time depends on variety and conditions. Cold slows growth—extend the season with row covers if needed.
Can I grow water taro in containers instead of a pond?
Use a large, deep container (12+ inches) with drainage holes and a mix of peat moss, sand, and compost. Place it in a sunny spot and keep water levels stable. Just ensure the container is heavy enough—water taro can get top-heavy as it grows!
What pests or diseases should I watch for?
Water taro is hardy but can attract aphids, slugs, or fungal issues in damp conditions. Spot-treat with neem oil or diatomaceous earth. Rotate plants yearly to prevent soil-borne diseases. Yellow leaves? Could be overwatering—adjust and monitor!
How do I know when water taro corms are ready to harvest?
Dig up a small corm after 4–6 months—it should be 2–4 inches wide and firm. Harvest in fall before frost. Wait until leaves yellow for the best flavor. Store corms in a cool, dry place (like potatoes) for up to 3 months.
Wrapping up and next steps
The water taro plant thrives when you embrace its swampy roots—literally! 🌱 With the right soil, watering routine, and a dash of patience, you’re well on your way to a bountiful harvest. Remember, consistency is key, whether you’re managing water levels or troubleshooting common issues.
Ready to dive deeper? Start small—plant a few tubers, experiment with your setup, and let your green thumb grow! Soon, you’ll be enjoying homegrown water taro like a pro. Happy gardening! 🌿