Vegetables
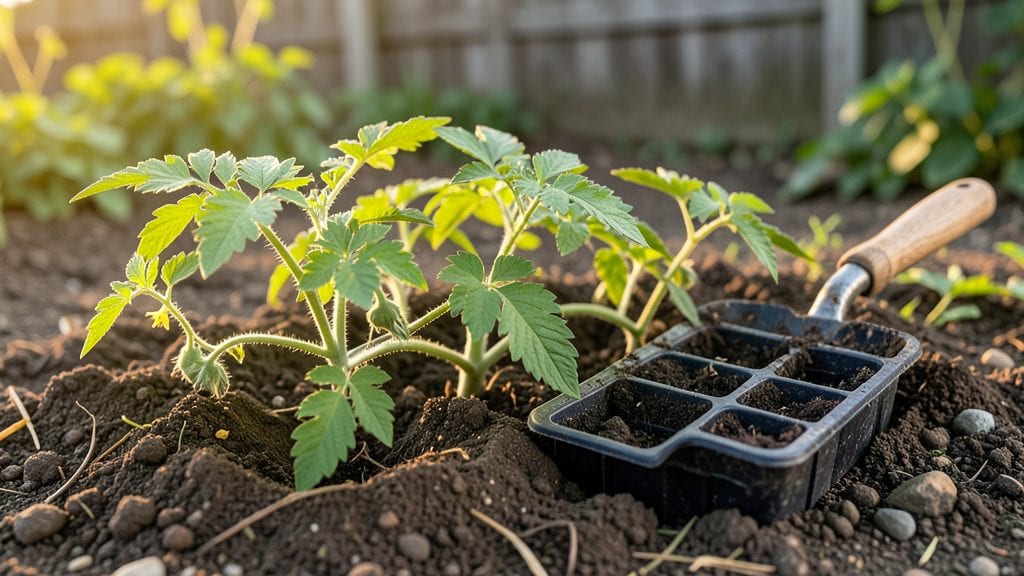
Trench planting tomatoes transforms my garden into a low-maintenance harvest machine. 🌱 Instead of wrestling with cages or stakes, I bury seedlings in a shallow ditch and watch them thrive—no flopping vines, no broken supports. The method keeps roots cool, conserves water, and even improves soil over time.
Here’s the best part: you don’t need fancy tools or years of experience. A simple shovel, a sunny spot, and a few hours on a warm afternoon are all it takes.
I’ve used this technique in both my raised beds and in-ground plots, and the results—heavier fruit, fewer diseases, and less work—speak for themselves.
By late summer, my trench-grown tomatoes outperform staked plants in both size and flavor. The plants stay upright naturally, the soil stays moist longer, and I spend half the time fussing over them. Plus, the method works in zones 4 through 10, making it adaptable to nearly any climate.
Fair warning: the first time you try it, you might question why you didn’t do this sooner. But once you see those sturdy plants loaded with fruit, you’ll never go back to traditional methods. Let’s get those trenches dug!
📚 In This Guide
- What you need
- Instructions
- Tips and common mistakes
- Wrapping up and next steps
What you need
- ● Tomato seedlings or seeds: 4–6 plants (determinate or indeterminate varieties work best).
- ● Garden trench: A 6–12 inch deep, 12–18 inch wide trench (adjust based on soil type).
- ● Compost or well-aged manure: 2–3 gallons per plant (rich in nitrogen for leafy growth).
- ● Organic mulch: Straw, grass clippings, or leaves (3–4 inches thick).
- ● Garden fork or trowel: For digging and mixing soil.
- ● Watering can or hose with gentle nozzle: For deep, even watering.
- ○ Balanced fertilizer (optional): 5-10-10 or compost tea for a mid-season boost.
- ● Row cover or shade cloth (to protect young plants from pests/sun).
- ● Drip irrigation kit (for consistent moisture without overwatering).
- ● Soil test kit (to check pH—aim for 6.0–6.8 for tomatoes).
- ● Plant markers (to track varieties if growing multiple types).
Step-by-step instructions for trench planting tomatoes
Here's how to grow strong, staking-free tomato plants that produce more fruit with less work.
🌱 Step 1: Choose the Right Location and Prepare the Soil
Select a spot with full sun exposure for at least 6-8 hours daily. Tomatoes thrive where they get plenty of warmth and light—this is non-negotiable for heavy yields. I always test the soil first by digging a 6-inch deep hole and checking for drainage. If water pools after 30 minutes, amend the soil with compost or sand to improve drainage.
Loosen the top 12 inches of soil with a broadfork or shovel, breaking up any compacted layers. This encourages roots to spread deeper and wider, which means more stable plants and bigger harvests. Work in a 2-3 inch layer of compost into the top 6 inches of soil—this feeds the roots as they grow and improves moisture retention.
🪴 Step 2: Dig the Trench and Plant Seedlings
Dig a trench 6 inches deep and 12 inches wide, long enough to accommodate all your tomato plants spaced 3 feet apart. The depth is key—it gives roots room to grow downward while still keeping the plant upright. Place your first seedling at one end of the trench, then gently spread its roots out along the bottom of the trench.
Cover the roots with soil, leaving only the top 1-2 inches of the stem exposed above ground. This buried stem will grow new roots, creating a stronger, more stable plant. Repeat for each seedling, spacing them evenly along the trench. I like to water lightly after planting to help settle the soil around the roots without disturbing them.
💧 Step 3: Fill and Mulch the Trench
Gradually fill the trench with soil, mounding it slightly around each plant to encourage roots to spread outward. Leave the top of the trench level with the surrounding soil—this prevents water from pooling and keeps the plants stable. Once filled, water deeply to settle the soil and encourage roots to grow into the new space.
Apply a 2-3 inch layer of organic mulch around each plant, keeping it 2-3 inches away from the stem to prevent rot. Mulch retains moisture, suppresses weeds, and keeps soil temperatures steady. I use straw because it breaks down slowly and adds organic matter to the soil as it decomposes. Water the mulch lightly after applying to help it settle.
☀️ Step 4: Maintain Water and Support Through the Season
Water deeply 1-2 times per week, aiming for 1-1.5 inches of water per week, depending on rainfall. Trench-planted tomatoes need consistent moisture to produce fruit, but avoid overhead watering—it spreads disease. Instead, water at the base of the plants early in the morning so the foliage has time to dry.
As the season progresses, gently mound soil around the base of the plants every 2-3 weeks to encourage deeper root growth. This is called "hilling," and it strengthens the plant's stability without needing stakes. You'll see new roots growing along the buried stems, which means your plants are thriving. Harvest when tomatoes are fully colored and slightly soft to the touch.
Tips & tricks for perfect trench-planted tomatoes
Here's what nobody tells you about getting the most out of this space-saving technique.
Sunlight Secret: Those 6-8 hours of daily sunlight are non-negotiable for tomato production, but here's the thing—morning sun is more important than afternoon. I've noticed my plants thrive best when they get that full sun exposure between 8am and 12pm. If you're in a shady area, consider using reflective surfaces like white plastic sheeting on the north side to bounce extra light onto your trench.
Soil Test Trick: That 30-minute drainage test is crucial, but I've learned to go one step further. After digging your 6-inch deep hole, add a handful of water and time how quickly it drains. If it takes longer than 30 minutes, you'll need more compost or sand. For heavy clay soils, I mix in perlite or vermiculite to create air pockets that roots will love.
Planting Technique: When burying those stems in Step 2, don't be shy—bury more than just 1-2 inches if you can. I've seen amazing results when I bury up to 4 inches of the stem, creating a stronger root system. Just make sure to leave the top leaves above ground so they can photosynthesize. This technique creates a network of roots that support the plant naturally.
Mulch Matters: That 2-3 inch layer of mulch is doing more than just retaining moisture. I've found it also regulates soil temperature beautifully—keeping roots cool in summer and warm in spring. For extra protection, I add a thin layer of straw over the mulch to prevent it from blowing away in windy conditions. This double-layer system keeps weeds at bay and maintains consistent moisture levels.
Pro Tips for Trench Planting Tomatoes
- Here's what nobody tells you about getting the most out of this space-saving technique.
- Sunlight Secret: Those 6-8 hours of daily sunlight are non-negotiable for tomato production, but here's the thing—morning sun is more important than afternoon.
- Soil Test Trick: That 30-minute drainage test is crucial, but I've learned to go one step further.
Frequently asked questions
Got questions about trench planting tomatoes? You're not alone! Here are some of the most common concerns—and straightforward answers—to help you get started with confidence.
What’s the best time of year to trench plant tomatoes?
Plant your tomatoes in early spring, about 2–4 weeks before your last expected frost date. This gives roots time to establish before the heat of summer. For fall harvests, plant in late summer (6–8 weeks before the first frost). Soil should be at least 50°F (10°C) for optimal growth.
Can I trench plant tomatoes in containers or raised beds?
Trench planting works great in containers (like large pots or grow bags) or raised beds. Just ensure the depth is at least 18–24 inches to accommodate root growth. For containers, add compost-rich soil and mulch to retain moisture—just mimic the trench method by burying stems as you plant.
What should I do if my trench-planted tomatoes develop blight or pests?
Prevent blight by spacing plants 18–24 inches apart for airflow and using disease-resistant varieties (like ‘Celebrity’ or ‘Mountain Merit’). For pests, handpick bugs or use organic sprays like neem oil. If blight strikes, remove affected leaves immediately and avoid overhead watering. Mulch heavily to deter soil-borne diseases.
How deep should I bury tomato stems in a trench?
Bury stems 2–3 inches deep at first, then gradually add soil as the plant grows (up to halfway up the stem). This encourages stronger roots and more fruit production. Avoid burying too deep—focus on 1–2 inches per week until the plant reaches maturity.
Do I need to fertilize trench-planted tomatoes differently?
Trench planting reduces the need for heavy fertilizers since compost and organic matter are already in the soil. Use a balanced fertilizer (10-10-10) at planting, then switch to a low-nitrogen, high-phosphorus feed (like 5-10-10) when flowers appear. Side-dress with compost mid-season for a nutrient boost.
Wrapping up and next steps
Trench planting tomatoes is a game-changer for gardeners who want bigger harvests with minimal effort—no staking, no fuss! By leveraging natural soil warmth and moisture retention, this method boosts growth while keeping your plants happy and healthy.
Whether you're a seasoned gardener or just starting out, this technique proves that great results don’t require complicated setups.
Ready to try it? Grab your tools, pick your favorite tomato variety, and dig in! Your future juicy, vine-ripened tomatoes are just a trench away. 🌱🍅