Pruning
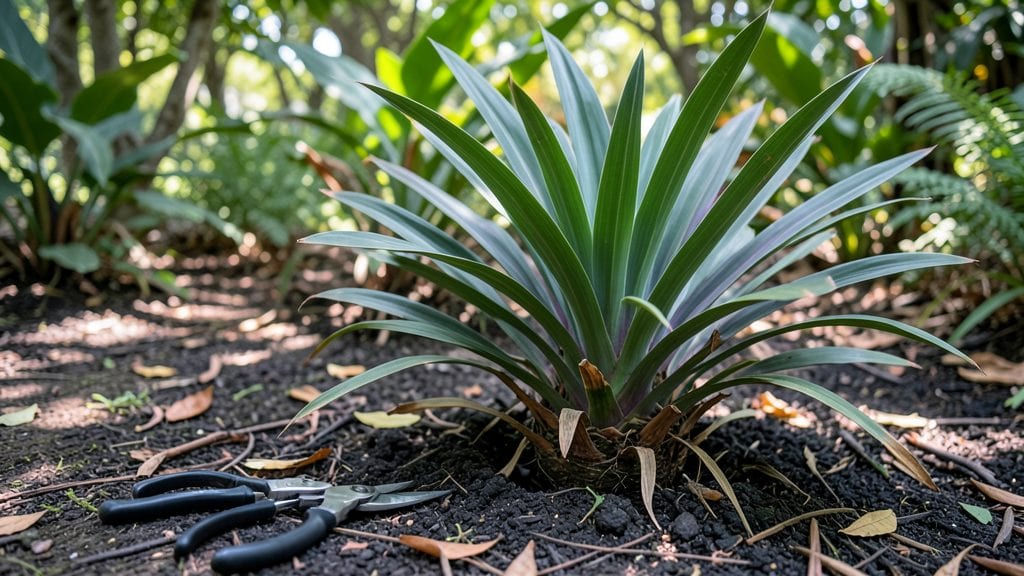
Pruning Cordyline plants transforms them from straggly to stunning—this is how I bring back their bold colors and tight shape every season. 🌿 My first attempt left them looking half-dead, but now I know the exact timing and cuts that make them thrive.
The key isn’t just cutting back; it’s understanding when to prune for the best regrowth and how much to remove without stressing the plant.
You’ll need sharp pruners, gloves, and a clear day to work—Cordylines respond best to pruning in late winter or early spring, just as new growth begins. I’ve learned that cutting back one-third of the oldest stems at a time prevents shock while encouraging fresh, vibrant foliage.
The plant’s natural layers reveal themselves as you work, making it easier to see which stems need attention.
After pruning, expect new shoots to emerge within 4-6 weeks, with the plant regaining its dramatic height and jewel-toned leaves. The secret is patience: avoid heavy pruning in summer, as the plant needs energy to support its current foliage.
With the right approach, your Cordyline will look better than ever, standing tall and colorful year-round.
This method works for both indoor and outdoor Cordylines, though outdoor plants may need slightly more aggressive pruning to handle wind and sun exposure. Once you’ve mastered the basics, you’ll see how pruning isn’t just maintenance—it’s the key to keeping these plants looking showstopping for decades.
📚 In This Guide
- What you need
- Instructions
- Tips and common mistakes
- Wrapping up and next steps
What you need
- ● Pruning shears or secateurs – Choose bypass-style (for clean cuts) or anvil-style (for thicker stems). Ensure they’re sharp and sterilized (rinse with rubbing alcohol or soapy water).
- ● Gloves – Garden or work gloves (nitrile-coated for grip) to protect against thorns and sap.
- ● Disinfectant – 70% isopropyl alcohol or a 10% bleach solution (1 part bleach to 9 parts water) to sterilize tools between cuts.
- ● Pruning saw – Only if dealing with thick, woody stems (3+ inches in diameter). Opt for a fine-toothed blade to minimize tearing.
- ● Sharpie or marker – For marking cuts if you’re shaping for symmetry.
- ● Trash bag or bucket – To collect pruned foliage and debris (compost later or dispose of diseased material).
- ● Horticultural oil or pruning sealant – Apply to large cuts (1+ inch diameter) to prevent disease entry (e.g., Tanglefoot Tree Wound Pruning Seal).
- ● Ladder or step stool – For tall Cordylines (6+ feet). Ensure it’s stable and non-slip.
- ● Plant food or fertilizer – A balanced, slow-release fertilizer (e.g., 10-10-10 NPK) to nourish the plant post-pruning.
- ● Mulch – Organic mulch (e.g., pine bark or shredded leaves) to retain moisture and protect roots after trimming.
- ● Camera or phone – Snap before/after photos to track progress!
- ● Check the weather – Prune on a dry, overcast day or in the early morning to reduce stress on the plant.
- ● Identify dead/diseased growth – Remove yellow, brown, or mushy leaves/stems first (sterilize tools between healthy and unhealthy cuts!).
- ● Plan your shape – Sketch a rough outline if you’re heavily reshaping (e.g., for hedges or topiaries).
Step-by-step guide to pruning Cordyline plants for year-round beauty
Here's how I keep my cordylines vibrant—whether you're shaping for summer blooms or winter color.
✂️ Step 1: Assess and Plan Your Pruning
Start by examining your cordyline from all sides. Look for dead or yellowing leaves at the base—these are your first targets. Healthy leaves should feel firm and have a waxy sheen. I always prune in the early morning when plants are fully hydrated, making cuts cleaner and reducing stress.
Use clean, sharp pruning shears to avoid crushing stems. Sketch a quick mental note of where you'll cut—cordylines grow in a fan shape, so aim to maintain that natural form. If you're pruning for color, focus on removing older leaves to reveal the striking red or purple stems underneath.
✂️ Step 2: Remove Dead and Damaged Growth
Begin by snipping off any brown, crispy, or mushy leaves at the base of the plant. These are energy drains and can invite pests. Cut just above a healthy leaf node or where the leaf meets the stem—this encourages new growth from the right spot.
For tattered or split leaves, trim them back to where the leaf is still intact. Avoid leaving stubs—they can rot. If a stem is completely dead (no green at all), remove it entirely. Cordylines are resilient, so don't worry about over-pruning here. Think of it as giving your plant a fresh start.
✂️ Step 3: Shape for Fullness and Color
Now, focus on shaping. Cordylines grow in a clumping habit, so I like to trim the outer leaves to encourage denser growth in the center. Cut back about 1/3 of the oldest leaves—this reveals the colorful stems and prevents the plant from looking leggy.
For a more dramatic look, especially in winter, trim leaves down to half their length. This exposes the vibrant red, orange, or purple stems that make cordylines so striking. Step back occasionally to check your progress—you want a balanced, full shape, not a bare center.
💧 Step 4: Clean Up and Care for Recovery
After pruning, gather all the clippings and dispose of them in the trash—not the compost pile. Cordyline leaves can harbor pests or diseases that might spread if composted. Wipe down your pruning shears with rubbing alcohol to sterilize them for the next cut.
Water your cordyline deeply after pruning to help it recover. The roots will need extra moisture to support new growth. Avoid fertilizing for 4-6 weeks—let the plant focus on healing before pushing out fresh leaves. In 2-4 weeks, you'll see new growth emerging from the center, signaling a successful prune.
⏰ Step 5: Schedule Seasonal Maintenance
Prune cordylines in early spring for general shaping and late winter to enhance color. I also do a light trim in summer to remove any damaged leaves from heat stress. Avoid heavy pruning in fall—this is when the plant is preparing for dormancy.
Watch for new growth at the base after each prune. This tells me the plant is happy and adapting well. If you notice yellowing leaves after pruning, it might mean your cordyline needs more light—move it to a brighter spot for 6-8 hours of indirect sunlight daily.
Tips & tricks for pruning Cordyline plants
Here's what I've learned after years of keeping my cordylines looking their absolute best—these small details make all the difference between a tired plant and a showstopper.
The Right Time of Day: I can't stress this enough—prune in the early morning when plants are fully hydrated. This makes cuts cleaner and reduces stress on the plant. I've seen people prune in the afternoon and end up with ragged cuts that look messy. Morning light also helps you see the true condition of leaves without glare.
Tool Prep is Non-Negotiable: Before you make a single cut, sterilize your pruning shears with rubbing alcohol. I've had to deal with fungal infections in my plants after using dirty tools—don't make my mistake! Also, make sure your shears are sharp enough to cut cleanly through the fibrous stems. Dull blades crush the plant tissue, which can invite disease.
Color Reveal Technique: For that dramatic winter look, trim leaves down to half their length—this exposes the stunning red or purple stems. Here's my secret: start from the outside and work your way inward. This creates a natural, layered effect that highlights the colorful stems while maintaining the plant's fullness. Step back every few cuts to check your progress!
Post-Prune Recovery Hack: After you're done, water deeply but don't fertilize for 4-6 weeks. The roots need time to establish new growth without competing with nutrients. I've found that moving the plant to a spot with 6-8 hours of indirect sunlight daily helps speed up recovery. Watch for new growth at the base—this is your sign that everything's working!
Pro Tips for Pruning Cordyline Plants
- Here's what I've learned after years of keeping my cordylines looking their absolute best—these small details make all the difference between a tired plant and a showstopper.
- The Right Time of Day: I can't stress this enough—prune in the early morning when plants are fully hydrated.
- Tool Prep is Non-Negotiable: Before you make a single cut, sterilize your pruning shears with rubbing alcohol.
Frequently asked questions
When is the best time to prune Cordyline plants?
The ideal time to prune Cordyline is in early spring before new growth begins. However, you can also prune lightly after flowering (late spring to summer) to maintain shape. Avoid heavy pruning in fall or winter, as the plant needs energy to recover before dormancy.
How much can I trim back a Cordyline without harming it?
You can safely trim up to one-third of the plant’s height at a time. For mature Cordylines, this may mean cutting back long stems to just above a leaf node. Avoid over-pruning—it can stress the plant and reduce its ability to regrow. If your plant is leggy, gradual pruning over a few seasons works best.
What should I do with the cuttings after pruning?
Cordyline cuttings root easily! After pruning, let the cut ends callus over (1–2 days), then place them in a well-draining potting mix. Keep the soil moist and provide bright, indirect light. Roots typically form in 4–6 weeks. You can also propagate in water for easier monitoring.
Why is my Cordyline turning yellow or brown after pruning?
Yellowing or browning leaves after pruning are often normal as the plant adjusts. However, if it’s widespread, check for overwatering, pests, or fungal issues. Ensure the plant has good airflow, reduce watering slightly, and avoid pruning during wet conditions. If the problem persists, inspect for signs of root rot or pests.
Can I prune Cordyline for color instead of shape?
Yes! Pruning can enhance color by encouraging new growth. Cut back faded or bare stems to stimulate fresh, vibrant foliage. Focus on removing older, less colorful leaves while keeping the plant’s structure intact. For variegated Cordylines, pruning also helps retain the plant’s striking patterns by promoting healthy new shoots.
Wrapping up and next steps
Pruning your Cordyline plants is a rewarding way to keep them vibrant, healthy, and full of life year-round! 🌿 With the right tools, timing, and techniques, you can easily revive their shape and enhance their stunning colors—whether you’re trimming for aesthetics, growth, or even propagation.
Remember, consistency is key, so don’t hesitate to make pruning a regular part of your gardening routine.
Now that you’re equipped with expert tips, grab those shears and get pruning! Need a little extra inspiration? Check out our guide on propagating Cordyline cuttings to turn your trimmings into new plants—it’s a win-win for your garden! 🌱