Pruning
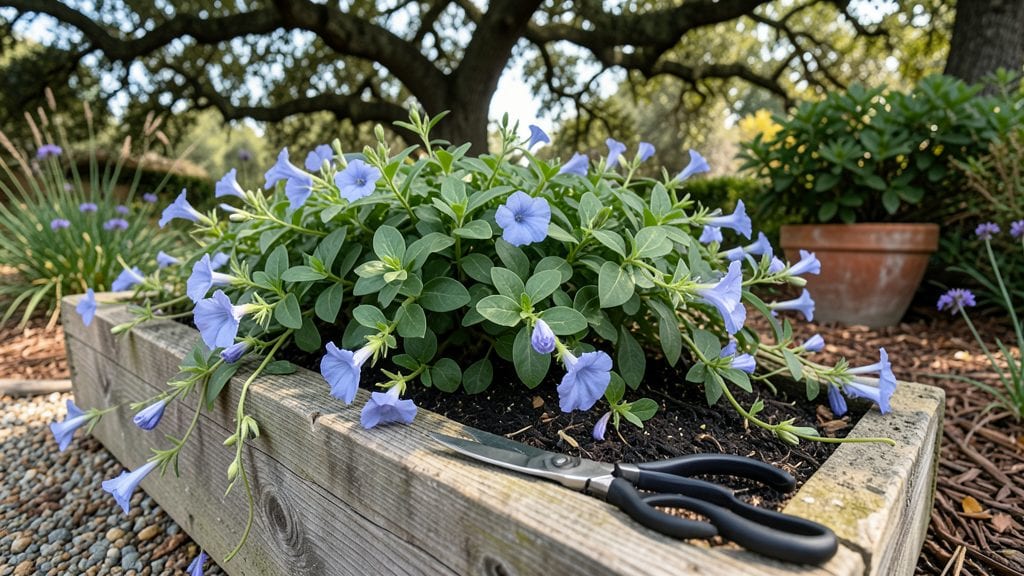
Pruning plumbago plants isn't just about shaping—it's how you get those sky-blue blooms lasting all summer long. 🌿 I've learned the hard way that timing and technique make the difference between a bush that fades fast and one that stays vibrant until frost.
The secret lies in a few simple cuts at the right moment, paired with deadheading to keep the flowers coming.
You'll only need two things: a pair of clean, sharp pruners and a sunny morning to work. Skip the heavy-duty shears—plumbago stems are delicate, and dull blades crush them. Gloves help too, since those thorns don't play nice.
The best time to prune is right after the first flush of blooms fades, usually in early summer, or a light trim in late winter before new growth starts.
Cut back about one-third of the plant to encourage bushier growth, and always snip just above a leaf node. Deadhead spent blooms by pinching them off at the base—this prevents seed formation and redirects energy to new flowers.
Within 2-3 weeks, you'll see fresh shoots and a second wave of blooms that outlasts anything you've seen before.
After pruning, give your plumbago a drink to help it recover, but don't overdo it—these drought-tolerant plants hate soggy roots. A light fertilizer boost in early summer keeps them thriving. The biggest mistake?
Waiting too long to prune or cutting into old wood—once the stems get woody, they won't rebloom as well. Trust the process, and you'll have plumbago blooms until the first frost.
📚 In This Guide
- What you need
- Instructions
- Tips and common mistakes
- Wrapping up and next steps
What you need
- ● Bypass pruners – Sharp, clean pruners (1 pair) to make precise cuts without crushing stems.
- ● Hand pruners or loppers – For thicker stems (2-3 inches in diameter), opt for loppers (1 pair).
- ● Disinfectant (rubbing alcohol or bleach solution) – A small bottle (4 oz) to sterilize tools between cuts and prevent disease spread.
- ● Garden gloves – A pair to protect your hands from thorns and dirt.
- ○ Garden twine or plant ties – A small roll (optional but helpful for supporting pruned branches if needed).
- ● Compost bin or bag – To collect pruned debris and recycle nutrients back into your garden.
- ● Extension pole pruners – If your Plumbago is tall or hard to reach, these save your back!
- ● Horticultural oil or pruning sealant – A small bottle to coat larger cuts and prevent sap oozing (great for woody stems).
- ● Spray bottle with water – Keeps tools clean and dust-free during the process.
- ● Notebook & pen – Jot down pruning notes or sketch your plant’s shape for future reference.
Step-by-Step guide to pruning plumbago for prolonged blooms
Here’s the simple method I use to keep my plumbago flowering nonstop—just a few cuts at the right time.
✂️ Step 1: Deadhead Faded Flowers Regularly
Pinch or snip off spent blooms as soon as they wilt to redirect the plant’s energy into new flowers. Use clean, sharp pruners or your fingers to avoid damaging the stems. I do this every 2-3 days during peak bloom—you’ll see fresh buds forming within 7-10 days.
Watch for flowers that drop petals naturally; these are ready for removal. If you skip deadheading, the plant will focus on seed production instead of blooming. This is the moment that matters: consistent deadheading keeps your plumbago looking full and vibrant.
✂️ Step 2: Trim Back Overgrown Growth in Early Spring
After the last frost, cut back leggy or overcrowded stems by one-third to encourage bushier growth. Use clean pruners and make cuts just above a leaf node or set of leaves. This is where new branches will sprout, giving you a fuller plant.
Don’t worry if it looks sparse after pruning—plumbago recovers fast. I always prune on a dry morning so the cuts have time to heal before evening. You’ll notice fresh green growth within 2-3 weeks, signaling the plant is thriving.
✂️ Step 3: Lightly Prune After Heavy Blooming Seasons
Once the blooms slow down in late summer or fall, trim back about 10-15% of the plant’s height to maintain shape and prevent woody growth. Focus on removing older, less productive stems first. This keeps the plant healthy and ready for another round of blooms next season.
Real talk: If you’re in a warm climate, you can prune lightly even in winter to encourage early spring growth. Just avoid heavy cuts—plumbago is tough but not invincible. Watch for new shoots emerging from the base; these are your signal that pruning worked.
⏰ Step 4: Clean Up and Sterilize Tools
After pruning, wipe your pruners with rubbing alcohol to prevent the spread of disease. I keep a small bottle of alcohol in my gardening toolbox for quick cleanups. Store tools in a dry place to keep them sharp and ready for the next pruning session.
Don’t skip this step—fungal spores can hitch a ride on dirty tools and cause problems later. A quick wipe takes 30 seconds but saves hours of cleanup if your plant gets infected. Your plumbago will thank you with healthier, longer-lasting blooms.
Tips & tricks for perfect plumbago pruning
These simple tricks will help you keep your plumbago blooming beautifully all season long.
Timing is Everything: The 2-3 day deadheading schedule in Step 1 might seem frequent, but it's crucial for continuous blooms. I learned this the hard way—skipping even one day can lead to seed formation instead of new flowers. Use a small notepad to track your last pruning day to stay consistent. The 7-10 day window for new buds to form is your reward for staying on schedule.
Pruning Precision: When trimming back overgrown growth in Step 2, focus on making clean cuts just above a leaf node. This is where new branches will emerge, creating that bushier shape. I use a small magnifying glass to spot these nodes on thicker stems—it's worth the investment for precise cuts. Remember, you're cutting back by one-third, not more, so don't be shy about making those cuts!
Seasonal Strategy: The 10-15% height reduction in Step 3 might seem minimal, but it's perfect for maintaining shape without stressing the plant. I find that pruning in late summer gives the plant time to recover before winter. In warm climates, that winter pruning tip about encouraging early growth is gold—just be gentle and watch for those new shoots as your sign of success.
Tool Maintenance: That 30-second tool wipe in Step 4 might seem like overkill, but I've seen fungal infections spread quickly through unsterilized tools. Keep rubbing alcohol handy and make it a habit to clean tools after every pruning session. Sharp tools also make the job easier—dull pruners can crush stems instead of making clean cuts.
Pro Tips for Plumbago Plant Pruning
- These simple tricks will help you keep your plumbago blooming beautifully all season long.
- Timing is Everything: The 2-3 day deadheading schedule in Step 1 might seem frequent, but it's crucial for continuous blooms.
- Pruning Precision: When trimming back overgrown growth in Step 2, focus on making clean cuts just above a leaf node.
Frequently asked questions
Got questions about pruning your Plumbago? You’re not alone! Here are answers to the most common concerns—so you can keep your plant thriving and blooming like a pro.
When is the best time to prune Plumbago for blooms?
The ideal time to prune is right after flowering (late spring to early summer) to encourage new growth and more blooms. For a light trim, you can also prune in early spring to shape the plant. Avoid heavy pruning in fall—it can stress the plant before winter dormancy.
How much can I cut back my Plumbago without harming it?
You can safely prune up to one-third of the plant’s height at a time. For established plants, a hard prune (cutting back to 6–12 inches) in spring stimulates bushier growth. Just avoid over-pruning—Plumbago is resilient but not indestructible!
What should I do if my Plumbago looks leggy after pruning?
Leggy growth happens when the plant isn’t getting enough light. After pruning, move it to bright, indirect sunlight (or full sun in warmer climates). Fertilize lightly with a balanced 10-10-10 mix to encourage compact, bushy regrowth. Patience pays off—new growth should fill in within 4–6 weeks!
Can I propagate Plumbago from pruned cuttings?
Take 4–6 inch cuttings from healthy stems, strip the lower leaves, and dip them in rooting hormone. Plant in moist potting mix and keep humid (use a plastic bag or propagator). Roots should form in 3–6 weeks. Perfect way to multiply your plant for free!
Why did my Plumbago stop blooming after pruning?
If blooms vanish, check these fixes:
- Light: Plumbago needs 6+ hours of sun daily.
- Fertilizer: Feed with low-nitrogen bloom booster in spring.
- Water: Overwatering stresses roots—let soil dry slightly between waterings.
Wrapping up and next steps
Pruning your plumbago plant isn’t just about keeping it tidy—it’s your secret weapon for longer, lusher blooms and a healthier plant! By mastering deadheading and strategic trimming, you’ll encourage vibrant growth and extend the flowering season.
Whether you’re a seasoned gardener or just starting, these techniques are simple yet powerful—so grab those shears and give your plumbago the love it deserves.
Ready to see the difference? Start with one pruning session this weekend and watch your plant thrive! For extra tips, bookmark this guide or share it with fellow plant lovers. Happy pruning! 🌸✂️