Propagation
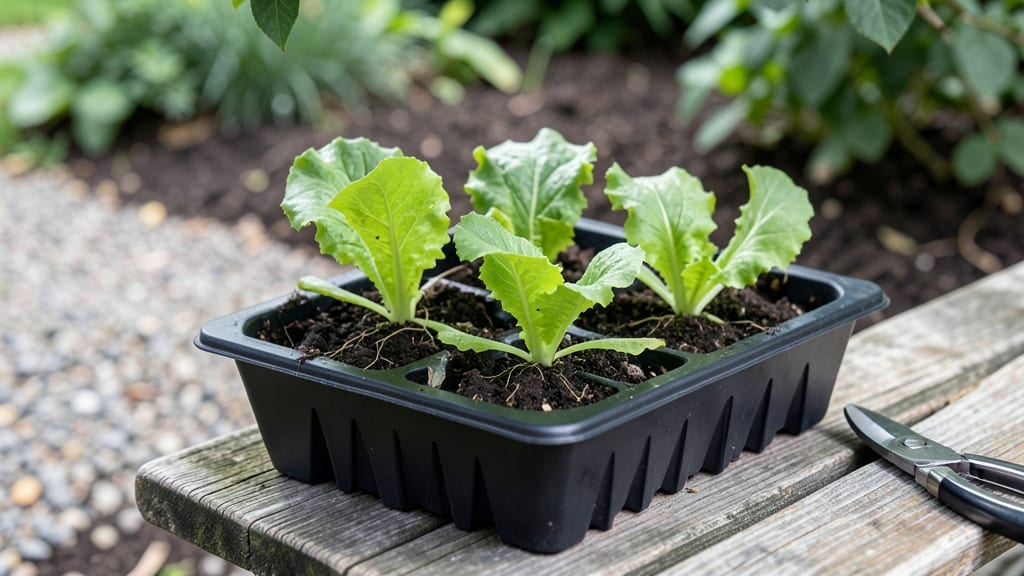
The planting seeds process starts with the right soil, depth, and patience—because those first few weeks determine whether you end up with robust seedlings or sad, spindly failures.
I’ve watched my own seeds go from paper-thin sprouts to sturdy plants ready for transplanting, and the difference comes down to these simple but critical steps. The key isn’t just throwing seeds into dirt and hoping; it’s creating the perfect conditions for them to wake up strong.
You’ll need a few basics: seed-starting mix (not regular garden soil), containers with drainage, a spray bottle for gentle watering, and a sunny spot or grow light. For outdoor sowing, timing matters—wait until the soil warms to at least 60°F and the last frost has passed.
Indoors, start 6-8 weeks before your last frost date, and keep seedlings cozy until they’re ready to harden off. The tools are simple, but the payoff—healthy, thriving plants—is worth the effort.
Once planted, your seeds need consistent moisture without drowning, warmth without heat stress, and light without scorching. A clear plastic dome or plastic wrap keeps humidity high until sprouts appear, and a south-facing window or LED grow light ensures they don’t stretch leggy.
In just 7-14 days, you’ll see those first green shoots breaking through, and that’s when the real magic begins—watching them grow into plants strong enough to thrive outdoors.
This process works for everything from tomatoes to marigolds, whether you’re sowing directly in the garden or starting indoors. The same principles apply, just adjusted for timing and space. Here’s how to do it right the first time—no more weak starts or wasted seeds.
📚 In This Guide
- What you need
- Instructions
- Tips and common mistakes
- Wrapping up and next steps
What you need
- ● Seeds: Choose high-quality, fresh seeds (check the packaging date—ideally planted within 1–2 years of harvest). Quantity depends on your project (e.g., 10–50 seeds for small containers, 100+ for larger gardens).
- ● Seed-starting mix: A lightweight, sterile potting mix (avoid garden soil—it’s too dense!). Use 1–2 cubic feet per 10–12 plants.
- ● Containers: Plastic trays with cells (3–4" deep, 50–100 cells per tray).
- ● Biodegradable pots (for transplanting later).
- ○ Yogurt cups, egg cartons, or recycled containers (optional, for budget-friendly starts).
- ● Watering can or spray bottle: A gentle misting function prevents seed displacement. Aim for 1–2 cups of water per tray (keep soil moist but not soggy!).
- ● Plant labels: Toothpicks + masking tape or pre-made seed tags (write seed type + date!).
- ○ Heat mat (optional): For warm-weather seeds (e.g., peppers, tomatoes), use a 70–80°F mat to speed germination.
- ● Grow lights or sunny windowsill: 12–16 hours/day of light (south-facing window or LED grow lights work best).
- ○ Fertilizer (optional): A balanced, water-soluble fertilizer (5-10-5 ratio) for seedlings after 2–3 weeks.
Instructions for planting seeds process: Step-by-Step success for strong starts
Here's how to turn tiny seeds into healthy seedlings with confidence and consistency.
Prepare Your Containers and Soil Mix
Start by selecting clean containers with drainage holes—even small pots work as long as they allow excess water to escape. I like to use seed-starting trays with individual cells because they prevent overcrowding and make transplanting easier later. Fill each container about three-quarters full with a quality seed-starting mix, leaving space at the top for seeds and watering.
Moisten the mix until it feels like a damp sponge—press gently to check moisture. The soil should hold together when squeezed but not feel soggy or crumble apart. This ensures your seeds have just the right amount of moisture to germinate without drowning. Avoid using garden soil; it's too heavy and may contain pathogens that harm delicate seedlings.
Plant Seeds at the Correct Depth
Check the seed packet for depth guidelines, but a general rule is to plant seeds at a depth roughly twice their diameter. For tiny seeds like lettuce or basil, this might mean pressing them just below the soil surface, while larger seeds like beans or peas can go deeper. I use my finger to make small indentations in the soil for precision, especially with tiny seeds.
Place one seed per container unless the packet specifies otherwise—overcrowding weakens seedlings and makes them more susceptible to disease. After planting, cover the seeds lightly with additional soil or mix, then pat gently to secure them. Label each container with the seed type and planting date to avoid confusion as sprouts appear.
Provide Warmth and Moisture for Germination
Seeds need warmth to germinate, ideally between 70-80°F. Place your containers in a warm spot, such as on top of a refrigerator or near a heat source, but avoid direct heat that could dry out the soil. Cover the containers with plastic wrap or a humidity dome to retain moisture and create a mini greenhouse effect.
Check the soil daily—it should stay consistently moist but not waterlogged. Mist the soil lightly if the surface feels dry to the touch. Most seeds sprout within 5-14 days, depending on the type. Once you see the first signs of green, remove the cover immediately to prevent mold and allow the seedlings to breathe and strengthen.
Move to Light and Maintain Growth
As soon as seedlings emerge, place them under bright, indirect light for at least 12-14 hours a day. A south-facing window or a grow light works well, but avoid placing seedlings in direct sunlight until they're stronger—intense light can scorch tender leaves. If using a grow light, keep it 2-4 inches above the seedlings and adjust the height as they grow.
Water gently from the bottom by placing the containers in a shallow tray of water for 10-15 minutes. This encourages roots to grow downward and prevents fungal diseases caused by overhead watering. Watch for first true leaves—these are the second set of leaves that appear after the initial seed leaves. Once they develop, you can thin seedlings if necessary, keeping the strongest one per container.
Harden Off and Transplant
About 1-2 weeks before your last frost date, begin hardening off your seedlings by gradually exposing them to outdoor conditions. Start with 1-2 hours a day in a sheltered, shaded spot, then slowly increase their time outside over 7-10 days. This helps them adjust to wind, sun, and temperature changes without shock.
When seedlings are ready, transplant them into the garden or larger containers, burying them slightly deeper than they were in their original pots. Water thoroughly after transplanting and keep the soil consistently moist for the first week. With proper care, your seedlings will grow into strong, healthy plants ready for the next stage of their journey.
Tips & tricks for perfect seed starting success
Starting seeds the right way can make all the difference between weak, leggy seedlings and strong, vibrant plants ready for transplanting.
Container Selection: While any container with drainage works, I've found that seed-starting trays with individual cells are worth the investment. They prevent overcrowding in Step 1, which reduces competition between seedlings and makes thinning easier later. If you're using recycled containers like yogurt cups, poke drainage holes with a heated nail or drill bit—just make sure they're large enough to prevent clogging with soil.
Soil Moisture Balance: In Step 1, when moistening your seed-starting mix, aim for that "damp sponge" consistency—it should hold together when gently squeezed but not drip water. Overwatering at this stage can lead to anaerobic conditions that prevent germination. I like to use a spray bottle for precision, especially with tiny seeds, rather than pouring water directly onto the mix which can displace seeds or create uneven moisture levels.
Germination Temperature Consistency: Maintaining that 70-80°F range in Step 3 is crucial, but don't assume your kitchen stays within this range. I've had seeds fail to germinate because they were placed too close to a cold window or far from a heat source. Consider using a seedling heat mat for just 5-14 days during germination—it's a small investment that pays off with faster, more uniform sprouting. Just remember to remove it once seedlings emerge to prevent over-heating.
Light Transition Strategy: The 12-14 hours of bright, indirect light in Step 4 is non-negotiable for strong seedlings. If you're using a grow light, rotate your trays daily so all seedlings get even exposure. I've noticed that seedlings grown under grow lights develop thicker stems and darker green leaves compared to those near windows. For window-grown seedlings, consider supplementing with a grow light if your plants start looking pale or stretched—this condition is called etiolation and makes seedlings weak.
Pro Tips for Planting Seeds Process
- Starting seeds the right way can make all the difference between weak, leggy seedlings and strong, vibrant plants ready for transplanting.
- Container Selection: While any container with drainage works, I've found that seed-starting trays with individual cells are worth the investment.
- Soil Moisture Balance: In Step 1, when moistening your seed-starting mix, aim for that "damp sponge" consistency—it should hold together when gently squeezed but not drip water.
Frequently asked questions
Got questions about planting seeds? You’re not alone—every gardener starts somewhere! Here are answers to the most common queries to help you grow with confidence.
What’s the best time of year to plant seeds?
The ideal time depends on your climate and plant type. For cool-season crops (like lettuce or peas), plant in early spring or late summer. Warm-season crops (tomatoes, peppers) thrive when soil temps hit 60°F+. Check your frost dates—seed packets often include planting guidelines!
How deep should I plant seeds?
Depth varies by seed size: tiny seeds (like basil) need just 1/8" of soil, while larger ones (beans, sunflowers) should go 1-2" deep. A handy rule: plant seeds 2-3x their width below soil. Press lightly to ensure good soil contact for moisture.
Why aren’t my seeds germinating?
Common culprits include wrong soil temps (too cold or hot), dry soil, or old seeds. Test moisture by touching soil—it should feel damp like a wrung-out sponge. If seeds are over a year old, try fresh ones or soak them overnight to boost germination.
Can I use regular potting soil for seedlings?
Yes! But opt for a seed-starting mix (lighter and sterile) to prevent damping-off disease. Mix in perlite or vermiculite (10-20%) for drainage. Avoid garden soil—it’s too dense and may harbor pests or pathogens that stress young plants.
What’s the fastest way to speed up germination?
Warmth and moisture are key! Place trays on a seedling heat mat (70-85°F) or near a sunny window. Cover seeds with a humidity dome or plastic wrap until sprouts appear. For stubborn seeds, try stratification (cold treatment) or scarification (lightly nicking the seed coat).
Wrapping up and next steps
Mastering the planting seeds process is your first step toward a thriving garden—whether you’re growing veggies, flowers, or herbs! 🌱 With the right tools, patience, and care, you’ll nurture strong starts that blossom into healthy plants. Ready to turn your green thumb dreams into reality?
Your next step? Start small! Pick one seed variety to practice, follow the steps you’ve learned, and track your progress. Before you know it, you’ll be sharing your success—and maybe even swapping seedlings with fellow plant enthusiasts. Happy growing! 🌟