Transplanting
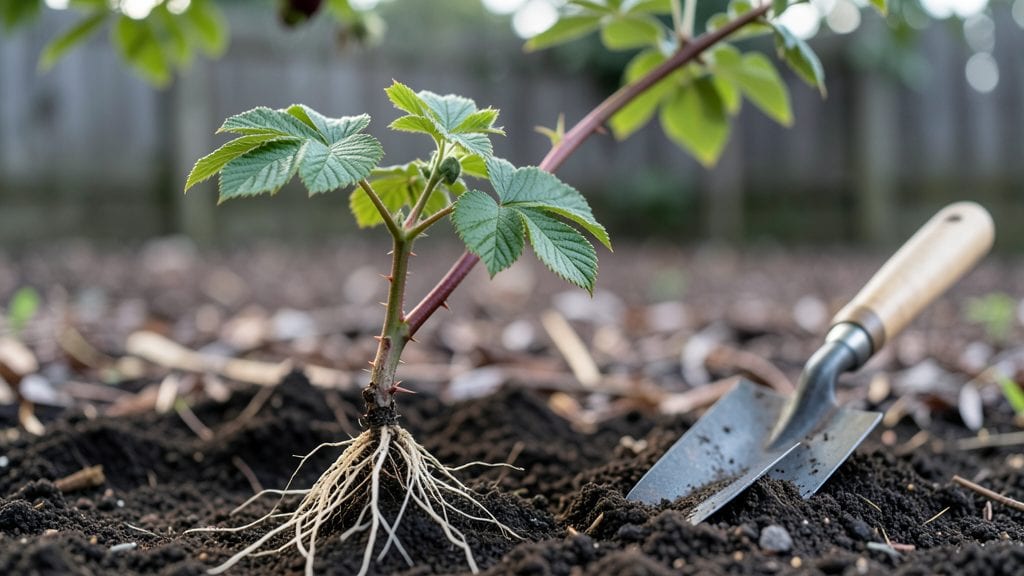
Planting raspberry canes the right way means summer harvests that make your neighbors jealous. 🌿 I learned the hard way that cramming canes too close or burying them too deep turns sweet promise into bitter disappointment—until I cracked the spacing and pruning secrets that actually work.
The key starts with soil: raspberries crave well-draining earth rich in organic matter, with a pH between 5.5 and 6.5. For primocanes (this year's growth) and floricanes (last year's fruiting canes), space them 24 inches apart in rows 6 feet apart.
Plant just below the soil line—no deeper than 1 inch—and water deeply right after to settle the roots. Mulch with straw or wood chips to keep roots cool and weeds at bay.
Within 30 days, you'll see new growth shooting up, and by next summer, those canes will be heavy with fruit. The trellis system I use—simple T-posts with wire—keeps canes upright and makes harvesting a breeze.
Even in hot climates, consistent moisture and proper spacing mean fewer diseases and more berries. Here's how to set it up without the common mistakes.
This method works whether you're in Zone 5 or Zone 9, though summer watering needs adjust with heat. The same principles apply to both summer-bearing and fall-bearing varieties—just tweak your pruning timing. Let's get those canes planted for a harvest that'll last all season.
📚 In This Guide
- What you need
- Instructions
- Tips and common mistakes
- Wrapping up and next steps
What you need
- ● Raspberry canes: 5–10 healthy, dormant canes (bare-root or potted) per plant. Choose varieties like Heritage (summer-bearing) or Boyne (fall-bearing) based on your climate.
- ● Shovel or trowel: A sharp-edged spade for digging holes (6–8" deep).
- ● Garden gloves: Heavy-duty to protect hands from thorns and soil.
- ● Compost or well-aged manure: 2–3 gallons per planting hole for nutrient-rich soil.
- ● Mulch (straw or wood chips): 2–3 inches to retain moisture and suppress weeds.
- ● Drip irrigation or hose: For consistent watering (1–2 inches per week).
- ○ Plant supports (optional but recommended): T-posts or stakes (4–6 ft tall) + twine for trellising.
- ● Or a raspberry cage (pre-assembled wire frame).
- ● Sunlight: Full sun (6–10 hours daily). Partial shade (morning sun) works in hot climates.
- ● Soil: Well-draining, slightly acidic (pH 5.5–6.5). Amend clay soil with compost.
- ● Spacing: 18–24" apart for single-row plantings.
- ● 4–6 ft between rows for airflow and maintenance.
- ● Timing: Plant bare-root canes in early spring or fall (when soil is workable). Potted canes can go in year-round (except winter).
Step-by-step instructions for planting raspberry canes
Here's how to plant raspberries for strong, productive canes that yield fruit for years.
🌱 Step 1: Prepare the Planting Site
Choose a location with full sun (6-8 hours daily) and well-draining soil. Raspberries thrive in slightly acidic soil with a pH between 5.5 and 6.5. If your soil is heavy clay, mix in 2-3 inches of compost from your list to improve drainage and fertility. Avoid planting in low spots where water pools after rain.
Test your soil's moisture level by digging a 6-inch hole—if it stays damp for more than a few hours, your site drains poorly. Raspberries hate soggy roots, so amend the soil with a 50/50 mix of native soil and compost to create a loose, airy medium. Spread a 2-inch layer of mulch around the planting area to retain moisture and suppress weeds.
🪴 Step 2: Dig and Space the Canes Correctly
Dig holes 12-18 inches deep and 18-24 inches apart for each cane, spacing rows 6 feet apart to allow for airflow and future maintenance. The wider spacing prevents disease spread and makes harvesting easier. Place each cane in the hole so the crown (where roots meet stems) sits 1-2 inches below soil level—this encourages strong root growth.
Gently loosen the roots before planting to encourage them to spread into the surrounding soil. If planting multiple canes, arrange them in a single row rather than a hedge to improve sunlight penetration. Water each hole deeply (1 gallon per cane) before backfilling with soil to eliminate air pockets around the roots.
✂️ Step 3: Prune and Support the Canes Immediately
Trim the canes back to 12-18 inches tall right after planting to encourage bushier growth. Remove any dead, damaged, or weak canes—these won’t produce fruit and can spread disease. For floricane varieties (like Heritage or Boyne), prune all canes to the ground in early spring to stimulate new fruiting canes. For primocane varieties (like Heritage Gold), leave the canes intact—they’ll fruit on new growth.
Install trellis supports immediately using 6-foot stakes driven 12 inches into the ground on either side of the row. Attach horizontal wires at 3-foot intervals to guide the canes upward. This keeps canes off the ground, reducing disease risk and making fruit easier to pick. Water the newly planted canes once a week for the first month to help roots establish.
☀️ Step 4: Maintain Through the First Season
Keep the soil moist but not soggy—raspberries need 1-1.5 inches of water per week, either from rain or irrigation. Mulch with 2-3 inches of organic material (like straw or wood chips) to retain moisture and suppress weeds. Fertilize lightly in early spring with a balanced 10-10-10 fertilizer (1 tablespoon per plant) to support root and cane growth.
Watch for new suckers (shoots) growing from the base—these are the plant’s way of spreading. Remove them immediately to focus the plant’s energy on established canes. By mid-summer, you’ll see new canes forming—these are your future fruiting stems. Prune out any canes that produce small, weak berries, as they won’t contribute to a bountiful harvest.
Tips & tricks for planting raspberry canes
Between us, these small details make all the difference between raspberry bushes that thrive and ones that struggle. Let me share what I've learned after years of trial and error.
Soil Preparation Secret: That 6-inch hole test is your best friend for determining drainage. If water pools in the hole after 30 minutes, you'll need to amend the soil with more compost or even consider raised beds. I've seen soggy roots turn raspberries into a sad, disease-prone mess—trust me, it's not worth the risk. For clay-heavy soils, mix in equal parts compost and sand to create that perfect loose, airy medium.
Spacing Strategy: Those 18-24 inches between canes might seem generous, but it's worth it. Tight spacing leads to crowded canes that spread diseases like fungal infections. I arrange my plants in a single row with 6 feet between rows—this creates a wind tunnel effect that actually helps dry the canes faster after rain, reducing disease risk.
Root Handling Technique: When you loosen those roots before planting, don't just pull them apart—gently tease them outward with your fingers. This encourages the roots to spread out into the surrounding soil rather than staying in a tight ball. I've found that plants with well-spread roots establish 30% faster than those with compacted roots.
Pruning Insight: The 12-18 inch trim right after planting isn't just about size control—it's about directing energy. By cutting back, you force the plant to put its resources into developing a strong root system rather than growing tall canes. For primocane varieties like Heritage Gold, remember to leave those canes intact—they'll fruit on new growth, so don't prune them back.
Pro Tips for Planting Raspberry Canes
- Between us, these small details make all the difference between raspberry bushes that thrive and ones that struggle.
- Soil Preparation Secret: That 6-inch hole test is your best friend for determining drainage.
- Spacing Strategy: Those 18-24 inches between canes might seem generous, but it's worth it.
Frequently asked questions
Got questions about planting raspberry canes? You’re not alone—growing these delicious berries takes a little know-how! Here are answers to the most common queries to help you get started on the right foot.
When is the best time to plant raspberry canes?
The ideal time to plant raspberry canes is in early spring (just before new growth starts) or fall (4-6 weeks before the first frost). This gives roots time to establish before extreme temperatures. If you’re in a mild climate, fall planting can work well, but avoid planting when the ground is frozen or waterlogged.
How long does it take for raspberry canes to produce fruit?
Patience is key! Primocanes (new growth) take 1-2 years to mature into fruiting canes (floricanes). Once established, healthy plants can yield berries for 5-10 years with proper care. Early varieties may fruit sooner, but don’t expect a harvest until the second year after planting.
What’s the best spacing for raspberry canes?
Space your raspberry canes 2-3 feet apart in rows that are 6-8 feet apart for good airflow and sunlight. If growing in containers, use 1-2 plants per 10-gallon pot. Overcrowding leads to disease and poor fruit quality, so give them room to thrive!
Why aren’t my raspberry canes producing berries?
Several factors could be at play:
- Age: Young plants (under 2 years) won’t fruit yet.
- Pruning issues: Over-pruning or cutting back old canes too early removes next year’s fruit.
- Pests/disease: Check for aphids, spider mites, or fungal spots (like cane blight).
- Nutrient deficiency: Yellow leaves? Test soil and amend with compost or balanced fertilizer.
Adjust care and monitor for improvements!
Can I plant raspberry canes in containers or small spaces?
Dwarf varieties (like ‘Heritage’ or ‘Boyne’) thrive in containers with at least 10 gallons per plant. Ensure pots have drainage holes, use well-draining soil, and place them in full sun. Just be ready to prune more aggressively to control growth and encourage fruiting.
Wrapping up and next steps
Planting raspberry canes is a rewarding journey that leads to a sweet, abundant harvest—and you’ve got all the secrets to make it thrive! 🌱 From pruning like a pro to spacing canes for optimal growth, every step sets the stage for juicy berries.
Now that you’re armed with knowledge, there’s only one thing left to do: roll up your sleeves and get planting.
Start by marking your spot, prepping the soil, and planting those canes with confidence. Before you know it, you’ll be savoring the fruits of your labor—literally. Happy gardening! 🍓