Shrubs
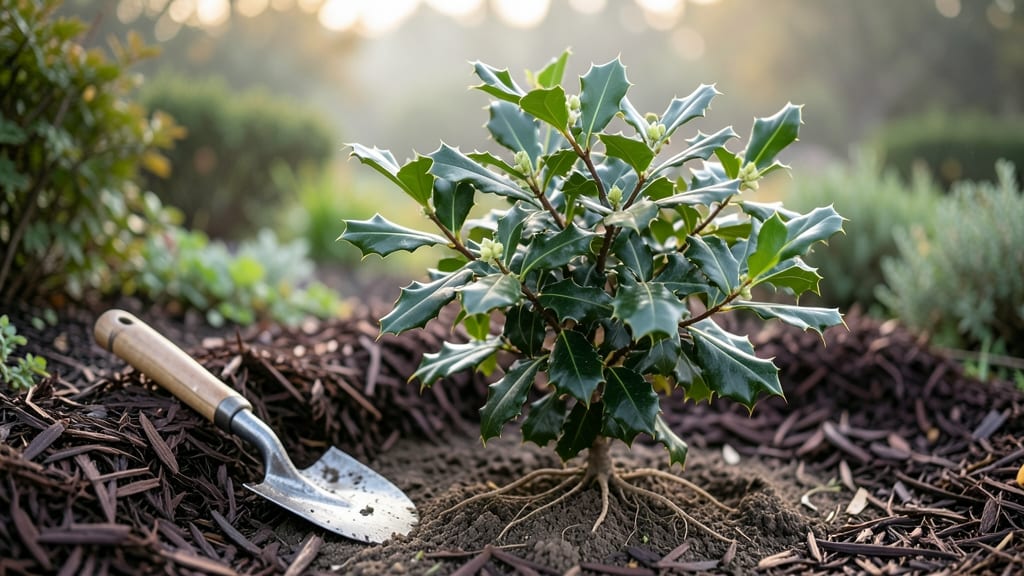
Planting holly bushes transforms your yard into a year-round green fortress. 🌿 I’ve planted mine in late fall and early spring, and the key is getting the soil just right—well-draining but moist, with a touch of compost to help roots spread.
The first year is all about patience; holly grows slowly but steadily, and by year three, you’ll have that dense, glossy privacy screen you’ve been dreaming of.
You’ll need a sunny spot with at least six hours of light, a shovel, and enough space to plant bushes 6 to 10 feet apart—closer for a tighter hedge, wider for full-grown width.
Dig a hole twice as wide as the root ball but no deeper, then loosen the roots before setting the plant in. Water deeply right after planting, and mulch around the base to lock in moisture while keeping weeds at bay.
Holly thrives with minimal fuss once established, but the first few months are critical. Keep the soil consistently moist but not soggy, and avoid fertilizing until spring. By summer, you’ll see new growth, and those iconic spiky leaves will start filling out.
The best part? They stay green all winter, making your yard stand out when neighbors’ gardens go dormant.
If you’re planting multiple bushes, stagger the rows to create a natural, layered look. And here’s a pro tip: male and female bushes are needed for berries, so add at least one male plant for every five females if you want those classic red ornaments.
Ready to get started? Your future privacy screen is just a shovel’s throw away.
📚 In This Guide
- What you need
- Instructions
- Tips and common mistakes
- Wrapping up and next steps
What you need
- ● Holly bushes: 3–5 plants per 10 feet of screen (varies by variety; check spacing guidelines for mature size). Opt for Ilex opaca (American holly) or Ilex × ‘Nellie R. Stevens’ for low-maintenance growth.
- ● Shovel or trowel: A round-point shovel (for digging holes) or a hand trowel (for smaller plants).
- ● Compost or well-aged manure: 2–3 gallons per plant to enrich soil.
- ● Mulch (pine straw, shredded bark, or wood chips): 2–3 inches to retain moisture and suppress weeds.
- ● Garden hose or watering can: With a spray nozzle for gentle watering.
- ● Gloves and knee pads: For comfort during planting.
- ○ Stakes and twine (optional but helpful): For young, tall holly varieties to prevent flopping.
- ● Soil amendment: Peat moss or composted leaves to improve drainage in clay-heavy soil.
- ● Slow-release fertilizer: 10-10-10 or holly-specific granules for a nutrient boost.
- ● Pruning shears: For shaping or trimming after planting.
- ● Soil pH test kit: Holly thrives in acidic soil (pH 5.0–6.0)—adjust with sulfur if needed.
- ● Drip irrigation system: For automated watering during dry spells.
Step-by-Step instructions for planting holly bushes
Here’s how I plant holly bushes for a lush, year-round privacy screen that thrives in any yard.
🌱 Step 1: Choose the Right Location and Dig Holes
Holly bushes need 6+ hours of sunlight daily but tolerate partial shade if your climate is hot. I mark spots 6-10 feet apart (depending on variety) to give them room to spread. Use a shovel to dig holes twice as wide as the root ball and just as deep—this prevents root strangulation.
Loosen the soil at the bottom of each hole with your fingers or a trowel. If your soil is heavy clay, mix in a handful of compost to improve drainage. Avoid disturbing the root ball when removing the plant from its container—holly roots are sensitive and can dry out quickly.
🪴 Step 2: Prepare the Root Ball and Position the Plant
Gently remove the holly bush from its container and inspect the roots. If they’re circling tightly, use your fingers to tease them outward slightly—this encourages outward growth instead of girdling. Place the plant in the hole so the top of the root ball sits 1 inch above ground level.
Here’s the thing—holly bushes hate soggy roots, so never bury the root flare (the swollen area where the roots meet the trunk). Fill the hole with native soil, pressing lightly around the edges to eliminate air pockets. Water deeply to settle the soil and help roots make contact.
☀️ Step 3: Mulch and Water for Establishment
Spread 2-3 inches of mulch around the base of each plant, keeping it 3 inches away from the trunk to prevent rot. I use shredded bark or pine straw because they break down slowly and retain moisture. Mulch also suppresses weeds, which compete with young holly bushes for nutrients.
Water immediately after planting to ensure the soil stays moist but not waterlogged. Holly bushes need 1 inch of water weekly during their first growing season, but check the soil—if the top 2 inches feel dry, water again. Overwatering is the fastest way to kill them, so let the top layer dry out slightly between waterings.
✂️ Step 4: Prune for Shape and Encourage Fullness
Skip heavy pruning the first year—let the holly bush establish its root system. In early spring, trim any broken or crossing branches with clean, sharp pruners. I like to shape mine into a slight pyramid to encourage dense growth. Cut just above a leaf node or outward-facing bud to promote new growth.
If you’re planting multiple bushes for a screen, prune the outer branches slightly to encourage inward growth. This creates a thicker barrier faster. Avoid pruning in late summer or fall—new growth won’t harden off before winter, and tender shoots will die back.
⏰ Step 5: Monitor and Maintain Through the Seasons
Holly bushes are low-maintenance once established, but I check them every few weeks for pests like spider mites or scale. A strong spray of water usually knocks off mites, and a dab of horticultural oil handles scale. Fertilize lightly in early spring with a balanced, slow-release fertilizer to support new growth.
In winter, holly bushes need no extra care unless your area gets heavy snow. Gently brush off accumulation to prevent branch breakage. By their third year, your screen will be dense enough to block wind and provide year-round privacy—no fences or temporary screens needed.
Tips & tricks for planting holly bushes
Planting holly bushes for a lasting privacy screen is easier when you know these key tricks to avoid common mistakes.
Soil Preparation Matters: In Step 1, when digging holes twice as wide as the root ball, take an extra moment to break up any compacted soil at the bottom. Holly roots need loose soil to spread outward—this prevents "root strangulation" where roots circle tightly instead of expanding. If your soil is heavy clay, mix in a handful of compost to improve drainage, but avoid over-amending with organic matter that could cause rot.
Root Ball Handling is Critical: During Step 2, when removing the holly bush from its container, gently squeeze the sides to loosen the root ball if it's stuck. Holly roots are delicate and can dry out quickly. If you notice roots circling tightly, use your fingers to tease them outward—this encourages outward growth rather than girdling, which can strangle the plant over time. The 1-inch elevation above ground level is crucial for preventing waterlogging.
Mulching Strategy for Success: In Step 3, when applying 2-3 inches of mulch, keep it 3 inches away from the trunk to prevent moisture buildup that causes rot. I've found that shredded bark or pine straw works best because they break down slowly while retaining moisture. This mulch layer also suppresses weeds that compete with young holly bushes for nutrients—just remember to reapply every few months as it decomposes.
Watering Wisdom: The 1-inch weekly watering guideline in Step 3 is perfect for most climates, but always check the top 2 inches of soil first. Holly bushes hate soggy roots, so let the top layer dry out slightly between waterings. I use a rain gauge or tuna can (filled with water) to measure exactly 1 inch—this prevents both underwatering and overwatering, which are the two biggest killers of young holly bushes.
Pro Tips for Planting Holly Bushes
- Planting holly bushes for a lasting privacy screen is easier when you know these key tricks to avoid common mistakes.
- Soil Preparation Matters: In Step 1, when digging holes twice as wide as the root ball, take an extra moment to break...
- Root Ball Handling is Critical: During Step 2, when removing the holly bush from its container, gently squeeze the si...
Frequently asked questions
about planting holly bushes—because even evergreens need a little guidance! Here are answers to the most common queries to help you grow a lush, thriving privacy screen.When is the best time to plant holly bushes?
Plant holly bushes in early spring or fall when soil temperatures are mild (50–70°F). Avoid extreme heat or frost—root establishment is key! Spring planting gives them time to grow before winter, while fall allows roots to settle before dormancy. Pro tip: Water deeply after planting to reduce transplant shock.
How far apart should I space holly bushes for a privacy screen?
Spacing depends on the holly variety and mature size. For dwarf hollies (e.g., 'Dwarf Burford'), plant 3–4 feet apart. Medium varieties (like 'Nellie R. Stevens') need 6–8 feet, while large hollies (e.g., 'Sky Pencil') should be 10–12 feet apart. Thinner spacing = faster coverage but more pruning later!
Why aren’t my holly bushes growing after planting?
Slow growth often stems from poor soil drainage, over/under-watering, or compacted soil. Ensure well-draining soil (amend with compost if needed) and water 1–2 inches weekly (more in drought). Check for pests like spider mites or scale insects. Pro tip: A light layer of mulch retains moisture and regulates soil temp!
Can I plant holly bushes in containers instead of the ground?
Yes! Holly bushes thrive in large containers (15+ gallons) with drainage holes. Use a balanced potting mix and repot every 2–3 years. Container-grown hollies may need more frequent watering and winter protection (move to a sheltered spot or wrap pots in burlap). Ideal for patios or small spaces!
Do holly bushes need male and female plants to produce berries?
Yes! Female holly bushes require a male pollinator (even if nearby) to produce berries. Plant at least one male bush for every 5–6 females within 30–50 feet. Popular male varieties include 'Southern Gentleman' or 'Jim Dandy.' Pro tip: Check your holly’s sex—some nurseries label plants!
How do I protect holly bushes in winter?
Most hollies are cold-hardy, but young plants or tender varieties (e.g., 'Chinese Holly') benefit from mulch (2–3 inches) around the base. Avoid heavy snow buildup on branches—gently brush it off. For container hollies, wrap pots in burlap or move to a sheltered area if temps drop below their zone’s tolerance.
Wrapping up and next steps
Planting holly bushes is a rewarding way to add year-round beauty, privacy, and wildlife support to your landscape! 🌿 With the right location, soil prep, and care, these evergreens will thrive for decades—offering lush foliage in winter, vibrant berries in fall, and even spring blooms.
Whether you’re creating a dense screen or adding focal points, holly delivers low-maintenance elegance that pays off in every season.
Ready to get started? Pick your favorite holly variety, mark your planting spots, and dig in! Your future privacy screen (and hungry birds!) will thank you. 🐦💚