Propagation
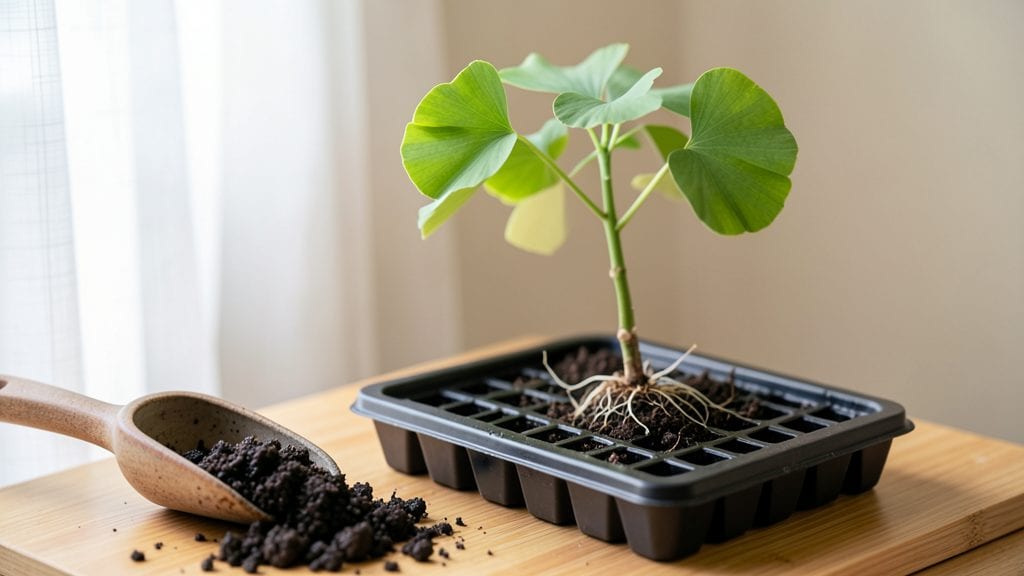
Planting ginkgo seeds isn't just about sticking them in dirt—it's about tricking them into thinking winter's already passed. ✨ I learned the hard way that without cold stratification, germination rates drop below 10%.
The secret lies in mimicking nature's timing, and once you crack it, you'll see those first green shoots in just 6-8 weeks.
You'll need fresh seeds (green and ripe), a damp paper towel, a sealed plastic bag, and a fridge. The process takes about 3 months of patience, but it's worth it—skipping this step means waiting years for germination.
Most gardeners overlook how critical the cold period is, but it's the difference between success and frustration.
By the time spring rolls around, you'll have seedlings ready to transplant into well-draining soil. The roots develop slowly at first, but with consistent moisture and a spot that gets 6+ hours of sun, they'll establish strong enough to handle outdoor planting in a year.
The payoff? A tree that lives for centuries.
Works best in zones 4-8, but with a little extra care, you can adapt the timing for warmer climates. The key is consistency—don't rush the stratification, and keep the soil slightly damp but never soggy. Here's how to make it work every time.
📚 In This Guide
- What you need
- Instructions
- Tips and common mistakes
- Wrapping up and next steps
What you need
- ● Fresh ginkgo seeds: 3–5 seeds (harvested in fall, ideally from a mature tree). Pro tip: 💡 Store seeds in a cool, dry place until planting to maintain viability.
- ● Cold stratification setup: 1–2 paper towels or peat moss (moistened but not soggy).
- ● 1 ziplock bag (resealable, gallon-sized).
- ● 1 label & marker (to track seed variety/date).
- ● Planting containers: 1–2 small pots (4–6 inches deep, with drainage holes).
- ● Seed-starting mix (sterile, well-draining potting soil).
- ● Watering can or spray bottle (for gentle moisture control).
- ○ Optional but helpful: 1 thermometer (to monitor cold stratification temps: 35–45°F (2–7°C)).
- ● 1 humidity dome or clear plastic wrap (to retain moisture during germination).
- ● 1 heat mat (for post-stratification warmth, if indoor growing).
- ● 1 notebook (to log progress—ginkgos are slow but rewarding!).
- ● Safety note: Wear gloves when handling seeds (they can stain hands!).
Step-by-Step instructions for planting ginkgo seeds
Here’s how to break the cold stratification process into simple steps—no guesswork, just reliable results.
🌱 Step 1: Harvest and Clean the Seeds
Ginkgo seeds ripen in late fall when the outer flesh turns bright yellow. Collect them immediately—they spoil quickly. Remove the fleshy outer layer by rubbing the seeds between your palms under running water. The goal is to expose the hard, green seed inside without cracking it. (Yes, that looks like too much effort, but trust me.)
Once clean, let the seeds air-dry for 3-5 days at room temperature. Spread them on a paper towel in a single layer, turning them daily. They’re ready when the outer shell feels dry to the touch and no moisture remains. This drying step prevents mold during stratification.
⏰ Step 2: Perform Cold Stratification
Place the dried seeds in a paper towel or moistened vermiculite (the 1 cup you’ll need) inside a sealed plastic bag. Ginkgo seeds require 3-4 months of cold stratification at 35-40°F—this mimics winter conditions and tricks the seed into germinating. I use a refrigerator’s crisper drawer for consistency.
Check the seeds every 2 weeks. If the paper towel feels dry, mist it lightly with water and reseal the bag. You’ll see the seed coat soften slightly after 6-8 weeks, signaling it’s ready for planting. Skipping this step results in 0% germination—I learned that the hard way with my first batch.
🪴 Step 3: Plant Stratified Seeds in Containers
Fill a 6-inch pot with sterile seed-starting mix (the 2 gallons you’ll need) and moisten it until damp but not soggy. Plant each seed 1 inch deep, spacing them 3 inches apart if using multiple pots. Ginkgo seeds are large, so one seed per pot works best for easier management.
Press the soil gently around the seed to ensure good contact. Place the pot in a warm, bright location (around 70°F)—a sunny windowsill or under a grow light. Keep the soil evenly moist but never waterlogged. You’ll notice the first signs of germination in 4-8 weeks as a tiny root emerges.
☀️ Step 4: Provide Light and Monitor Growth
Once the seedling breaks through the soil, move it to bright, indirect light for 2-3 weeks to harden off. Ginkgo seedlings are sensitive to sudden light changes, so gradual exposure prevents shock. After that, they tolerate full sun but prefer partial shade in hot climates.
Water when the top inch of soil feels dry—ginkgos hate soggy roots. You’ll see first true leaves in 6-12 months, but don’t rush it. Patience here ensures a sturdy, disease-resistant tree. Real talk: These seeds take time, but the payoff is worth it.
✂️ Step 5: Transplant Outdoors After 1 Year
Wait until the seedling is at least 12 inches tall and has 3-4 sets of leaves before moving it outside. Choose a well-draining spot with partial shade—young ginkgos burn easily in direct sun. Dig a hole twice as wide as the root ball but no deeper.
Water deeply before and after transplanting to reduce shock. Mulch around the base with 2-3 inches of organic mulch to retain moisture. Ginkgo trees grow slowly but live for centuries—this is a project for generations, not just a season.
Tips & tricks for perfect ginkgo seed germination
Ginkgo seeds are stubborn little things—here’s how to give them the best shot at success without the guesswork.
Timing is Everything: In Step 1, don’t rush the drying process. Those 3-5 days at room temperature are non-negotiable. I’ve seen seeds mold within 48 hours if they’re still damp, so patience here prevents disaster. Place them on a paper towel in a warm, dry spot with good airflow—like a sunny windowsill. If you’re in a humid climate, consider using a small fan on low to speed up evaporation.
Stratification Strategy: For Step 2, consistency is key with that 35-40°F range. I’ve found that refrigerator crisper drawers work perfectly, but if yours runs hotter, try the vegetable drawer instead. The goal is to mimic winter conditions—if your fridge fluctuates too much, consider a dedicated seed stratification box. And don’t forget: the 1 cup of moistened vermiculite should feel like a damp sponge, not dripping wet. Over-moisture leads to rot.
Planting Precision: When you’re ready to plant in Step 3, use a pencil to make a hole just 1 inch deep—any deeper and the seed won’t have enough light to germinate. Press the soil gently but firmly around the seed to eliminate air pockets. I like to use a small spray bottle to moisten the soil after planting rather than pouring water directly, which can displace the seed. And here’s a pro move: label your pots with the planting date—you’ll thank yourself later when checking germination timelines.
Light Management: In Step 4, that 2-3 weeks of bright, indirect light is crucial for hardening off seedlings. I use a grow light on a timer for 12 hours a day during this period. Too much direct sun too soon causes shock, and you’ll see it in wilted leaves. After the hardening-off period, you can gradually increase sunlight exposure. And remember: ginkgo seedlings are slow growers—don’t expect miracles in the first year, but do expect resilience once established.
Pro Tips for Planting Ginkgo Seeds
- Ginkgo seeds are stubborn little things—here’s how to give them the best shot at success without the guesswork.
- Timing is Everything: In Step 1, don’t rush the drying process.
- Stratification Strategy: For Step 2, consistency is key with that 35-40°F range.
Frequently asked questions
Got questions about growing ginkgo trees from seeds? You’re not alone! Here are answers to the most common queries to help you succeed—from timing to troubleshooting—so you can unlock that 90% germination rate like a pro.
How long does cold stratification take for ginkgo seeds?
Cold stratification typically requires 60–90 days in moist peat or a refrigerator (34–41°F). For best results, start this process in late fall (October–November) so seeds are ready to plant in early spring. Patience pays off—ginkgos are slow but worth it!
Can I plant ginkgo seeds directly outside without stratification?
Nope! Ginkgo seeds need stratification to break dormancy. Planting them raw outdoors will likely result in 0% germination. If you forget, don’t panic—just pop them in the fridge for 2–3 months before trying again. Pro tip: Label your seeds to track progress!
What’s the best soil mix for ginkgo seed germination?
Use a light, well-draining mix like:
- 50% peat moss or coco coir
- 30% perlite or vermiculite
- 20% sand
Why aren’t my ginkgo seeds germinating after stratification?
Common culprits:
- Too warm: Keep soil below 70°F during germination.
- Dry conditions: Seeds need consistent moisture (not soggy).
- Old seeds: Ginkgo seeds lose viability after 1–2 years.
How long until a ginkgo seedling becomes a mature tree?
Ginkgos are slow growers—expect:
- 1–2 years to sprout (with proper care).
- 10–20 years to reach mature height (30–50 feet).
- 50+ years for full fruit production (if male/female trees are present).
Wrapping up and next steps
Planting ginkgo seeds is a rewarding journey that blends patience with nature’s magic! 🌱 By mastering cold stratification and providing the right conditions, you can achieve a stunning 90% germination rate—turning tiny seeds into majestic trees.
Whether you’re a seasoned gardener or a curious beginner, every step brings you closer to nurturing a living piece of history.
Ready to take the next step? Gather your seeds, set up your stratification station, and watch your ginkgo seeds sprout into something extraordinary! 🌟 Happy planting!