Shrubs
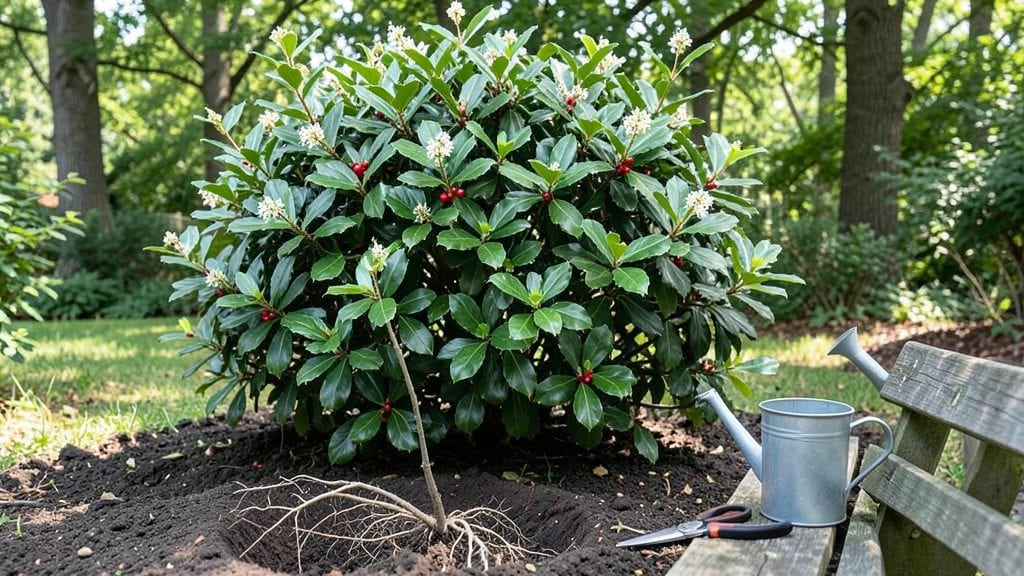
Planting evergreen bushes transforms your yard into a lush, four-season backdrop that never skips a beat. 🌿 I learned the hard way that proper planting makes the difference between bushes that thrive for decades and ones that struggle for years—my first attempt with poor soil prep nearly cost me a favorite arborvitae.
The secret isn’t just digging a hole; it’s about matching the right soil, spacing, and care to what your evergreens naturally need.
You’ll need a few key things: well-draining soil (amend heavy clay with compost), the right-sized hole (twice as wide as the root ball but no deeper), and a sturdy shovel for backfilling.
Evergreens hate soggy roots, so if your soil drains poorly, add a layer of gravel at the bottom of the hole. Spacing matters too—crowded bushes compete for nutrients and light, leading to weak growth and pest problems.
After planting, water deeply to settle the soil and eliminate air pockets around the roots. A good rule is to water enough that the soil drains out the bottom of the hole—this ensures the roots get a strong start.
Mulch around the base (but keep it a few inches away from the trunk) to retain moisture and protect against temperature swings. Within a few weeks, you’ll see new growth signaling the roots are establishing.
Evergreens are low-maintenance once established, but the first year is critical. Check soil moisture weekly (stick your finger in—if it’s dry an inch down, water again). In hot climates, you might need to water twice a week; in cooler areas, once every 10 days suffices.
With the right care, your bushes will grow steadily, providing year-round color and structure for your landscape.
📚 In This Guide
- What you need
- Instructions
- Tips and common mistakes
- Wrapping up and next steps
What you need
- ● Evergreen bushes: Choose 3–5 mature plants (depending on desired spacing), sized 1–3 gallons (12–24" tall). Popular picks: Holly, Boxwood, Juniper, or Azalea.
- ● Shovel or spade: A round-point shovel (12–14" wide) for digging holes efficiently.
- ● Garden gloves: Heavy-duty, waterproof gloves to protect hands from thorns (e.g., holly) and soil.
- ● Measuring tape or ruler: To ensure proper spacing (typically 3–6 feet apart, depending on bush variety).
- ● Compost or organic mulch: 2–3 cubic feet per bush (e.g., pine bark, shredded leaves, or composted wood chips).
- ● Slow-release fertilizer: 1–2 lbs per bush (e.g., 10-10-10 or 12-4-8 formula).
- ● Watering can or hose with nozzle: A gentle spray or soaker hose to avoid disturbing soil.
- ● Pruning shears: Bypass pruners (for trimming roots or shaping plants post-planting).
- ● Soil test kit: To check pH and nutrient levels (ideal range: 5.0–7.0 for most evergreens).
- ● Root stimulator: A powder or liquid (e.g., Mycorrhizal fungi) to boost root growth.
- ● Epsom salt: 1 tbsp per bush (for magnesium-rich soil, especially for Azaleas).
- ● Mulch mat or landscape fabric: To suppress weeds around the base.
- ● Stakes or plant ties: If planting in windy areas (especially for taller varieties like Juniper).
Step-by-step guide to planting evergreen bushes
Here's how I plant evergreens for lush, healthy growth that lasts all year.
🌱 Step 1: Choose the Right Location and Prepare the Soil
Evergreens thrive in well-draining soil with 6+ hours of sunlight daily. I dig a hole twice as wide as the root ball but only as deep—planting too deep suffocates roots. The hole should look like a cone, not a bowl, to encourage roots to spread outward.
Mix the removed soil with 2-3 inches of organic compost to improve drainage and fertility. Evergreens hate soggy roots, so if your soil drains poorly, add a handful of perlite to the mix. I like to work the compost into the sides and bottom of the hole first, then add a small mound of the amended soil in the center.
🪴 Step 2: Remove the Bush from Its Container and Inspect Roots
Gently squeeze the sides of the container to loosen the root ball before sliding the bush out. If roots are circling tightly (a common issue with container-grown plants), use your fingers to tease them outward. This prevents girdling, which strangles growth over time.
Check for any mushy or dark roots—these are rotting and should be trimmed away with clean pruners. Healthy roots are white or tan. Place the bush in the hole so the top of the root ball sits 1-2 inches above ground level. This prevents water from pooling around the stem and causing rot.
💧 Step 3: Plant and Water Deeply for Stability
Fill the hole with soil, pressing lightly as you go to remove air pockets. I like to add a slow-release fertilizer to the backfill soil for steady growth. Water the bush deeply right after planting—this settles the soil and eliminates air gaps. You should see water pooling at the surface before it drains away.
Mulch around the base with 2-3 inches of wood chips or pine straw, keeping it 3-4 inches away from the stem to prevent moisture buildup. Mulch helps retain soil moisture and regulates temperature, which evergreens appreciate year-round. Avoid piling mulch against the trunk, as this can cause rot.
☀️ Step 4: Provide Aftercare for Strong Establishment
Water newly planted evergreens once a week for the first month, or more often if your climate is hot and dry. You’ll know they need water when the soil feels dry 2-3 inches below the surface. Overwatering is the biggest mistake—evergreens prefer slightly dry soil to soggy conditions.
Fertilize lightly in early spring with a balanced, slow-release fertilizer. I avoid heavy feeding the first year, as new roots are still establishing. Prune only to shape or remove dead branches—never cut into old wood, as evergreens won’t regrow foliage from pruned areas.
Tips & tricks for perfect evergreen planting
These simple tricks will help your evergreens thrive for years to come—no green thumb required.
Soil Preparation Secret: Before planting, test your soil's drainage by digging a small hole and filling it with water. If it drains completely within an hour, your soil is fine. If water remains after 2 hours, mix in more perlite or coarse sand to improve drainage. Evergreens despise soggy roots, so this simple test can save you from future problems.
Root Ball Inspection: When removing your evergreen from its container, pay close attention to the roots. If you notice roots circling tightly around the root ball, gently separate them with your fingers. This prevents girdling—a common issue where roots strangle the plant as it grows. Think of it as giving your plant a root massage!
Planting Depth Matters: The top of the root ball should sit 1-2 inches above ground level after planting. This might seem counterintuitive, but it prevents water from pooling around the stem, which can cause rot. Imagine the root ball sitting on a small mound of soil—this creates the perfect drainage angle.
Mulching Like a Pro: Spread 2-3 inches of mulch around your evergreen, but keep it 3-4 inches away from the stem. This creates a protective barrier that regulates soil temperature and retains moisture. Use wood chips or pine straw—they break down slowly and improve soil quality over time. Just remember: mulch should look like a donut, not a volcano!
Pro Tips for Planting Evergreen Bushes
- These simple tricks will help your evergreens thrive for years to come—no green thumb required.
- Soil Preparation Secret: Before planting, test your soil's drainage by digging a small hole and filling it with water.
- Root Ball Inspection: When removing your evergreen from its container, pay close attention to the roots.
Frequently asked questions
Got questions about planting evergreen bushes? You’re not alone! Here are some of the most common concerns—plus quick, actionable answers to help you grow lush, thriving foliage all year long.
When is the best time to plant evergreen bushes?
The ideal window is early spring or fall—when temperatures are mild (50–70°F) and soil isn’t frozen. Spring gives bushes time to establish roots before summer heat, while fall planting avoids drought stress. Avoid planting in peak summer or winter, as extreme temps can shock young roots. Pro tip: Water deeply after planting and mulch to retain moisture!
Do evergreen bushes need winter care?
Most evergreens handle winter fine, but young or newly planted bushes may need extra protection. Apply a 2–3 inch layer of mulch around the base (but not touching the trunk) to insulate roots. For harsh climates, consider burlap wraps or frost cloth to shield tender varieties like Boxwoods. Avoid heavy snow buildup—gently brush it off to prevent branch breakage!
How close can I plant evergreen bushes to my house or fence?
Keep bushes 3–6 feet away from structures to allow airflow and prevent moisture buildup (which causes rot). For privacy screens, space them 3–5 feet apart—closer for compact varieties like Dwarf Alberta Spruce, wider for sprawling types like Arborvitae. Check mature size tags when shopping to avoid overcrowding!
Why are my evergreen bushes turning brown?
Brown tips or needles usually mean overwatering, underwatering, or salt buildup (from tap water). Check soil moisture—evergreens prefer well-draining soil. If roots are soggy, improve drainage; if dry, water deeply but infrequently. Brown patches in winter? It’s likely winter burn—apply anti-desiccant spray in late fall to protect foliage.
What’s a good alternative to traditional evergreen bushes?
If you want low-maintenance, year-round greenery but prefer alternatives, try:
Choose based on your climate—some (like Leucothoe) handle humidity better than others!
Wrapping up and next steps
Planting evergreen bushes is a rewarding way to add year-round color, texture, and privacy to your landscape—no green thumb required! 🌿 Whether you’re a beginner or a seasoned gardener, choosing the right species, preparing the soil, and giving them proper care will ensure lush, thriving bushes that stand the test of time.
With patience and a little know-how, you’ll enjoy a vibrant, low-maintenance garden that keeps your outdoor space beautiful in every season.
Ready to take the next step? Pick your favorite evergreen variety, grab your tools, and start planting—your future self (and your neighbors!) will thank you. Happy gardening! 🌱