Shrubs
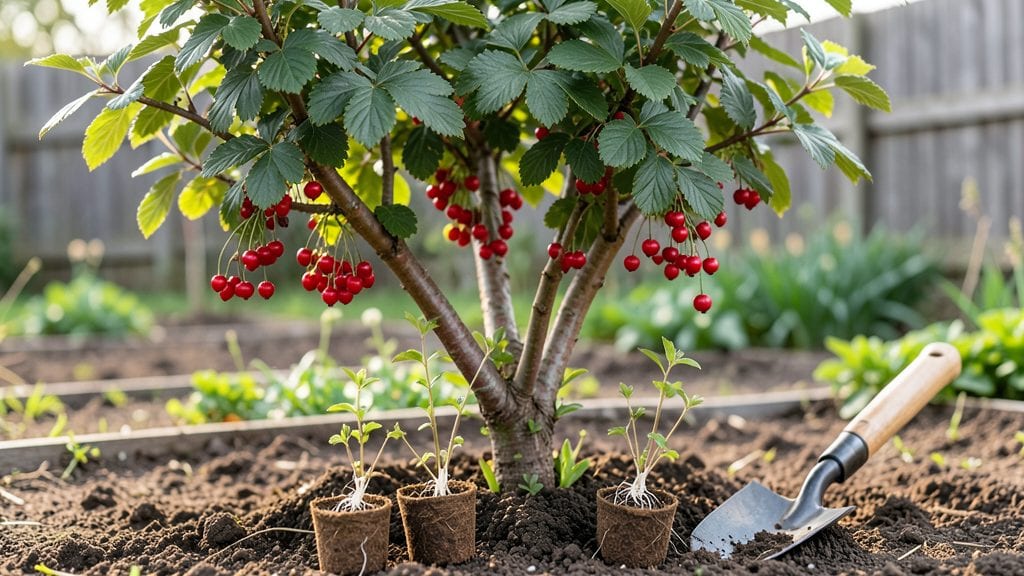
Planting currant bushes in well-drained soil means foolproof berry harvests with almost no fuss—just rich, deep flavors and minimal maintenance once they’re established. 🌿 I’ve planted three varieties over the years, and the ones I chose for their hardiness and compact size now produce buckets of berries with almost no effort after the first year.
The secret starts with the right spot: currants love morning sun and afternoon shade, especially in hotter climates where leaves can scorch.
You’ll need healthy nursery stock, a 5-foot spacing between plants, and a shovel for digging. The soil should be loose and amended with compost—currants hate soggy roots but thrive in slightly acidic, fertile ground.
Plant the bushes 2 inches deeper than their container level, and water them deeply right after planting to settle the soil. Most people overwater at first, but currants are tough once they’re settled.
Within a month, you’ll see new growth pushing through the soil, and by next summer, you’ll be harvesting berries that taste like candy.
The bushes stay compact, so they don’t take over your yard, and they’re resistant to most pests—just watch for white pine blister rust if you’re in a high-risk area. Prune lightly in late winter to keep them tidy, and you’re done.
This method works for red, black, and golden currants, and it’s perfect for small gardens, containers, or even urban yards. Once you’ve planted them right, they’ll reward you for years with almost no work. Let’s get those bushes in the ground!
📚 In This Guide
- What you need
- Instructions
- Tips and common mistakes
- Wrapping up and next steps
What you need
- ● Currant bushes: 3–5 healthy, disease-free plants (red, black, or white currants—your choice!)
- ● Shovel or trowel: For digging holes (a 5–6 inch-wide shovel works best)
- ● Garden gloves: To keep your hands clean and protected
- ● Compost or well-aged manure: 5–10 lbs per plant (boosts soil fertility)
- ● Mulch (straw, wood chips, or pine needles): 2–3 inches thick (retains moisture, suppresses weeds)
- ● Pruning shears: For trimming dead or overgrown branches
- ● Watering can or hose with a gentle spray nozzle: For post-planting hydration
- ● Soil test kit: To check pH (currants prefer 6.0–6.5)
- ● Fertilizer (balanced or acidic, like peat moss): If your soil is lacking nutrients
- ● Plant supports (stakes or cages): For taller varieties (like black currants)
- ● Bird netting: To protect ripening berries from hungry birds 🐦
- ● Organic pest control (neem oil, diatomaceous earth): For aphid or spider mite prevention
Step-by-step guide to planting currant bushes
Here’s how to plant currant bushes for a bountiful harvest with minimal fuss.
🪴 Step 1: Choose the Perfect Spot and Prepare the Soil
Currants thrive in full sun to partial shade, so pick a location that gets at least 6 hours of sunlight daily. They also need well-draining soil—avoid low spots where water pools. Before planting, loosen the soil to a depth of 12 inches using a garden fork or tiller. This helps roots spread easily.
Mix in 2-3 inches of compost to enrich the soil, but avoid fresh manure—it can burn tender roots. Test the soil pH; currants prefer slightly acidic to neutral soil (pH 6.0-7.0). If your soil is too alkaline, add sulfur to adjust it gradually. Here’s the thing—currants hate soggy roots, so if your yard drains poorly, consider planting on a mound or raised bed.
🌱 Step 2: Dig Holes and Plant the Bushes
Dig holes twice as wide as the root ball but only as deep as the container’s root base. This prevents burying the stem too deeply, which can cause rot. Gently remove the bush from its container and tease apart any circling roots—this encourages outward growth. Place the plant in the hole so the top of the root ball sits 1 inch above ground level. This slight elevation helps prevent water from sitting against the stem.
Fill the hole with soil, pressing lightly around the roots to remove air pockets. Water deeply right after planting to settle the soil and eliminate gaps. Space bushes 4-6 feet apart—this gives them room to grow without competing for nutrients. If planting a hedge, maintain 3-4 feet between plants for a denser look. Don’t skip this step; crowded currants produce smaller berries and struggle with diseases.
💧 Step 3: Water and Mulch for Healthy Growth
Water the newly planted bushes deeply once a week for the first month, ensuring the soil stays moist but not waterlogged. After that, reduce watering to every 10-14 days, depending on rainfall. Currants are drought-tolerant once established, but young plants need consistent moisture to root well. You’ll know you’re doing it right when the soil feels damp 2 inches below the surface—stick your finger in to check.
Apply 2-3 inches of organic mulch, like wood chips or straw, around the base of each bush. Keep the mulch 3 inches away from the stem to prevent rot. Mulch helps retain moisture, suppress weeds, and regulate soil temperature. Replenish mulch annually to maintain its benefits. Real talk: Mulching saves time and keeps your bushes healthier with less effort.
☀️ Step 4: Provide Support and Prune for Better Yields
Currants benefit from light pruning in late winter or early spring before new growth begins. Remove any dead, diseased, or crossing branches first—this improves air circulation and reduces pests. Then, cut back any overly long or weak stems to encourage stronger growth. Aim to shape the bush into an open, vase-like form. You’ll see more berries and easier harvesting if you keep the center of the bush open to sunlight.
If your currants grow tall or flop over, install light stakes or a small trellis to support them. This isn’t always necessary, but it helps in windy areas or if you’re growing taller varieties like black currants. Prune again after harvesting to remove any fruited wood—this redirects the plant’s energy into next year’s crop. Currants are forgiving, but consistent pruning keeps them productive for years.
Tips & tricks for planting currant bushes
Here's what I learned after years of growing currants—and how to avoid the mistakes I made.
The Sunlight Secret: While 6 hours of sunlight is the minimum, I've found currants actually thrive with 8-10 hours daily for maximum berry production. If your spot gets less, choose a more shade-tolerant variety like red currants. They'll still fruit, just with slightly smaller yields.
Soil Prep Game-Changer: Don't just loosen that 12 inches of soil—break up any large clumps and mix in a handful of perlite or coarse sand if your native soil is heavy clay. This improves drainage dramatically, which is critical since soggy roots are currants' biggest enemy. I've seen bushes in poorly draining soil develop root rot within months.
Planting Depth Tip: That 1-inch elevation above ground level is crucial, but here's the thing: if your soil is particularly dense, consider raising the entire planting area by 2-3 inches. This creates better drainage from the start and prevents water from pooling against the stem. I've had better success with raised beds for currants than flat ground.
Mulch Strategy: When applying that 2-3 inches of mulch, use a wider radius than you might think—about 18 inches from the stem. This creates a moisture-retaining zone that encourages deeper root growth. Just remember to keep it 3 inches away from the stem to prevent rot. I've seen bushes with mulch piled against the stem develop fungal issues within weeks.
Pro Tips for Planting Currant Bushes
- Here's what I learned after years of growing currants—and how to avoid the mistakes I made.
- The Sunlight Secret: While 6 hours of sunlight is the minimum, I've found currants actually thrive with 8-10 hours daily for maximum berry production.
- Soil Prep Game-Changer: Don't just loosen that 12 inches of soil—break up any large clumps and mix in a handful of perlite or coarse sand if your native soil is heavy clay.
Frequently asked questions
Got questions about planting currant bushes? You’re not alone! Here are some of the most common concerns—and their simple solutions—to help you grow like a pro.
When is the best time to plant currant bushes?
Plant currant bushes in early spring or fall when the soil is workable but not frozen. Avoid extreme heat or drought, as young plants need consistent moisture to establish roots. If you’re in a mild climate, fall planting (6-8 weeks before frost) gives roots time to settle before winter.
How far apart should I space currant bushes?
Space currant bushes 4-6 feet apart for red and white currants, or 5-7 feet apart for black currants (which grow larger). Proper spacing ensures good airflow, reducing disease risk and making harvesting easier. If space is tight, opt for dwarf varieties like ‘Consort’ or ‘Ben Connan.’
Why are my currant leaves turning yellow or curling?
Yellowing or curling leaves often signal fungal diseases (like powdery mildew) or aphids. Improve airflow by pruning, avoid overhead watering, and treat with neem oil or insecticidal soap if pests appear. For fungal issues, apply a copper fungicide in early spring as a preventive measure.
Can I grow currant bushes in containers?
Yes! Currants thrive in large containers (at least 18-24 inches deep) with well-draining soil and regular watering. Choose compact varieties like ‘Red Lake’ or ‘Black Down.’ Just ensure the pot has drainage holes and move it to a sunny spot (6+ hours of light daily). Containers also make harvesting easier!
Do currant bushes need winter protection?
In cold climates (Zone 3-5), protect young bushes with a 3-4 inch layer of mulch (straw or wood chips) and wrap the base with burlap if temps drop below -10°F. Established bushes usually handle winter well, but late frosts can damage flowers—cover with frost cloth if needed.
Are currants easy to grow compared to berries like raspberries?
Yes! Currants are low-maintenance—they don’t need trellises (unlike raspberries), are less prone to pests, and produce berries on both old and new wood. However, they’re more susceptible to fungal diseases, so proper spacing and sanitation are key. Think of them as the “set-it-and-forget-it” berry!
Wrapping up and next steps
Planting currant bushes is a rewarding experience that brings delicious, low-maintenance fruit to your garden with just a little effort! By choosing the right location, preparing the soil, and following proper spacing and care tips, you’ll set the stage for a bountiful harvest year after year.
Whether you’re a seasoned gardener or a beginner, these simple steps make growing currants both accessible and enjoyable.
Now that you’re armed with the knowledge, roll up your sleeves and get planting! 🌱 Start small—pick a sunny spot, grab your tools, and soon you’ll be savoring homegrown berries. Happy gardening!