Picking
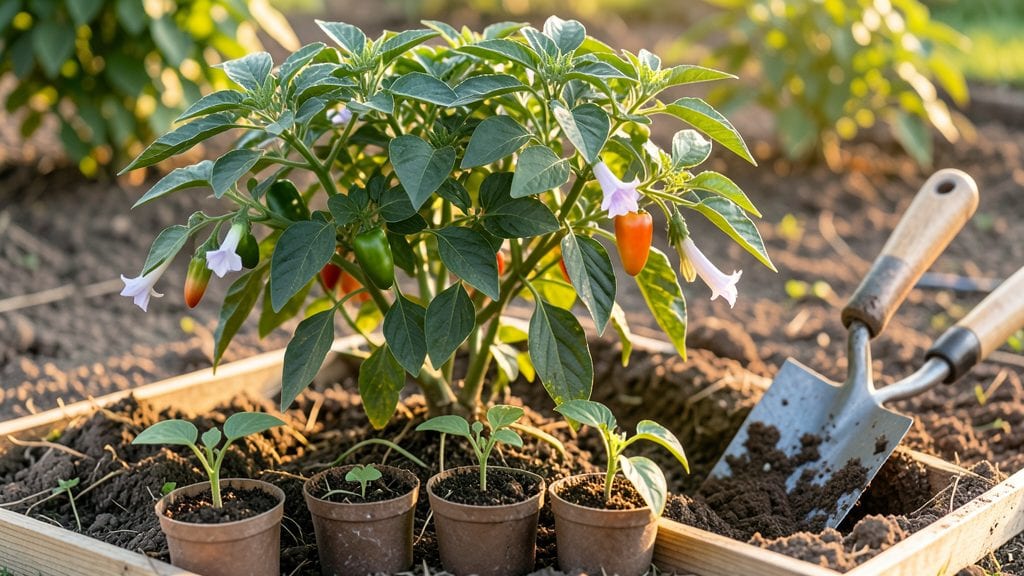
Planting Anaheim peppers from seed to harvest delivers a rewarding harvest of mild, versatile peppers perfect for stuffing, roasting, or fresh eating. I’ve grown them in every season, and the key to success starts with timing, soil, and a little patience—especially when you’re working with a shorter growing season.
The first step is choosing the right time to plant, which depends on whether you’re starting indoors or directly in the ground.
For best results, begin seeds indoors 8-10 weeks before your last frost date, using a well-draining seed-starting mix and keeping them in a warm spot (around 75°F). If you’re planting directly outdoors, wait until soil temperatures reach 60°F or higher—cold soil slows germination and stunts growth.
Anaheim peppers thrive in full sun (at least 6-8 hours daily), so pick a spot where they won’t be shaded by taller plants or structures.
Once seedlings are 3-4 inches tall and have 2-3 true leaves, they’re ready to transplant. Space them 18 inches apart in rows 2 feet apart to allow airflow and prevent disease.
The deeper you plant them (up to the first set of leaves), the stronger the root system becomes, which translates to bigger peppers later. Water deeply after planting to settle the soil and encourage root growth.
Here’s where most beginners trip up: overwatering or inconsistent moisture. Anaheim peppers need 1-1.5 inches of water per week, but they hate soggy soil. Let the top inch dry out between waterings, and always water at the base to avoid wetting the leaves—this prevents fungal issues like blight.
Within 60-70 days after transplanting, you’ll see those first peppers forming, and with proper care, you’ll have a harvest that lasts through fall.
📚 In This Guide
- What you need
- Instructions
- Tips and common mistakes
- Wrapping up and next steps
What you need
- ● Seeds or Seedlings: 5–10 Anaheim pepper seeds (or 3–5 starter seedlings from a nursery).
- ● Pro tip: 💡 Opt for heirloom or organic seeds for richer flavor!
- ● Containers: 5–10-inch pots with drainage holes (one per plant) or a 5-gallon grow bag for multiple plants.
- ○ Optional: Self-watering pots to keep moisture consistent.
- ● Soil: 1–2 bags of well-draining potting mix (look for "pepper mix" or amend regular soil with perlite/vermiculite).
- ● Pro tip: 🌡️ Mix in compost (10–20%) for extra nutrients!
- ● Fertilizer: Balanced liquid fertilizer (e.g., 10-10-10) or organic options like fish emulsion.
- ● Slow-release granular fertilizer (follow package rates).
- ● Tools: Trowel or small shovel for transplanting.
- ● Spray bottle (for seedling hydration).
- ● Pruning shears (for later trimming).
- ● Sunlight: 6+ hours of direct sunlight daily (south-facing window or grow lights).
- ● Temperature: Warmth is key! Keep soil at 70–85°F (use a heat mat if starting indoors).
- ● Water: Access to room-temperature water (peppers hate cold roots!).
- ● Patience: 🎯 Anaheims take 70–90 days to mature—plan ahead!
Step-by-Step instructions for planting Anaheim peppers
Here's how to grow vibrant, productive Anaheim peppers from seed to harvest using proven techniques.
Prepare Containers and Seed-Starting Mix
Start with four 4-inch diameter pots filled with 2 gallons of sterile seed-starting mix. Anaheims thrive in airy, moisture-retentive soil that prevents root rot. I press the mix down lightly with my fingers until it's firm but not compacted—this ensures roots can push through easily without air pockets. The goal is a texture that holds its shape when squeezed but crumbles when poked with a finger.
Moisten the mix thoroughly with warm water until it feels like a damp sponge. Avoid cold water, which can shock the seeds and delay germination. Place the pots in a shallow tray to catch any excess water, then let them sit for 10 minutes to ensure even moisture distribution. This prep work prevents the common issue of seeds drying out or sitting in soggy soil.
Sow Seeds at the Correct Depth and Spacing
Plant one Anaheim pepper seed per pot at a depth of ¼ inch, using the depth gauge provided with your seed packet. Sowing too deep forces seedlings to work harder to reach the surface, while planting too shallow risks exposing them to drying out. I like to use a toothpick to make a small hole, drop the seed in, then cover it lightly with additional mix.
Gently pat the soil surface around each seed to secure it in place. Label each pot immediately with the planting date and variety—Anaheims can look identical to other peppers until they fruit. Place the tray in a warm, dark location (around 75-80°F) to encourage germination. Expect sprouts in 7-14 days, depending on your home's humidity levels.
Provide Optimal Light and Temperature
Once seedlings emerge, move them to a location with 14-16 hours of bright light daily. A south-facing window rarely provides enough intensity, so I supplement with a full-spectrum LED grow light positioned 2-3 inches above the seedlings. Raise the light as plants grow to maintain that distance—this prevents leggy, weak stems that can't support heavy peppers later.
Keep soil consistently moist but never soggy. Anaheims hate sitting in waterlogged conditions, which can cause root rot. Water from the bottom by placing pots in an inch of water for 10-15 minutes, then drain excess. You'll know moisture is right when the soil surface looks slightly damp but not glistening. Maintain temperatures between 65-75°F during the day and 55-65°F at night for best growth.
Transplant and Harden Off Seedlings
Two weeks before your last frost date, begin hardening off seedlings by placing them outside in a sheltered spot for 1-2 hours the first day. Gradually increase outdoor time by 1 hour daily until they can tolerate a full day outside. This process teaches plants to adapt to wind, sun, and temperature fluctuations without shock.
Choose a sunny garden spot with 6-8 hours of direct sunlight and well-draining soil amended with 1 gallon of compost. Dig holes 12-18 inches apart—Anaheims need space to develop strong root systems. Transplant seedlings on an overcast afternoon to reduce stress, then water deeply at the base. Mulch with 1 inch of straw to retain moisture and suppress weeds, which is especially important in hot climates.
Maintain Through the Growing Season
Water Anaheims at the base 1-2 inches deep whenever the top 1 inch of soil feels dry. Overhead watering can spread fungal diseases, so I use a soaker hose or drip irrigation instead. Fertilize every 4-6 weeks with a balanced 10-10-10 formula to encourage both foliage and fruit production.
Prune suckers (the small shoots that form in the leaf axils) to direct energy toward fruit development. You'll see these suckers as tiny buds where a leaf meets the stem—remove them with clean pruners. Harvest peppers when they reach 6-8 inches long for the best flavor and heat balance. This encourages continuous production throughout the season.
Tips & tricks for perfect Anaheim pepper planting
A few key techniques will help you avoid common pitfalls and maximize your Anaheim pepper harvest from seed to harvest.
The Soil Texture Secret: When preparing your seed-starting mix in Step 1, aim for a texture that resembles damp potting soil—it should hold its shape when squeezed but easily crumble when poked with your finger. This balance prevents both compaction (which restricts root growth) and excessive dryness (which delays germination). The 10-minute moisture settling period is crucial; it allows water to distribute evenly without creating waterlogged pockets that can cause damping-off disease.
Germination Temperature Control: Maintaining that 75-80°F range during germination in Step 2 makes all the difference. I've found that placing the seed tray on top of a refrigerator (not inside) provides consistent warmth without overheating. If your home tends to be cooler, consider using a seedling heat mat—just be cautious not to exceed 85°F, which can inhibit germination. The 7-14 day window for sprouts is normal, but if you're in a particularly humid environment, germination may occur on the faster end of that spectrum.
Light Management Technique: For the critical 14-16 hours of light in Step 3, I recommend using a timer for your grow light to maintain consistency. Anaheim seedlings will naturally stretch toward any light source, so rotate your pots daily to ensure even growth. The 2-3 inch distance from light to seedlings is ideal—too close causes leaf burn, while too far results in leggy, weak plants that can't support heavy pepper production later. Watch for the first true leaves (the second set after the initial seed leaves) as your indicator that the seedlings are ready for this light regimen.
Transplanting Timing Strategy: When hardening off seedlings in Step 4, I've learned that starting with just 1-2 hours on the first day helps prevent transplant shock. Gradually increasing by 1 hour daily gives seedlings time to acclimate to outdoor conditions. A pro move is to transplant on an overcast afternoon—cloud cover reduces the intensity of sunlight, giving seedlings a gentler introduction to their permanent environment. The 12-18 inch spacing is non-negotiable; Anaheims need room to develop their extensive root systems for maximum fruit production.
Pro Tips for Planting Anaheim Peppers
- A few key techniques will help you avoid common pitfalls and maximize your Anaheim pepper harvest from seed to harvest.
- The Soil Texture Secret: When preparing your seed-starting mix in Step 1, aim for a texture that resembles damp potting soil—it should hold its shape when squeezed but easily crumble when poked with your finger.
- Germination Temperature Control: Maintaining that 75-80°F range during germination in Step 2 makes all the difference.
Frequently asked questions
Got questions about growing your own Anaheim peppers? You’re not alone! Here are some of the most common queries—plus quick answers to help you cultivate a thriving harvest.
When is the best time to plant Anaheim peppers?
Start seeds indoors 8–10 weeks before your last frost date (typically late winter/early spring). Transplant seedlings outdoors after soil reaches 60°F (15°C) and nighttime temps stay above 50°F (10°C). Anaheims thrive in warm weather, so avoid planting too early—cold snaps stunt growth!
How long does it take for Anaheim peppers to grow?
From seed to harvest, expect 70–90 days for mature peppers. Seedlings take 6–8 weeks to germinate and grow strong enough for transplanting. Patience pays off—peppers need time to bulk up before producing fruit! Pro tip: Use a growth chart to track progress.
Can I grow Anaheim peppers in containers?
Choose a 5-gallon pot or larger with drainage holes. Use well-draining soil and place containers in full sun (6+ hours/day). Dwarf varieties like ‘Lunchbox’ work well in pots. Just ensure pots stay warm—containers cool faster than garden beds.
Why aren’t my Anaheim peppers producing fruit?
Common culprits: inconsistent watering, nutrient deficiencies (add compost or balanced fertilizer), or temperature stress (peppers need warmth to set fruit). Check for pests (aphids, spider mites) and ensure plants get full sun. If flowers drop, it might be too hot—provide afternoon shade if temps exceed 90°F (32°C).
What can I plant alongside Anaheim peppers?
Companion plants boost growth! Try basil, onions, garlic, or marigolds to deter pests and improve flavor. Avoid planting near fennel or brassicas (kale, cabbage), which can stunt pepper growth. Bonus: Interplanting with herbs like cilantro or dill attracts beneficial insects.
Wrapping up and next steps
Growing Anaheim peppers is a rewarding journey that brings bold flavors straight from your garden to your plate! 🌱 Whether you're a seasoned gardener or a curious beginner, these versatile peppers thrive with just a little patience and care.
Now that you’re equipped with the right tools, tips, and troubleshooting advice, it’s time to roll up your sleeves and plant those seeds—your future salsas, stir-fries, and grilled dishes are waiting!
Ready to take the next step? Start small—try a few plants in pots or a sunny patch of your yard—and watch your confidence (and harvest!) grow. Happy planting! 🌞