Propagation
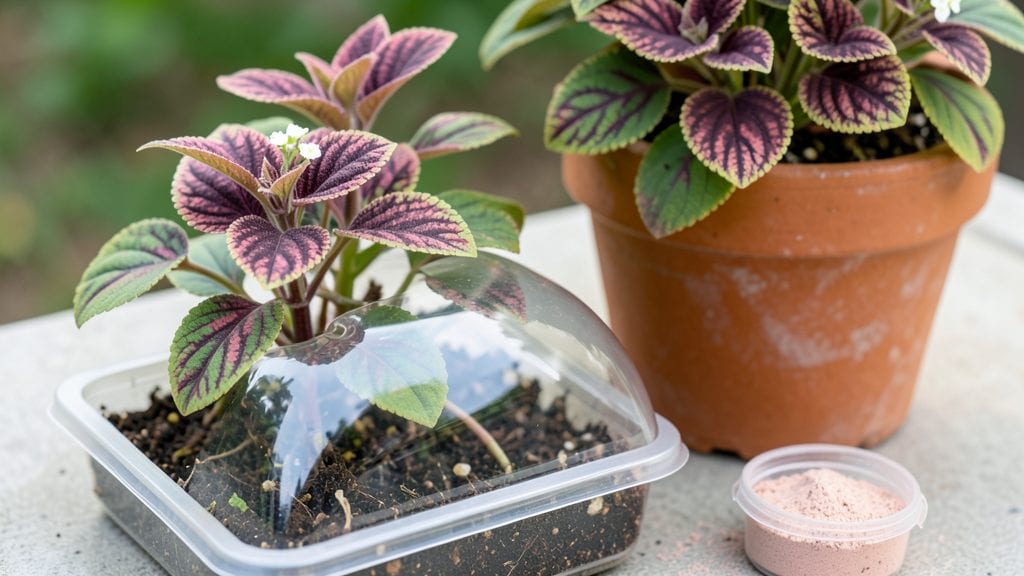
Plant cutting propagation turns scraps into thriving plants in just three weeks—and I’ve perfected the method after rooting dozens of cuttings, from herbs to roses. The key isn’t luck; it’s matching the right plant to the right technique, whether that’s water, soil, or even a damp paper towel.
Most beginners overcomplicate it, but the science is simple: cut at the right spot, control humidity, and wait. My first successful cutting was a basil stem that rooted in a glass of water, and now I propagate year-round.
You’ll need basic supplies: sharp scissors, rooting hormone (optional but helpful), and either water or a well-draining mix of perlite and peat. Herbs like mint and basil root easily in water, while woody plants like roses prefer soil.
The trick is keeping cuttings moist but not soggy—think of it like a greenhouse in a jar. Within 10-14 days, you’ll see tiny roots forming, and by week three, they’re ready to plant out. It’s shockingly reliable once you get the hang of it.
What you end up with is a lush, self-sustaining garden—free plants for your home, gifts for friends, or even a small business. The first time I watched a cutting grow roots before my eyes, I realized how much cheaper and easier it is than buying plants.
Plus, propagated plants adapt better to your soil and climate. Here’s how to avoid the two biggest mistakes: rot (from too much water) and slow growth (from poor light).
This method works for indoor herbs, outdoor shrubs, and everything in between—even if you’ve failed before, this time will be different. The satisfaction of growing a full plant from a single cutting is unmatched. Let’s get those cuttings rooted!
📚 In This Guide
- What you need
- Instructions
- Tips and common mistakes
- Wrapping up and next steps
What you need
- ● Healthy parent plant: Choose a mature, non-flowering stem (4–6 inches long, with at least 2–3 leaf nodes).
- ● Sharp pruning shears or scissors: Sterilized to prevent disease (1 pair).
- ○ Rooting hormone (optional but recommended): Powder, gel, or liquid (1 small container).
- ● Well-draining propagation medium: Perlite or vermiculite (1–2 cups), or
- ● Sphagnum moss (1 small bag), or
- ● Cactus/succulent mix (1 small bag).
- ● Small pots or propagation trays: 2–4 inch pots (2–4 units) with drainage holes.
- ● Clear plastic bag or humidity dome: To retain moisture (1–2 units).
- ● Spray bottle: With water (1 unit, 8–16 oz).
- ● Watering can or cup: For hydrating the medium (1 unit).
- ● Heat mat: Speeds up rooting (1 unit, 100–150W).
- ● Grow lights: For low-light setups (1–2 units, LED preferred).
- ● Fungicide: Prevents rot (1 small bottle).
- ● Labels & markers: Track plant types (1 pack).
- ● Aluminum foil: Covers pots to block light (if propagating in bright conditions).
Step-by-step instructions for plant cutting propagation
Here’s how to coax roots from cuttings in just three weeks—no fancy equipment needed.
Select Healthy Cuttings and Prep Them Properly
Choose stems that are 4-6 inches long with at least 3-4 sets of leaves and no signs of disease. I always snip just below a leaf node (the bump where leaves grow) with clean, sharp scissors. This ensures the cutting has the energy reserves to grow new roots. Remove the lower leaves, leaving only the top 2-3 sets, so they won’t rot in the water or soil.
Let the cut ends callus over for 12-24 hours before planting. This means placing them in a dry, shaded spot to form a slight scab—it prevents rot when you put them in water or soil. Think of it like letting a paper cut heal before bandaging it. If you skip this step, your cuttings may develop mold instead of roots.
Choose Your Propagation Method
For water propagation, fill a clean glass or jar with room-temperature water and place the cuttings so only the bare stem (no leaves) is submerged. Change the water every 3-4 days to keep it fresh and prevent bacteria. You’ll see tiny white roots in 2-3 weeks—that’s your signal to transplant into soil. This method works best for plants like pothos, mint, and coleus.
For soil propagation, dip the callused end in rooting hormone (if using) and stick it into moist potting mix about 2 inches deep. Keep the soil consistently damp but not soggy—think of it like wringing out a sponge. Cover the pot with a plastic bag to trap humidity, but prop it open slightly so air can circulate. This setup speeds up rooting for plants like succulents, lavender, or herbs.
Provide Ideal Conditions for Root Growth
Place your cuttings in a spot with bright, indirect light—direct sun can scorch tender new growth. A south-facing window works, but if your space is dim, supplement with a grow light kept 6-12 inches away. Avoid drafts or temperature swings; aim for a steady 65-75°F. Too cold, and roots grow slowly; too hot, and the cuttings wilt.
Check moisture daily. For water propagation, roots should appear in 2-3 weeks—if not, try adding a pinch of cinnamon to the water (it fights bacteria). For soil propagation, gently tug on the cutting after 3 weeks—if you feel resistance, roots have formed. If not, give it another week before transplanting.
Transplant and Care for New Plants
Once roots are 1-2 inches long, it’s time to move your cuttings to their permanent home. For water-propagated plants, transfer them to potting mix and water lightly to settle the soil. For soil-propagated cuttings, gently remove them and replant, firming the soil around the base. Water thoroughly but avoid drowning the roots—soggy soil suffocates them.
Keep new plants in partial shade for a week to help them adjust, then gradually introduce them to their usual light conditions. Fertilize lightly after 4-6 weeks with a balanced houseplant fertilizer to encourage leaf growth. With patience, your cuttings will thrive as full-fledged plants in just a few months.
Tips & tricks for perfect plant cutting propagation
Here's what I've learned after successfully rooting dozens of cuttings—these tricks make all the difference between success and disappointment.
Callusing is Non-Negotiable: That 12-24 hour callusing period in Step 1 isn't optional. I learned this the hard way when my first batch of cuttings developed mold because I rushed them into water. Place your cuttings in a dry, shaded spot where they can breathe. You'll know they're ready when you see a slight scab form at the cut end—this natural barrier prevents rot when you finally put them in water or soil.
Water Quality Matters: For water propagation, use filtered or room-temperature tap water that's been sitting out for at least an hour. I've found that plain water from the faucet can contain chlorine or bacteria that stunts root growth. Changing the water every 3-4 days as instructed prevents algae growth and keeps your cuttings healthy. If you notice any cloudiness or slimy residue, it's time for a fresh change.
Rooting Hormone Shortcut: While rooting hormone isn't required, it can dramatically speed up root development for soil propagation. I like to use a powder formula because it's easy to apply—just dip the callused end and tap off the excess. For stubborn plants like rosemary or lavender, this extra step can cut your waiting time in half. If you don't have hormone, willow water (steep willow branches in water for 24 hours) works as a natural alternative.
Light Balance is Critical: The bright, indirect light mentioned in Step 3 is essential, but finding the right balance can be tricky. I've had cuttings get sunburned when placed too close to a south-facing window, and others stretch leggy when they don't get enough light. A simple test: if your cuttings are growing toward the light source, they need more indirect exposure. For indoor growers, a basic LED grow light kept 6-12 inches away provides perfect conditions without the risk of overheating.
Pro Tips for Plant Cutting Propagation
- Here's what I've learned after successfully rooting dozens of cuttings—these tricks make all the difference between success and disappointment.
- Callusing is Non-Negotiable: That 12-24 hour callusing period in Step 1 isn't optional.
- Water Quality Matters: For water propagation, use filtered or room-temperature tap water that's been sitting out for at least an hour.
Frequently asked questions
Got questions about plant cutting propagation?
You’re not alone! Here are some of the most common queries—plus quick, actionable answers to help you grow roots like a pro in just three weeks.
Can I propagate any plant from cuttings?
Not all plants propagate easily, but many common ones do! Succulents, herbs (like basil and mint), and woody plants (such as lavender or rosemary) are great starters. Avoid plants with hollow stems (like cacti) or those prone to disease—they’re trickier. Pro tip: Research your plant first or ask at a local nursery!
How long does it take for cuttings to root?
With the right conditions, most cuttings root in 2–3 weeks. Fast-rooters (like pothos or coleus) may sprout roots in 7–10 days, while slower growers (like citrus or olive) can take up to 6 weeks. Patience is key—keep them hydrated and in indirect light!
Should I use water or soil for propagation?
It depends! Water is best for monitoring root growth (like with pothos or African violets) and works well for plants prone to rot. Soil is ideal for drought-tolerant plants (like succulents) or those that hate humidity. Pro tip: Try both methods with a few cuttings to see what works best for your plant!
Why are my cuttings rotting?
Rotting usually means too much moisture or poor airflow. Check these fixes:
- Use a well-draining medium (perlite + soil or water with a rooting hormone).
- Ensure the cutting’s bottom node is just below the water/soil line.
- Provide bright, indirect light and avoid overcrowding.
- Trim any yellowing leaves to reduce stress.
Can I propagate plants from grocery store cuttings?
Many grocery store plants (like mint, basil, or herbs) root easily. Just snip a healthy stem, remove lower leaves, and place it in water or soil. Pro tip: Skip herbicide-treated plants—they won’t root. Opt for organic or homegrown options for best results!
Wrapping up and next steps
Mastering plant cutting propagation is like unlocking a green thumb superpower—it’s rewarding, cost-effective, and endlessly creative! 🌱 With the right techniques, you can grow lush new plants in just three weeks, expanding your garden without breaking the bank.
Whether you're a beginner or a seasoned gardener, every successful cutting starts with patience, the right tools, and a little confidence.
Ready to take the next step? Start small—pick one plant to propagate this week, experiment with the methods that excite you, and watch your garden flourish! Share your progress with fellow plant lovers, and soon, you’ll be the go-to expert for rooting secrets. Happy propagating! 🌿✨