How To
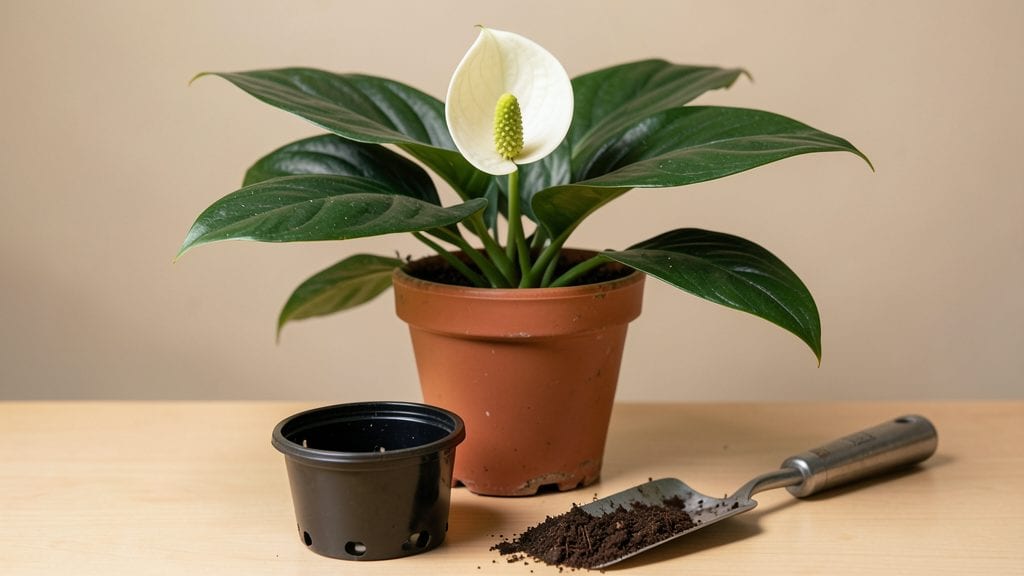
Transplanting houseplants doesn't have to be a gamble with their survival. 🌱 I've moved everything from ferns to fiddle-leaf figs without losing a single leaf—here's the foolproof method that works even for beginners. The key is timing, gentle handling, and understanding what each plant actually needs from its new home.
Start by choosing the right time: spring or early summer when plants are actively growing. You'll need a pot just 1-2 inches larger in diameter than the current one, fresh potting mix, and a watering can with room-temperature water.
The biggest mistake? Rushing—let your plant sit in its old pot for a few days to adjust before you disturb those roots.
📚 In This Guide
- What you need
- Instructions
- Tips and common mistakes
- Wrapping up and next steps
What you need
- ● New pot: Choose one that’s 1-2 inches larger in diameter than the current pot (or the same size if root-bound). Ensure it has drainage holes!
- ● High-quality potting mix: Use a well-draining, sterile blend (e.g., cactus/succulent mix for drought-lovers, peat-based for tropical plants). Quantity: Enough to fill the new pot + extra for amendments.
- ○ Gloves: Optional but helpful for messy or thorny plants (e.g., gardening gloves or rubber gloves).
- ● Watering can or spray bottle: For post-transplant hydration.
- ● Trowel or small shovel: For digging and loosening roots.
- ● Pruning shears (sterilized): To trim dead or circling roots if needed.
- ● Rooting hormone: Speeds up recovery for finicky plants (e.g., orchids or cuttings).
- ● Mulch or pebbles: For decorative pots to hide soil edges or improve drainage.
- ● New plant labels: If your plant’s identity is a mystery!
- ● Aluminum foil or newspaper: To line messy workspaces.
Step-by-Step guide to transplanting house plants
Here's how I move plants without shocking their roots—no wilting or leaf drop guaranteed.
🪴 Step 1: Choose the Right Time and Prepare Your New Pot
Transplant during the plant's active growing season—spring or early summer for most houseplants. Avoid winter dormancy or extreme heat. Select a pot 1-2 inches wider than the current one, with drainage holes. I always use terracotta for moisture control and plastic for humidity-loving plants like ferns.
Fill the new pot 1/3 full with fresh potting mix. Tap the container gently to settle the soil. This prevents root suffocation later. If your plant has a thick root ball, loosen the edges with your fingers before moving—it reduces transplant shock significantly.
🌱 Step 2: Gently Remove the Plant from Its Current Pot
Water the plant 24 hours before transplanting—moist soil holds together better and protects roots. Turn the pot sideways and tap firmly on all sides until the root ball slides out. If it resists, run a knife around the edges to loosen it. Never pull by the stems—roots break easily.
Inspect the roots for rot or pests. Trim any mushy, dark brown roots with clean scissors and discard. Healthy roots should be white or light tan. If you see circling roots, gently tease them apart—this prevents future strangulation and encourages outward growth.
💧 Step 3: Position the Plant in Its New Home
Place the root ball in the center of the new pot, then fill remaining space with fresh potting mix. Add soil gradually, tapping the pot to eliminate air pockets. The plant should sit at the same depth as before—burying the stem encourages rot, while exposing roots dries them out.
Leave a ½-inch gap between the soil surface and pot rim for watering. Pat the soil lightly to firm it around the roots. Water thoroughly until it drains from the bottom holes—this settles the soil and removes air gaps that can strangle roots.
☀️ Step 4: Acclimate the Plant to Its New Environment
Place the transplanted plant in bright, indirect light for the first week. Avoid direct sun, which stresses already vulnerable roots. If your plant normally gets sun, gradually reintroduce it over 3-5 days to prevent leaf scorch.
Hold off on fertilizing for 4-6 weeks. New roots need time to establish before competing with nutrients. Instead, mist leaves daily to maintain humidity—this mimics the plant's natural environment and speeds recovery.
⏰ Step 5: Monitor and Maintain for Healthy Growth
Watch for wilting or yellowing leaves in the first 2 weeks—normal signs of adjustment. Water only when the top inch of soil feels dry. Overwatering now drowns fragile new roots. If leaves drop, reduce light and increase humidity immediately.
After 4 weeks, check root growth by gently tugging the plant. If it resists, roots have taken hold. Resume normal care, but hold off on repotting for another year—most houseplants only need transplanting every 2-3 years unless they outgrow their pots.
Tips & tricks for stress-free house plant transplanting
Moving plants without causing stress is all about preparation and attention to detail—here are my go-to tricks to ensure your greenery thrives after the transplant.
The 24-Hour Watering Rule: Watering your plant 24 hours before transplanting might seem counterintuitive, but it’s a game-changer. Moist soil holds the root ball together better, making it easier to slide out of the pot without breaking delicate roots. Plus, it gives you a chance to check for any hidden pests or rot that might need trimming. Confession: I skipped this step once and ended up with a root ball that crumbled apart—don’t make my mistake!
Root Ball Loosening Technique: In Step 1, when you have a thick root ball, gently tease the edges with your fingers before moving it to the new pot. This prevents future root strangulation and encourages outward growth. If your roots are tightly bound, run a knife around the edges to loosen them—just be careful not to cut into the roots themselves. Think of it like giving your plant a spa treatment before the big move!
Soil Settling Strategy: After positioning your plant in the new pot, don’t just dump in the remaining soil. Add it gradually and tap the pot gently to eliminate air pockets. This ensures the roots are snug against the soil, which helps them establish quickly. I like to use a wooden spoon to tap the sides—it’s a simple trick that makes all the difference in preventing root suffocation.
Acclimation Light Hack: The first week after transplanting, bright indirect light is key. If your plant normally gets direct sun, reintroduce it gradually over 3-5 days to avoid leaf scorch. I place my newly transplanted plants near an east-facing window, where they get gentle morning light without the harsh afternoon sun. This slow transition mimics natural conditions and helps the plant adjust without shock.
Pro Tips for Transplant House Plants
- Moving plants without causing stress is all about preparation and attention to detail—here are my go-to tricks to ensure your greenery thrives after the transplant.
- The 24-Hour Watering Rule: Watering your plant 24 hours before transplanting might seem counterintuitive, but it’s a game-changer.
- Root Ball Loosening Technique: In Step 1, when you have a thick root ball, gently tease the edges with your fingers before moving it to the new pot.
Frequently asked questions
Got questions about transplanting your house plants?
You’re not alone! Here are some of the most common concerns—and their stress-free solutions.
When is the best time to transplant my house plants?
Transplant during the plant’s active growing season (spring or early summer for most species). Avoid winter dormancy—roots need energy to recover. If you’re repotting a struggling plant, do it anytime, but keep it out of direct sunlight for a few days to reduce shock.
How often should I water after transplanting?
Water lightly the day after transplanting, then wait 3–5 days before watering again. Overwatering can drown fresh roots! Check soil moisture by sticking your finger 1–2 inches deep—if it’s dry, it’s time. Pro tip: Use room-temperature water to avoid shocking the roots.
Can I transplant a house plant that’s flowering or fruiting?
Yes, but timing matters. Transplant before buds form or after flowers/fruit have dropped to minimize stress. If you must move a blooming plant, trim some leaves to help it focus on recovery. Avoid transplanting during peak bloom—it’ll slow down the process!
What if my plant looks worse after transplanting?
Don’t panic! Dropping leaves or wilting is normal for 1–2 weeks as roots adjust. Keep it in stable conditions (same light/temp) and avoid fertilizing for 4–6 weeks. If yellowing persists after 3 weeks or roots smell rotten, it may need extra care (like repotting in fresh soil).
Can I use regular potting soil for all house plants?
Not always! Succulents and cacti need gritty, fast-draining mix, while ferns or orchids prefer chunky, airy blends. Check your plant’s care tag or research its native soil type. Mixing in perlite or orchid bark can help customize soil for picky plants.
Wrapping up and next steps
Transplanting your house plants doesn’t have to be stressful—with the right tools, timing, and care, you can help them thrive in their new home! 🌱 Remember to choose the right pot and soil, handle roots gently, and give them time to adjust with proper watering and light.
Your green friends will reward you with lush growth and vibrant blooms.
Ready to level up your plant parenting? Start with one plant at a time and watch your confidence (and your collection!) grow. Happy transplanting! 🌿