How To
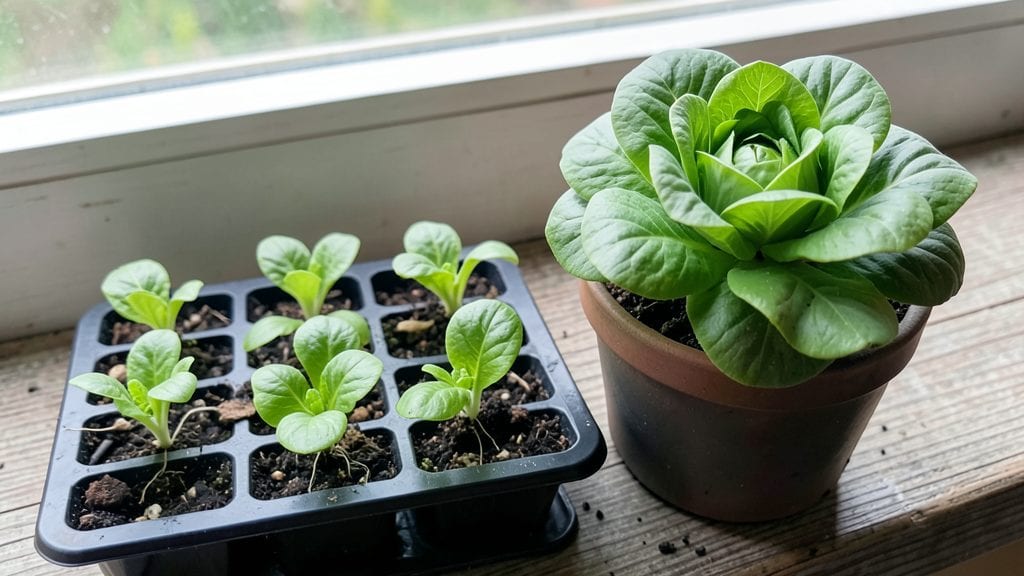
A DIY planting station can turn even a tiny balcony into a thriving garden hub—no yard required. I built mine from scrap wood and a repurposed toolbox, and it now holds all my seed-starting supplies, potting soil, and young plants in one organized spot.
The best part? It folds flat when not in use, saving precious space in my urban apartment.
You’ll need basic materials like plywood, screws, and a few paintbrushes, plus optional add-ons like pegboard for tool storage or a built-in watering tray. The whole setup takes under 2 hours and costs less than $50 if you reuse what you already own.
I painted mine a matte green to match my patio furniture, but any color works—just make sure the finish is weatherproof.
Once built, your station becomes the heart of your growing space. Store seeds in labeled jars, keep gloves and pruners handy, and watch seedlings grow under grow lights or natural sunlight. By summer, you’ll be transplanting lush, healthy starts that would’ve died in a cluttered garage or crowded windowsill.
Pro tip: Add wheels or casters if you want to move it around, or mount it vertically against a fence to save floor space. Urban gardeners swear by these stations—they’re the secret to growing more in less room without sacrificing organization or style.
📚 In This Guide
- What you need
- Instructions
- Tips and common mistakes
- Wrapping up and next steps
What you need
- ● Base Structure: Wooden pallets (2–3) – untreated, sturdy, and sanded
- ● Screws or nails (1 lb) – deck screws or galvanized nails for durability
- ○ Wood glue (optional but recommended for extra strength)
- ● Growing Containers: Plastic pots (5–10) – 5–7" diameter with drainage holes
- ● Fabric grow bags (2–4) – 5–10 gallon size, with handles
- ● OR hanging pockets (10–20) – for vertical planting
- ● Essentials: Potting mix (2–3 bags) – lightweight, well-draining blend
- ● Drainage tray or saucer (1–2) – to catch overflow
- ● Watering can or spray bottle – with a fine rose for gentle watering
- ● Measuring tape or ruler
- ● Drill with bits (for making drainage holes)
- ● LED grow lights (1–2) – full-spectrum for indoor use
- ● Self-watering system – wicking beds or reservoir trays
- ● Herb planters or modular trays – for customizable sections
- ● Paint or stain (for wood) – weather-resistant finish
- ● Wheel kit (if mobile) – for easy repositioning
Instructions for building a DIY planting station
Here's how to create a functional, space-saving hub that maximizes your urban growing potential.
Choose and Prepare Your Base Structure
Start with a sturdy base like a wooden pallet, repurposed shelving unit, or even a large plastic bin with legs. I like using pallets because they're free from many local businesses and provide natural drainage holes. Measure your space first—this station will hold 4 plants, so aim for at least 2 feet wide by 3 feet long to accommodate containers and tools.
Sand any rough edges on wooden bases to prevent splinters, then apply a non-toxic wood sealant if working outdoors. For plastic bins, drill ¼-inch drainage holes along the bottom if they don't already have them. Place your base on level ground or a flat surface—uneven bases cause water to pool and rot roots.
Install Shelf Levels for Plant Containers
Use 2x4 lumber or sturdy metal brackets to create 3-4 shelf levels spaced 12-18 inches apart. This vertical arrangement lets you grow 4 plants in a small footprint while keeping all containers accessible. For pallets, simply stack them horizontally with 2x4 spacers between layers to create stable platforms.
Cover each shelf with landscape fabric or hardware cloth to prevent soil from falling through gaps. Secure it tightly with staples or screws—loose fabric creates mess and attracts pests. I like adding small plastic plant saucers under each container to catch excess water and keep my workspace clean.
Add Essential Storage Components
Attach pegboard strips to one side for hanging tools like trowels, pruners, and gloves. Use small plastic bins with lids for storing seeds, soil amendments, and fertilizer. For watering supplies, mount a 5-gallon bucket with a spout on the lowest shelf—this gives you gravity-fed irrigation for easy watering.
Include 2-3 wire mesh trays on the bottom shelf for propagating cuttings or storing harvested produce. Label each storage compartment clearly—trust me, you'll forget where you put that packet of basil seeds after a few weeks. Keep frequently used items like gloves and spray bottles within arm's reach for convenience.
Set Up Lighting and Irrigation
Install LED grow lights on adjustable arms above the top shelf for plants needing 14-16 hours of light daily. Position them 6-12 inches above your tallest containers. For irrigation, run a soaker hose along the back edge of each shelf or use drip irrigation lines connected to a timer—this saves time and prevents overwatering.
Test your lighting setup by placing a plant under it for 24 hours—if leaves turn pale or stretch toward the light, adjust the height or duration. For watering systems, run them for 10-15 minutes to ensure even coverage. Keep a small watering can nearby for spot-watering delicate seedlings that need precise moisture control.
Organize Your Planting Layout
Place taller plants like tomatoes or peppers on the bottom shelf where they won't be shaded. Medium-height herbs and leafy greens go on the middle shelves, while shallow-rooted plants like basil or lettuce thrive on the top level. Leave 6-12 inches between containers for airflow—crowding invites fungal diseases.
Group plants with similar water needs together to simplify care. Add self-watering reservoirs to containers that dry out quickly, like succulents. Keep a small notebook on your station to track planting dates, watering schedules, and growth milestones—this helps you anticipate each plant's needs before problems arise.
Tips & tricks for perfect DIY planting station
Building your urban garden hub gets easier when you know these practical strategies for maximizing space and functionality.
Base Stability is Everything: When selecting your base structure, prioritize level ground placement above all else. I've seen pallets wobble after just a few waterings because they weren't properly leveled. Use a carpenter's level to check all four corners before securing your base. For extra stability with wooden pallets, add diagonal braces between opposite corners. This prevents shifting that could damage your plants or irrigation system.
Shelf Spacing Secret: The 12-18 inch spacing between shelves in Step 2 isn't just arbitrary—it accounts for standard container depths while allowing airflow. For deeper containers (like those for tomatoes), you might need to adjust to 20 inches between shelves. Remember that airflow prevents fungal diseases, so don't sacrifice space for aesthetics. I've found that adding small fans on the bottom shelf can help circulate air even more effectively in humid climates.
Lighting Test That Saves Time: The 24-hour lighting test in Step 4 reveals more than just whether your lights are working. Pay attention to leaf color changes—pale yellow leaves indicate too much light, while elongated stems mean insufficient light. I recommend testing with a fast-growing plant like basil first, as you'll see results within days rather than weeks. Adjust your light height incrementally (2-3 inches at a time) until you achieve optimal growth patterns.
Watering System Pro Tip: For the 10-15 minute irrigation test, start with the shorter duration and increase gradually. Many urban growers overwater because they assume more is better. A good rule of thumb is to check soil moisture after watering—top inch should be damp but not soggy. Consider adding moisture meters to your station for precise monitoring, especially if you're growing plants with varying water needs on the same shelf.
Pro Tips for Diy Planting Station
- Building your urban garden hub gets easier when you know these practical strategies for maximizing space and functionality.
- Base Stability is Everything: When selecting your base structure, prioritize level ground placement above all else.
- Shelf Spacing Secret: The 12-18 inch spacing between shelves in Step 2 isn't just arbitrary—it accounts for standard container depths while allowing airflow.
Frequently asked questions
Got questions about building your DIY planting station? You’re not alone! Here are answers to the most common concerns—whether you're a beginner or a seasoned urban gardener.
What’s the best location for a DIY planting station?
Place your station in a spot with 6+ hours of sunlight daily (south-facing windows or balconies work best). Avoid drafty areas or extreme heat—aim for consistent temperatures (50–85°F). If natural light is limited, supplement with grow lights (LED or fluorescent) for 12–16 hours/day.
How long does it take to assemble a basic planting station?
For a simple pallet or crate station, expect 1–2 hours (including prep). More complex setups (like vertical towers or hydroponic systems) may take 3–5 hours. Pro tip: Pre-drill holes and gather tools first to save time!
Can I use recycled materials instead of buying new supplies?
Upcycle wooden pallets, plastic bins, or old dressers for planters. Clean and treat wood with food-safe sealant if growing edibles. Avoid toxic materials like pressure-treated wood—opt for cedar or pine instead. Bonus: Check local thrift stores or community boards for free/cheap finds!
What if my plants aren’t growing well in the station?
Troubleshoot with these fixes:
Yellow leaves? Overwatering or poor drainage—add perforated pots or a tray with pebbles.
Leggy plants? Insufficient light—move closer to a window or add grow lights.
Pests? Isolate affected plants and use neem oil or insecticidal soap.
Keep a plant journal to track conditions and adjust!
What’s the easiest plant to start in a small DIY station?
Begin with fast-growing, low-maintenance plants like:
- Herbs: basil, mint, or parsley (thrive in 6-inch pots).
- Leafy greens: lettuce, spinach, or kale (harvest in 3–4 weeks!).
- Microgreens: radish or broccoli sprouts (ready in 10–14 days!).
These tolerate small spaces and forgive beginner mistakes!
Wrapping up and next steps
Creating your own DIY planting station is a game-changer for urban growers—it’s budget-friendly, space-efficient, and packed with creative potential! 🌱 Whether you’re a beginner or a seasoned gardener, this project proves that green thumbs don’t need a backyard to thrive.
With just a few materials and a little imagination, you’ve got a functional hub for herbs, veggies, or flowers right at your fingertips.
Now that you’re inspired, take the next step: grab your tools, pick your plants, and start building! Share your progress with fellow urban gardeners or even tweak the design to fit your space. Happy growing—your future harvest (and Instagram-worthy setup) awaits! 🌿✨