Planting
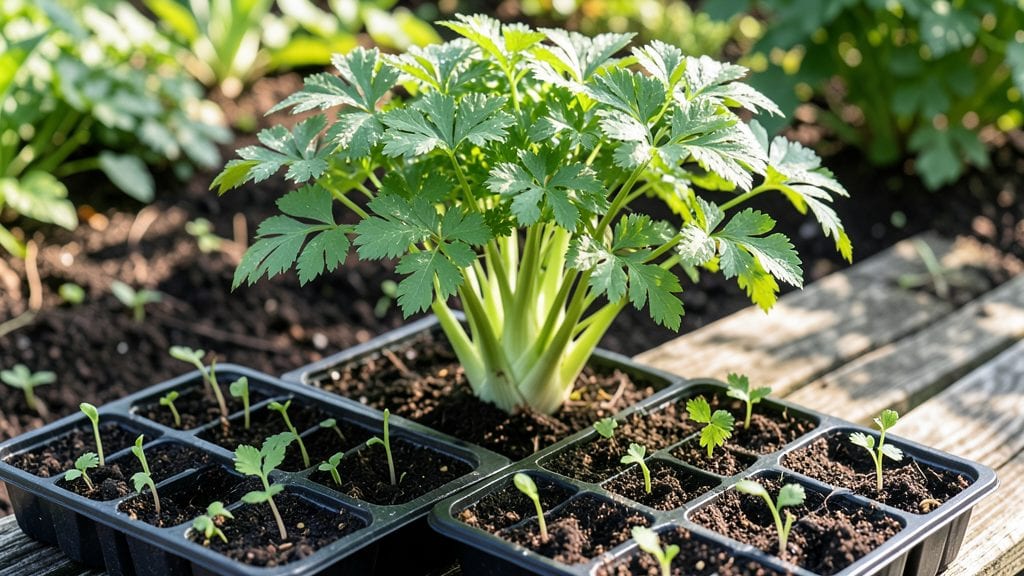
Here are some essential celery planting tips—because growing this crunchy crop from seed feels like nurturing a tiny forest, where each seedling needs room to thrive into thick, sweet stalks. 🌱 turn those delicate seedlings into the crisp, juicy celery you crave.
The secret isn’t just patience; it’s giving them room to breathe and soil that holds moisture like a sponge.
Start seeds indoors 10-12 weeks before your last frost, or transplant young seedlings in early spring when soil temps hit 50°F. Space them 6-8 inches apart in rows 18 inches apart—this prevents competition and lets you tuck in companion plants like lettuce or radishes.
Keep soil consistently moist (never soggy) and mulch heavily to retain humidity, since celery hates drying out. Within 8 weeks, you’ll see those thick, vibrant stalks forming, ready for harvest.
📚 In This Guide
- What you need
- Instructions
- Tips and common mistakes
- Wrapping up and next steps
What you need
- ● Celery seeds or transplants: Seeds: 1–2 tbsp (about 1,000–2,000 seeds per ounce; start indoors 10–12 weeks before last frost).
- ● OR Transplants: 4–6 healthy seedlings (buy from a nursery or start your own from seeds).
- ● Growing containers or garden bed: Containers: 5–6-inch deep pots (minimum) with drainage holes, 1–2 plants per 12-inch pot.
- ● Garden bed: Full sun (6+ hours/day) or partial shade; well-draining soil.
- ● High-quality potting mix or garden soil: 1–2 bags of organic, well-draining mix (amend garden soil with compost if needed).
- ○ Optional: 1 part perlite or vermiculite per 2 parts soil to improve aeration.
- ● Fertilizer: Balanced, slow-release fertilizer (e.g., 10-10-10 or 5-5-5) or compost (mix 1 cup per 5 gallons of soil).
- ○ Liquid seaweed extract (optional, for a growth boost; 1 tbsp per gallon of water).
- ● Watering tools: Watering can with a rose nozzle (for gentle watering).
- ● OR a hose with a soft spray attachment.
- ● Planting & care tools: Hand trowel or small transplant spade.
- ○ Gloves (optional, but handy for messy soil!).
- ● Mulch (e.g., straw or shredded leaves to retain moisture).
- ● Grow lights: If starting indoors before last frost (LED or fluorescent, 12–16 hours/day).
- ● Plant markers: Small stakes or labels to track varieties (e.g., "Utah," "Tall Utah," or "Golden Self-Blanching").
- ● Epsom salt: 1 tbsp per gallon of water (monthly foliar spray for magnesium boost).
- ● Row covers or shade cloth: To protect seedlings from pests or harsh sun.
- ● pH test kit: Ideal soil pH for celery: 6.0–6.8 (adjust with lime or sulfur if needed).
Step-by-Step instructions for planting celery like a pro
Here’s how to grow celery with bold, thick stems—no more stringy disappointments.
🌱 Step 1: Prepare the Soil for Maximum Moisture Retention
Celery thrives in consistently damp soil, so enrich your garden bed with 3 inches of compost mixed into the top 12 inches of soil. I like to work in a handful of organic matter (like well-aged manure or leaf mold) to improve drainage while keeping moisture levels steady. Avoid garden soil that’s too sandy or clay-heavy—celery roots need a balance that holds water but doesn’t suffocate.
Test your soil’s readiness by squeezing a handful: it should hold together lightly but not crumble. If it feels too dry, add 1 part peat moss to 3 parts soil to help retain moisture. Work the amendments in a week before planting so they integrate fully—celery roots are sensitive to fresh organic matter.
🪴 Step 2: Plant Transplants at the Right Depth and Spacing
Start with 4-week-old celery transplants (younger plants struggle in the garden). Set them 12–18 inches apart in rows spaced 18 inches apart—this gives stems room to thicken without competing for nutrients. Dig a hole just deep enough to bury the plant up to its first true leaves (about 1 inch below soil level).
Gently firm the soil around the roots to eliminate air pockets, but don’t pack it down. Pressing too hard can damage delicate roots and slow growth. Water immediately after planting to settle the soil and remove any air gaps. You’ll see the first sign of success when the outer leaves perk up within 24 hours.
💧 Step 3: Maintain Consistent Moisture for Thick Stems
Celery’s secret to bold stems? Never let the soil dry out. Water deeply twice weekly (or daily in hot weather) to keep the top 2 inches of soil damp. Use a drip irrigation system or soaker hose to deliver water at the base—avoid overhead sprinklers, which can cause fungal diseases like early blight.
Here’s the trick: mulch with 2–3 inches of straw or shredded leaves right after planting. This locks in moisture and keeps roots cool, which prevents bolting (when celery flowers prematurely). Check soil moisture by sticking your finger 1 inch deep—if it feels dry, water immediately. Leggy, thin stems? You’re underwatering.
☀️ Step 4: Protect from Heat and Provide Partial Shade
Celery prefers cool temperatures (60–75°F) and partial shade, especially in hot climates. If your summers hit 80°F+, shade plants with floating row covers or a lightweight cloth during peak afternoon sun (12–4 PM). Too much heat causes stems to turn bitter and split.
Watch for wilting in the heat—this is your cue to move plants to a shadier spot or increase watering frequency. In cooler climates, a south-facing bed with afternoon shade works perfectly. You’ll know you’ve got it right when leaves stay deep green and crisp, not yellowing or crispy at the edges.
✂️ Step 5: Harvest at Peak Maturity for Maximum Flavor
Celery takes 100–130 days to mature, but you can start harvesting outer stalks as early as 8 weeks without harming the plant. To harvest whole heads, cut the base 1 inch above the soil with a sharp knife. Avoid pulling—this can uproot the plant and stunt future growth.
For continuous harvests, leave 4–6 inches of stalk in the ground. New growth will fill in, and you’ll get 2–3 harvests per season. Store harvested celery in the fridge wrapped in a damp paper towel to keep it crisp for 2 weeks. If you see leaves yellowing before harvest, your plants need more nitrogen—add a balanced fertilizer at half strength.
Tips & tricks for perfect celery planting
These game-changing tips will help you grow celery with restaurant-quality thick stems that stay crisp and flavorful.
Soil Prep Secret: In Step 1, when mixing in that 3 inches of compost, consider adding a handful of perlite or vermiculite to the soil mix. This creates tiny air pockets that improve drainage while still retaining moisture—celery roots hate soggy conditions but need consistent dampness. Think of it as giving your celery the perfect balance between a spa day and a workout.
Transplant Timing: The instructions mention 4-week-old transplants, but here's what nobody tells you—if you're starting from seed indoors, transplant them when they've developed their second set of true leaves (not the first!). This ensures stronger roots and better survival rates when you move them to the garden. I learned this the hard way after losing half my first batch.
Watering Hack: In Step 3, when you're maintaining that 2 inches of damp soil, try this trick: water in the early morning so the foliage dries completely by evening. This prevents fungal diseases like early blight that can ruin your crop. I've found that using a watering wand with a gentle spray helps distribute moisture evenly without disturbing the soil surface.
Heat Protection: The instructions mention protecting plants when temperatures hit 80°F+, but here's my extra tip: if you're using floating row covers, secure them tightly with clips or bricks—celery plants can get blown over in windy conditions, and that's when you'll see those telltale yellowing leaves. Also, make sure the covers allow for some airflow to prevent overheating during the day.
Pro Tips for Celery Planting Tips
- These game-changing tips will help you grow celery with restaurant-quality thick stems that stay crisp and flavorful.
- Soil Prep Secret: In Step 1, when mixing in that 3 inches of compost, consider adding a handful of perlite or vermiculite to the soil mix.
- This ensures stronger roots and better survival rates when you move them to the garden.
Frequently asked questions
Got questions about growing your own celery? You’re not alone! Here are some of the most common concerns—plus quick, actionable answers to help you cultivate thick, flavorful stems like a pro.
When is the best time to plant celery?
Celery thrives in cool weather, so plant seeds indoors 8–10 weeks before your last frost date (early spring or late summer for fall harvest). Transplant seedlings outdoors after soil warms to 50–60°F (10–15°C)—avoid planting when temps exceed 75°F (24°C), or stems will bolt or turn bitter.
How long does it take for celery to grow?
From seed to harvest, celery takes 100–140 days, but patience pays off! If you’re starting with transplants, expect 80–100 days. Pro tip: Use black plastic mulch to speed up growth by warming the soil—celery loves consistency!
Can I grow celery in containers?
Celery does well in deep containers (12+ inches) with drainage holes. Use a light, well-draining potting mix and keep soil moist. Bonus: Containers let you move plants to shade if summer heat arrives early. Just ensure they get 6+ hours of sunlight daily.
Why is my celery turning yellow or wilted?
Yellowing leaves often signal overwatering or poor drainage, while wilting can mean underwatering or root rot. Check soil moisture—celery needs consistently damp (not soggy) soil. Fix it: Adjust watering, improve drainage, and mulch to retain moisture without suffocating roots.
Does celery need full sun?
Celery prefers partial shade in hot climates (especially in summer) to prevent bolting. Aim for 4–6 hours of morning sun and afternoon shade. In cooler regions, full sun (6+ hours) is fine—just monitor for stress signs like leaf scorch.
Wrapping up and next steps
Growing plump, flavorful celery is totally within your reach—just follow the right spacing and soil secrets! With the perfect balance of sunlight, moisture, and patience, you’ll harvest crisp, thick stems that rival store-bought (or even beat them). 🌱
Now that you’re armed with expert tips, roll up your sleeves and get planting! Start small, track your progress, and soon you’ll be enjoying homegrown celery straight from your garden. Happy growing! 🌟