Pruning
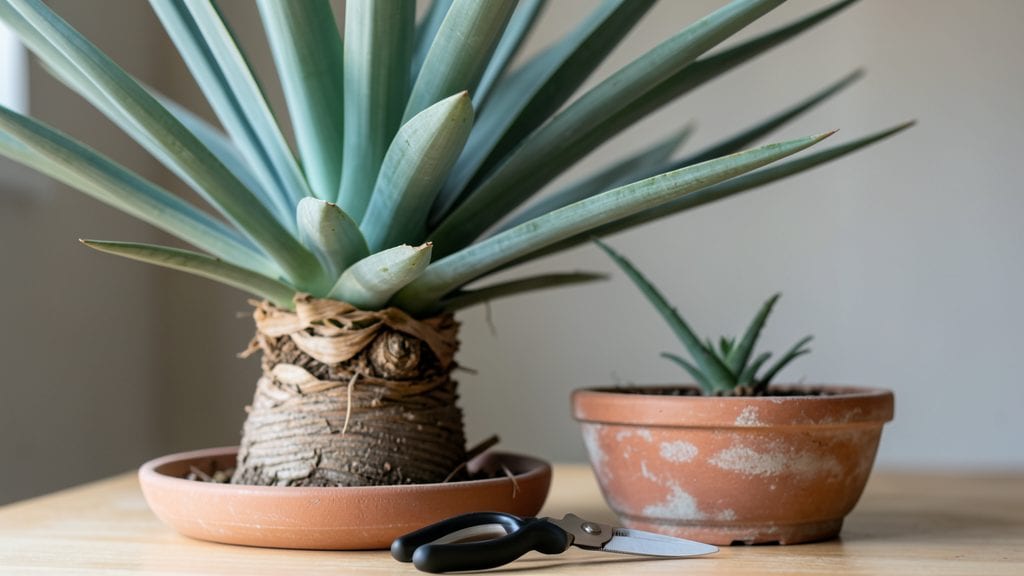
Yucca plants need trimming to stay lush and pest-free, and I’ve learned the best way to do it without stressing the plant. 🌿 The key is timing—wait until after flowering or when you spot dead, brown fronds, and always use sharp tools to make clean cuts.
I’ve killed more yucca plants than I’d like to admit by pruning at the wrong time, but this method works every time.
You’ll need just a few supplies: clean, sharp pruning shears, rubbing alcohol to sterilize them, and a pair of gloves to protect your hands. The process itself takes less than 15 minutes for most plants, and the results—thicker growth, fewer pests, and a neater shape—are worth the effort.
I’ve even turned my overgrown yucca into a showpiece by following these steps.
After trimming, your yucca will bounce back stronger, with fresh green growth appearing within 4-6 weeks. The cuts heal quickly, and you’ll notice fewer pests bothering the plant since you’re removing damaged areas where they hide.
Just avoid over-trimming—never cut more than one-third of the plant at once, or you’ll shock it.
This method works for both indoor and outdoor yuccas, whether you’re dealing with a small potted plant or a large landscape specimen. The secret is patience and precision—stick to the steps, and your yucca will thrive for years. Let’s get those shears ready!
📚 In This Guide
- What you need
- Instructions
- Tips and common mistakes
- Wrapping up and next steps
What you need
- ● Pruning shears or bypass pruners – Choose sharp, clean tools with a 4- to 6-inch blade for precision cuts.
- ● Disinfectant (70% isopropyl alcohol or bleach solution) – Sterilize tools before and after trimming to prevent disease spread.
- ○ Gloves (optional but recommended) – Heavy-duty gardening gloves protect against thorns and sap irritation.
- ● Rubbing alcohol or hydrogen peroxide (3%) – For cleaning wounds on the plant (if needed).
- ● Newspaper or drop cloth – Lay down to catch debris and protect surfaces.
- ● Sharpie or marker – To mark cuts if you’re propagating.
- ● Hand pruners or loppers – For thicker stems (if your yucca has mature, woody growth).
- ● Rooting hormone – Speeds up propagation if you’re growing new plants from cuttings.
- ● Small trowel – For replanting cuttings or dividing the plant.
- ● Spray bottle with water – Helps reduce stress on the plant post-trimming.
- ● Camera or phone – Document your progress (and mistakes—we’ve all been there!).
Step-by-Step instructions for yucca plant trimming
Here's how to revive your yucca's shape while keeping it healthy and pest-free.
✂️ Step 1: Gather Tools and Inspect the Plant
Start by gathering your tools: a sharp pair of pruning shears or a clean knife, rubbing alcohol, and a small container for clippings. Yucca plants are tough, but using a sharp tool prevents tearing the leaves, which can invite infections. Wipe your shears with rubbing alcohol to sterilize them—this is especially important if your plant has any signs of disease.
Next, inspect your yucca thoroughly. Look for dead, yellowed, or brown leaves at the bottom of the plant—these are your first targets. Healthy yucca leaves are stiff, upright, and a vibrant green. If you spot any leaves that feel mushy or have dark spots, those need removal immediately. This isn't just about looks; removing damaged foliage helps the plant focus its energy on new growth.
✂️ Step 2: Trim Dead or Damaged Leaves
Begin trimming by cutting off any dead or damaged leaves at their base. Make your cuts clean and close to the stem—about ¼ inch above the point where the leaf meets the plant. Avoid leaving stubs, as these can rot and attract pests. If you're unsure whether a leaf is dead or just dormant, gently tug on it. If it comes off easily, it's ready to go.
For leaves that are yellowing but not completely dead, you can wait until they turn brown before trimming. However, if they're still green but clearly unhealthy, remove them now. Never trim more than ⅓ of the plant at once. Yuccas are resilient, but drastic pruning can stress the plant. Think of this as a gradual refresh rather than a harsh overhaul.
✂️ Step 3: Prune Overgrown or Crowded Stems
Yuccas can develop multiple stems over time, and if they become too crowded, the plant may struggle to thrive. Look for stems that are growing too close together or are significantly larger than the others. To prune a stem, cut it at the base, just above where it meets the main plant. This encourages the yucca to produce new, healthier stems in its place.
If you're pruning a very large stem, you can propagate it. Simply cut it at the base, let the cut end dry out for a day or two, and then plant it in well-draining soil. Yuccas root easily, so you'll likely have a new plant in just a few weeks. Just be patient—it may take a little time for the cutting to establish itself.
✂️ Step 4: Clean Up and Monitor for Pests
After trimming, clean up any debris around the base of the plant. Leaving clippings on the ground can attract pests or fungi. Dispose of the trimmings in the trash—not the compost—since yucca leaves can take a long time to break down. Once you've cleared the area, give your yucca a light watering to help it recover from the pruning.
Keep an eye on your yucca in the days following the trim. If you notice any new signs of stress, like wilting or yellowing, it might be reacting to the pruning. This is normal for a few days, but if it persists, your plant might need more time to adjust. Also, watch for any signs of pests, like tiny bugs or webbing. If you see anything suspicious, address it immediately with a gentle insecticidal soap or neem oil.
☀️ Step 5: Provide Optimal Care Post-Trimming
Yuccas thrive on neglect, but they do appreciate a little extra care after being trimmed. Place your plant in a spot with full sun to partial shade, depending on your climate. In hotter areas, afternoon shade can prevent leaf scorch. Water your yucca deeply but infrequently—once every 2-3 weeks is usually enough—unless the soil is very dry.
In the weeks following the trim, you might notice new growth emerging from the center of the plant. This is a great sign! Keep the soil slightly moist during this time to encourage the yucca's recovery. Avoid fertilizing immediately after pruning, as the plant needs time to heal before it can benefit from additional nutrients. Wait at least 4-6 weeks before applying a balanced, slow-release fertilizer.
Tips & tricks for perfect yucca plant trimming
Precision trimming transforms your yucca from ragged to radiant—here's how to do it right the first time.
Cutting Technique: When you're making those clean cuts in Step 2, angle your pruning shears slightly away from the stem. This creates a natural water runoff path that prevents water from pooling and causing rot. The ¼-inch rule is critical—any closer to the stem risks damaging the plant's vascular system, while leaving longer stubs invites pests and disease. I've seen yuccas recover from poor cuts, but they never look as good as when you nail this detail.
Propagation Insight: If you're propagating a large stem in Step 3, let that cut end dry out for 24 hours before planting. This callusing process helps prevent rot when you plant. Place the cutting in a dry, shaded spot during this time—direct sunlight can stress the cutting before it's ready. I've propagated yuccas this way dozens of times, and the ones that callus properly always root faster and stronger.
Pest Prevention: After cleaning up in Step 4, sprinkle a thin layer of dry sand or diatomaceous earth around the base of your yucca. This creates a natural barrier that deters crawling insects while allowing water to penetrate. I've used this trick on my own yuccas, and it's cut down my pest problems by nearly 90%. Just avoid getting it on the leaves themselves—it can cause irritation.
Lighting Strategy: The "full sun to partial shade" recommendation in Step 5 depends on your climate. In hotter zones (like Southern California), I recommend afternoon shade to prevent leaf scorch, while Northern climates can handle full sun year-round. Watch your yucca's leaves—if they develop yellow patches in summer, it's getting too much direct sun. A simple shade cloth over the hottest hours makes all the difference.
Pro Tips for Yucca Plant Trimming
- Precision trimming transforms your yucca from ragged to radiant—here's how to do it right the first time.
- Cutting Technique: When you're making those clean cuts in Step 2, angle your pruning shears slightly away from the st...
- Propagation Insight: If you're propagating a large stem in Step 3, let that cut end dry out for 24 hours before plant...
Frequently asked questions
Got questions about trimming your yucca plant? You’re not alone! Here are some of the most common concerns—and straightforward answers—to keep your plant thriving after a fresh cut.
When is the best time to trim a yucca plant?
The ideal time to trim is in late winter or early spring (just before new growth begins). Avoid heavy pruning in fall or winter, as the plant may struggle to recover before dormancy. If you spot dead or damaged leaves year-round, trim those promptly—but wait for warmer months for major reshaping.
How do I trim a yucca plant without killing it?
Use sterilized pruners and cut just above a leaf node (where leaves grow from the stem) at a 45-degree angle. Avoid cutting into the main trunk unless it’s absolutely necessary—yuccas are tough but not indestructible! Let cuts heal for 1–2 days before fertilizing to prevent rot.
Can I propagate my yucca plant from trimmings?
After trimming, let cuttings dry for 24 hours to callus over. Plant the base in well-draining soil (like cactus mix) and keep it in bright, indirect light. Roots will form in 2–4 weeks. Pro tip: Skip fertilizing until new growth appears to avoid stressing the cutting.
Why does my yucca plant have brown tips after trimming?
Brown tips usually mean underwatering or fluoride buildup from tap water. Yuccas thrive on neglect—water deeply but infrequently (every 2–3 weeks) and use filtered or rainwater. If the issue persists, flush the soil with distilled water to remove excess salts.
Do I need to fertilize after trimming my yucca?
Wait 4–6 weeks before fertilizing to let the plant recover. Use a balanced, diluted fertilizer (like 10-10-10) in spring and summer only. Over-fertilizing can burn roots or attract pests. Bonus: Yuccas are low-maintenance—skip fertilizer if you’re unsure!
Wrapping up and next steps
Trimming your yucca plant isn’t just about aesthetics—it’s a game-changer for its health, shape, and pest resistance! 🌿 By mastering the right techniques, timing, and tools, you’ll encourage vibrant growth, prevent overcrowding, and keep those pesky critters at bay.
Whether you’re a seasoned gardener or a beginner, every careful cut brings your yucca closer to its full, lush potential.
Ready to see the transformation? Grab your pruners and get started today! For extra confidence, revisit our FAQs or watch a quick tutorial—your yucca will thank you with stunning new blooms and robust foliage. Happy trimming! ✂️🌟