Planting
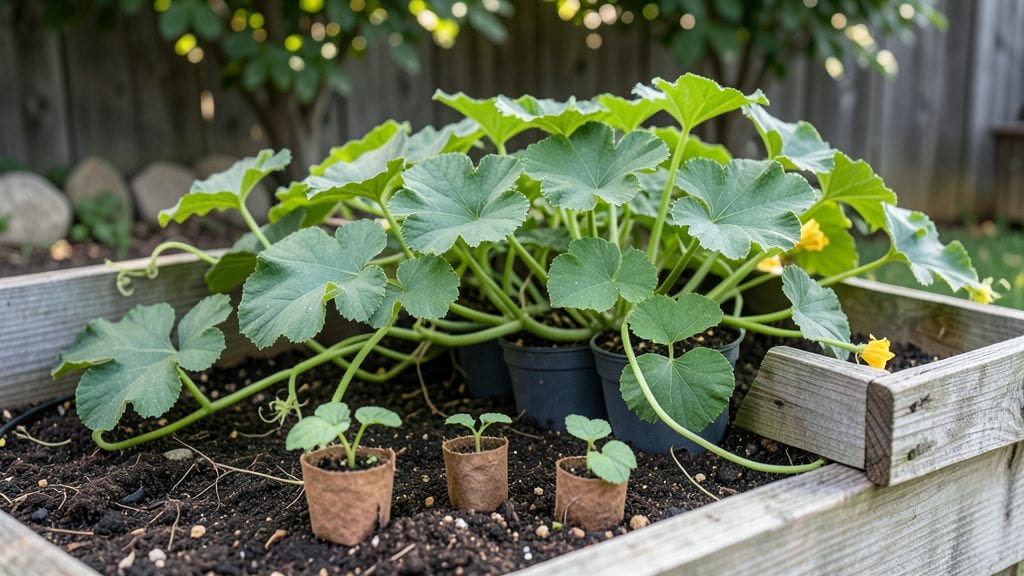
Starting pumpkin plants from seed is where the magic begins—those first green shoots breaking through the soil after just a few weeks feel like a promise of summer. 🌱 I’ll never forget my first attempt when a single vine sprawled across my backyard, producing a 20-pound pumpkin by October.
The secret isn’t luck; it’s timing, soil, and a few simple tricks most beginners miss.
You’ll need rich, well-draining soil mixed with compost, seeds planted 1 inch deep and 2 feet apart (they’ll spread!), and a spot that gets full sun (6+ hours daily).
Most people overlook the importance of warm soil—wait until nighttime temps stay above 60°F before planting, usually mid-May in most zones. A small hoop or wire trellis can save space if you’re short on yard.
Watering is the make-or-break part: keep soil moist but not soggy, especially after germination. Within 7-10 days, you’ll spot those first leaves—thin seedlings to 12 inches apart to give roots room.
The vines will grow fast, but don’t rush to fertilize yet; too much too soon leads to leafy monsters with no fruit.
Here’s the game-changer: mulch heavily to retain moisture and prevent weeds, and watch for squash vine borers by mid-summer. By following these steps, you’ll go from seed to vine in 3-4 weeks, setting up a harvest that’ll have neighbors asking for cuttings. Ready to grow your own giant?
📚 In This Guide
- What you need
- Instructions
- Tips and common mistakes
- Wrapping up and next steps
What you need
- ● Pumpkin Seeds: 3–5 seeds per plant (or 10+ if planting multiple vines). Opt for heirloom or hybrid varieties like Howden, Jack Be Little, or Cinderella for best results.
- ● Growing Space: Direct sunlight: 6–8+ hours daily (full sun is a must!).
- ● Space: 50–100 sq. ft. per plant (pumpkins spread wide!). For container growing, use a 5-gallon+ pot with drainage.
- ● Soil: Well-draining, fertile soil with a pH of 6.0–6.8. Mix in 2–3 inches of compost or aged manure before planting.
- ● Fertilizer: Balanced fertilizer (10-10-10) at planting time.
- ● Organic options: Fish emulsion or worm castings (apply every 3–4 weeks).
- ● Watering Supplies: Drip irrigation or a watering can with a long spout (pumpkins need 1–2 inches of water weekly, especially during flowering).
- ○ Support Structures (Optional but Helpful): Trellis or cage for smaller varieties (e.g., Jack Be Little).
- ● Straw or landscape fabric to mulch around plants (retains moisture and deters weeds).
- ● Garden trowel or transplanting spade (for digging holes).
- ● Gloves (to protect hands from prickly vines).
- ● Pruners or scissors (for trimming excess vines later).
- ● Spray bottle (for misting seeds during germination).
- ● Row cover or frost cloth (if planting early in cool climates).
- ● Last frost date: Plant seeds 1–2 weeks after the last expected frost in your area (pumpkins hate cold!).
- ● Warm soil: Ideal soil temperature for germination: 70–90°F.
- ● Growing season: 75–120 days to harvest (varies by variety).
Step-by-step success for starting pumpkin plants from seed
Here’s how I get vigorous pumpkin vines every season—no guesswork, just reliable growth.
🌱 Step 1: Prepare Your Pumpkin Seeds for Planting
Pumpkin seeds germinate best when prepped properly. Soak the seeds in lukewarm water for 12 hours—this softens the tough outer coating and speeds up sprouting. I use a small bowl or even a damp paper towel to keep them moist. After soaking, let them dry slightly so they don’t stick together when handling.
Here’s the thing—don’t skip this step. I’ve tried planting dry seeds, and they take twice as long to sprout. Once the seeds feel slightly damp but not wet, they’re ready for the soil. You’ll see tiny white roots emerging within 24 hours if conditions are right.
🪴 Step 2: Choose the Right Containers and Fill with Soil
Pumpkins need space, so start them in 3-4 inch pots or even a seed tray with individual cells. Fill the containers with a lightweight, well-draining potting mix—never garden soil, as it compacts and suffocates roots. I like to mix in a handful of compost for extra nutrients, but keep it loose.
Press the soil down gently until it’s firm but not packed. The surface should be level, not mounded. You’ll want to plant seeds 1 inch deep—any deeper, and they’ll struggle to break through. A good trick? Use a pencil to make a small hole for each seed—it keeps spacing consistent.
💧 Step 3: Plant and Water for Germination
Drop one soaked seed into each hole, then cover lightly with soil. Water gently until the surface is moist but not soggy. Pumpkin seeds need warmth to germinate—aim for 70-90°F soil temperature. If your space runs cooler, place the pots on a seedling heat mat.
Keep the soil consistently moist but never waterlogged. You’ll see sprouts in 5-10 days, but if the soil dries out, germination slows or stops. A clear plastic dome or plastic wrap over the tray helps retain humidity until the first leaves appear.
☀️ Step 4: Provide Light and Monitor Growth
Once seedlings emerge, move them to a sunny windowsill or under a grow light for 12-14 hours daily. Pumpkin seedlings need bright light to prevent leggy growth. If leaves stretch toward the light, your setup isn’t intense enough—adjust the light within 4 inches of the plants.
Watch for the first true leaves (the second set after the initial seed leaves). These will be broader and more defined. When they appear, thin to the strongest seedling per pot. Weak seedlings compete for nutrients, and you’ll end up with underdeveloped vines.
⏰ Step 5: Harden Off Before Transplanting Outdoors
Two weeks before your last frost date, start hardening off the seedlings. Place them outside in a sheltered spot for 1-2 hours the first day, gradually increasing time over 7-10 days. Pumpkins are sensitive to cold, so never transplant until soil is at least 60°F.
Real talk: Skipping this step leads to shocked plants that wilt or fail to thrive. You’ll know they’re ready when they handle a full day outdoors without wilting. After hardening, transplant to your garden with plenty of space—pumpkins spread 5-10 feet per vine!
Tips & tricks for starting pumpkin plants from seed
These tried-and-true strategies will help you bypass the common pitfalls and grow pumpkin vines that thrive from the very beginning.
Soaking Secret: The 12-hour soak is your first critical step—don't rush it! I've found that using a small mesh bag for soaking keeps seeds organized and prevents them from sinking to the bottom. After soaking, place them between damp paper towels in a sealed container to accelerate root development. You'll notice tiny white roots appearing within those 24 hours if conditions are perfect.
Soil Temperature Matters: Those 70-90°F soil temperatures in Step 3 aren't just numbers—they're the difference between rapid germination and weeks of waiting. If your space runs cooler, invest in a seedling heat mat ($15-20) or place pots on top of your refrigerator. I've seen germination times double in cooler conditions without proper warmth. For extra insurance, place a thermometer in the soil to monitor temperatures.
Lighting Strategy: The 12-14 hours of light in Step 4 requires more than just placing seedlings near a window. I recommend using a full-spectrum grow light positioned 4 inches above the seedlings for even growth. Watch for leaves stretching toward the light—this legginess indicates insufficient light intensity. Rotate your seedlings daily to ensure even growth all around.
Hardening Off Hack: The gradual 7-10 day hardening process in Step 5 is where most beginners fail. Start with just 1-2 hours the first day in a sheltered spot, then increase by 1-2 hours each subsequent day. I've seen pumpkin seedlings shocked beyond recovery when moved directly to full sun after indoor growing. The key is to mimic outdoor conditions slowly—wind, sun intensity, and temperature fluctuations all play a role.
Pro Tips for Pumpkin Plant Beginning
- These tried-and-true strategies will help you bypass the common pitfalls and grow pumpkin vines that thrive from the ...
- Soaking Secret: The 12-hour soak is your first critical step—don't rush it! I've found that using a small mesh bag fo...
- Soil Temperature Matters: Those 70-90°F soil temperatures in Step 3 aren't just numbers—they're the difference betwee...
Frequently asked questions
Got questions about starting your pumpkin plant journey? You’re not alone! Here are some of the most common queries—plus quick, actionable answers to get you growing with confidence.
When is the best time to plant pumpkin seeds?
Pumpkins thrive in warm soil, so wait until after the last frost when temperatures consistently stay above 70°F (21°C). For most regions, this means late spring or early summer. If you’re in a cooler climate, consider starting seeds indoors 2–3 weeks earlier or using black plastic mulch to warm the soil faster.
How deep should I plant pumpkin seeds?
Plant seeds about 1 inch deep in well-draining soil. Space them 2–3 feet apart if you’re growing bush varieties, but give vining types 3–6 feet of room to sprawl. Pro tip: Plant 2–3 seeds per hole and thin to the strongest sprout once seedlings emerge. This gives your pumpkins room to stretch—and prevents overcrowding!
Why aren’t my pumpkin seeds sprouting?
Seeds need warmth, moisture, and patience to germinate. If they’re not sprouting within 7–14 days, check these fixes:
- Soil temperature: Use a seedling heat mat if soil is below 60°F (15°C).
- Moisture: Keep soil damp (not soggy) by watering gently.
- Seed viability: Test old seeds by soaking them in water—if they sink, they’re likely good!
Can I grow pumpkins in containers?
Just choose smaller varieties like ‘Jack Be Little’ or ‘Baby Boo’ and use containers at least 5 gallons in size. Ensure they have drainage holes, and place them in a spot with 6–8 hours of sunlight daily. Containers dry out faster, so water consistently and fertilize every 2–3 weeks.
How do I tell if my pumpkin plant is healthy?
A thriving pumpkin plant has:
- Vibrant green leaves (no yellowing or spots).
- Strong, hairy vines (a sign of good root health).
- Male flowers first (they have long stems), followed by female flowers (with tiny pumpkins at their base).
Wrapping up and next steps
Starting your pumpkin plant journey from seed is a rewarding adventure that combines patience, care, and a little bit of magic! 🌱 From selecting the perfect seeds to nurturing your vines, every step brings you closer to a bountiful harvest.
Remember, even the most experienced gardeners started with their first seed—so embrace the process, learn along the way, and enjoy the sweet (and savory!) fruits of your labor.
Now that you’re armed with knowledge, take the next step! Whether you’re planting seeds indoors or directly in the soil, grab your gardening tools and get growing.
Before you know it, you’ll be watching those sprawling vines and dreaming of pumpkin pies—or maybe even a jack-o’-lantern masterpiece. Happy planting! 🎃✨