Pruning
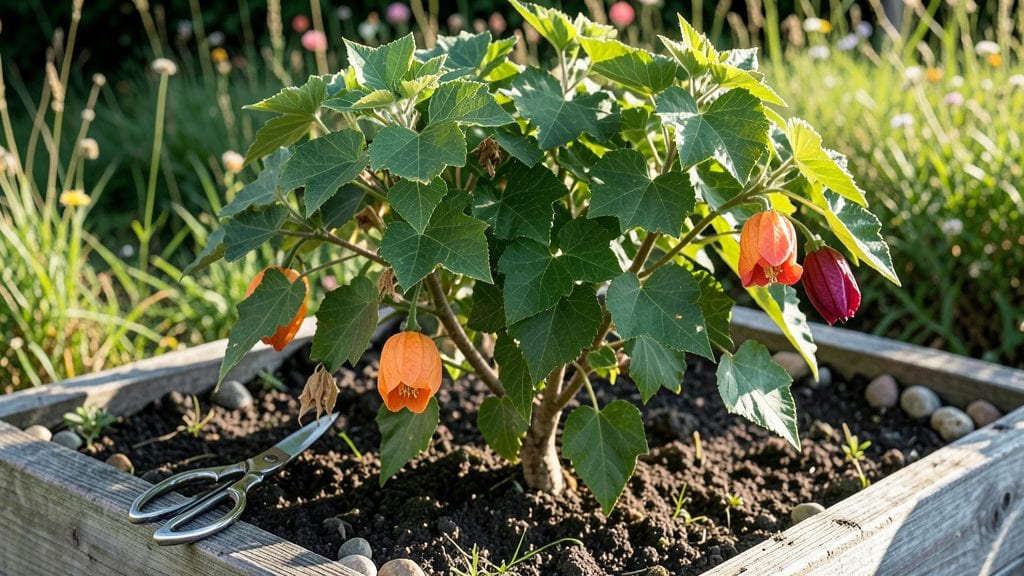
Pruning abutilon plants isn't just about keeping them tidy—it’s the secret to nonstop blooms and a bushier shape all year long. 🌟 I’ve pruned mine every season for five years, and the difference between a well-shaped abutilon and a leggy, sparse one is all in the cuts.
The key is timing: prune lightly after blooms fade in spring, then do a heavier shape-up in early summer before the next flush of flowers. Winter’s the perfect time to clean up and prep for next year’s growth.
You’ll need just three things: sharp bypass pruners (dull blades tear stems), clean gloves (abutilons can be a little sticky), and a small bucket for clippings. Pro tip: sterilize your tools with rubbing alcohol between cuts to prevent disease.
Abutilons are forgiving, but they reward precision—think of it like giving them a haircut that encourages fullness, not thinning. Start with the oldest growth first; these plants bloom on new wood, so you’re actually encouraging more flowers by cutting back.
After pruning, your abutilon will respond in 10-14 days with fresh, vibrant new shoots. That’s when you’ll see the magic: thicker branches, more blooms, and a shape that stays compact whether it’s in a pot or planted in the ground.
Just keep the soil slightly moist (not soggy) and feed with a balanced fertilizer every 4-6 weeks to fuel that regrowth. The result? A plant that looks like it’s been professionally groomed—and keeps blooming like crazy.
Here’s the thing about abutilons: they handle mistakes better than most plants, but they do hate being over-pruned. If you cut back too hard in winter, you’ll delay spring blooms. And always cut just above a leaf node (the bump where leaves grow) to encourage branching.
For container plants, prune a little more aggressively to keep them from outgrowing their pots. Now grab those shears—your abutilon’s about to look its best yet.
📚 In This Guide
- What you need
- Instructions
- Tips and common mistakes
- Wrapping up and next steps
What you need
- ○ Sharp bypass pruners: 1 pair (sterilized with rubbing alcohol to prevent disease). Optional: Larger loppers for thicker stems.
- ● Clean, sharp garden shears: 1 pair (for finer cuts on smaller branches).
- ● Rubbing alcohol (70% isopropyl): Small bottle (for sterilizing tools between cuts).
- ● Disposable gloves: 1 pair (nitrile or latex-free for sensitive skin).
- ○ Pruning sealant (optional but helpful): Small tube (like Tree Seal or Pruning Wax to prevent sap bleeding on larger cuts).
- ● Disposable bags or bucket: 1-2 (for collecting clippings—compost them later!).
- ● Permanent marker: 1 (for marking cuts if shaping complexly).
- ● Timing: Prune in early spring (before new growth) or after blooming (late summer/fall) for best results. Avoid pruning during frost or extreme heat.
- ● Light conditions: Choose a bright, indirect light spot for post-pruning recovery (e.g., a sunny windowsill or shaded patio).
- ● Water access: Ensure your plant has well-draining soil and is watered 1-2 days before pruning (but not soggy!).
- ● Patience: Abutilons bounce back fast, but avoid over-pruning—aim to remove no more than 1/3 of the plant at once.
Step-by-Step instructions for pruning abutilon plants
Here’s the gentle yet effective approach I use to keep my abutilons flowering abundantly while maintaining their natural shape.
✂️ Step 1: Time Your Pruning for Peak Growth
Prune your abutilon in early spring just as new growth begins—you’ll see fresh, plump buds forming at the base of stems. This timing ensures you’re cutting back before the plant’s main energy surge, so it recovers quickly. Avoid pruning in late fall or winter when the plant is dormant; you’ll risk stunting next year’s blooms.
If you’re pruning for shape mid-season, do it after a major flowering cycle. Watch for spent blooms turning brown—that’s your cue the plant has finished its current display. Abutilons are forgiving, but pruning right before a heatwave can stress them, so check your local forecast first.
✂️ Step 2: Identify and Remove Dead or Weak Growth
Start by inspecting your plant for dead, yellowed, or leggy stems—these are the first to go. Use clean, sharp pruning shears to cut just above a leaf node (the bump where leaves attach) at a 45-degree angle. This encourages new growth to sprout from that node. If a branch is completely bare or mushy, remove it entirely—it’s not coming back.
Don’t worry about leaving small nubs; abutilons heal quickly. Focus on stems thinner than a pencil—they’ll never support strong blooms. Healthy branches should feel firm and green, not hollow or brittle. If you’re unsure, give it a gentle tug—if it resists, it’s still alive.
✂️ Step 3: Shape the Plant for Balance and Airflow
Step back and visualize your abutilon’s natural shape—most varieties grow bushy with multiple stems. Use your shears to trim back the longest branches by one-third to encourage bushier growth. Cut just above a leaf node where new growth will emerge. Avoid cutting into old wood (woody stems), as this slows recovery.
Thin out crowded stems to improve airflow—this prevents fungal issues like powdery mildew. Aim for a rounded silhouette with no single branch dominating. If your plant has become top-heavy, prune the topmost growth slightly more to encourage lower branches to fill out. You’ll see new leaves forming within 2-3 weeks as the plant responds.
✂️ Step 4: Encourage More Blooms with Strategic Cuts
To trigger more flowers, pinch back the tips of new growth when they reach 4-6 inches tall. This redirects the plant’s energy into producing side shoots, each of which can develop into a blooming stem. Use your fingers or small pruners—no need for heavy cuts here. You’ll notice smaller leaves forming at the pinched points, signaling new growth.
After a major pruning, fertilize lightly with a balanced, water-soluble fertilizer (like 10-10-10) to support recovery. Avoid heavy feeding right after pruning—it can lead to lush foliage but fewer blooms. Instead, wait until you see new growth with 2-3 sets of leaves, then feed sparingly every 4-6 weeks during the growing season.
🌿 Step 5: Clean Up and Monitor for Recovery
After pruning, remove all fallen leaves and debris from the area to reduce disease risk. Sterilize your shears with rubbing alcohol between cuts if you’re working with multiple plants. Place your abutilon in a bright, indirect light spot for the first week—this helps it recover without stress from direct sun.
Water deeply but not excessively—the soil should stay evenly moist but not soggy. You’ll know you’ve nailed the balance when new leaves emerge with a vibrant green color and the plant starts producing fresh buds within 6-8 weeks. If you see yellowing leaves, it’s usually a sign of overwatering or root stress from aggressive pruning.
Tips & tricks for pruning abutilon plants
These simple yet powerful tricks will help you prune your abutilons like a pro, ensuring they stay healthy and produce those stunning blooms all year.
Timing is Everything: Early spring is your best window for pruning, but if you're shaping mid-season, wait until after the plant has finished its major flowering cycle. I learned this the hard way—pruning too early can stress the plant, while waiting too long means you miss the opportunity to encourage new growth before summer heat sets in. Always check your local forecast before pruning; heatwaves can be particularly stressful for newly pruned plants.
The 45-Degree Angle Secret: When you make your cuts in Step 2, that 45-degree angle isn't just for show—it helps water run off the cut and prevents rot. I use clean, sharp pruning shears to make this cut just above a leaf node. This small detail makes a big difference in how quickly your abutilon recovers and starts producing new growth. If you don't have a 45-degree angle tool, a simple diagonal cut with clean shears works just fine.
One-Third Rule for Shaping: In Step 3, when you're trimming back the longest branches, remember the one-third rule. Cutting back by about one-third encourages bushier growth and helps maintain that beautiful rounded silhouette. This technique works wonders for keeping your abutilon compact and full. You'll notice new leaves forming within 2-3 weeks, signaling that your plant is responding well to the pruning.
Pinch for More Blooms: The pinch technique in Step 4 is a game-changer for encouraging more flowers. When new growth reaches 4-6 inches tall, pinch back the tips to redirect energy into side shoots. This simple action can significantly increase your abutilon's blooming potential. Just use your fingers or small pruners—no need for heavy cuts. You'll see smaller leaves forming at the pinched points, which is a great visual cue that new growth is happening.
Pro Tips for Pruning Abutilon Plants
- These simple yet powerful tricks will help you prune your abutilons like a pro, ensuring they stay healthy and produc...
- Timing is Everything: Early spring is your best window for pruning, but if you're shaping mid-season, wait until afte...
- The 45-Degree Angle Secret: When you make your cuts in Step 2, that 45-degree angle isn't just for show—it helps wate...
Frequently asked questions
Got questions about pruning your Abutilon plants? You’re not alone!
Here are some of the most common concerns—plus straightforward answers to keep your "indoor maple" thriving and blooming like a pro.
When is the best time to prune my Abutilon?
Prune your Abutilon in early spring (just before new growth starts) or after blooming in late summer to encourage fresh flowers. Avoid heavy pruning in winter—it stresses the plant. Light trimming to shape can happen year-round, but never prune when buds are forming (they’ll drop!).
How much can I cut back my Abutilon?
You can trim up to 1/3 of the plant’s height in one session, but avoid drastic cuts (like 50% or more) unless reviving a leggy or overgrown specimen. For shaping, focus on selective pruning—remove only the branches that disrupt your vision of the ideal shape. Abutilons bounce back fast!
Will pruning stop my Abutilon from flowering?
Not at all! Pruning actually boosts blooms by promoting bushier growth and more flower nodes. Just avoid cutting back all the old wood at once—leave some stems with buds intact. If flowers drop after pruning, it’s likely due to shock; give the plant a week to recover before expecting a full rebound.
What if my Abutilon looks sad after pruning?
Don’t panic! Yellowing leaves or wilting can happen, but it’s usually temporary. Water lightly and keep the plant in bright, indirect light. If the issue persists, check for pests (like spider mites) or root rot. For severe stress, a light fertilizer dose (half-strength) can help it perk up faster.
Can I propagate my Abutilon from pruned cuttings?
Pruning = free plants
. Dip 4–6 inch cuttings in rooting hormone (optional) and place them in moist perlite or water. Keep them in warm, humid conditions (like a plastic bag tent) until roots form (2–4 weeks). Once rooted, transplant to soil—your pruned branches are now future Abutilon babies!
Wrapping up and next steps
Pruning your abutilon plants doesn’t have to be intimidating—it’s all about timing, technique, and a little patience! 🌿 With the right tools and a gentle touch, you’ll encourage lush growth, vibrant blooms, and a shape that steals the show.
Whether you’re trimming for aesthetics or health, remember: confidence comes with practice, and your abutilon will thank you with stunning results.
Ready to take the next step? Grab your shears and schedule a quick session—your plant’s future beauty starts with just a few snips! For extra inspiration, explore pruning timelines or join gardening forums to share your progress. Happy pruning! ✂️💚