Propagation
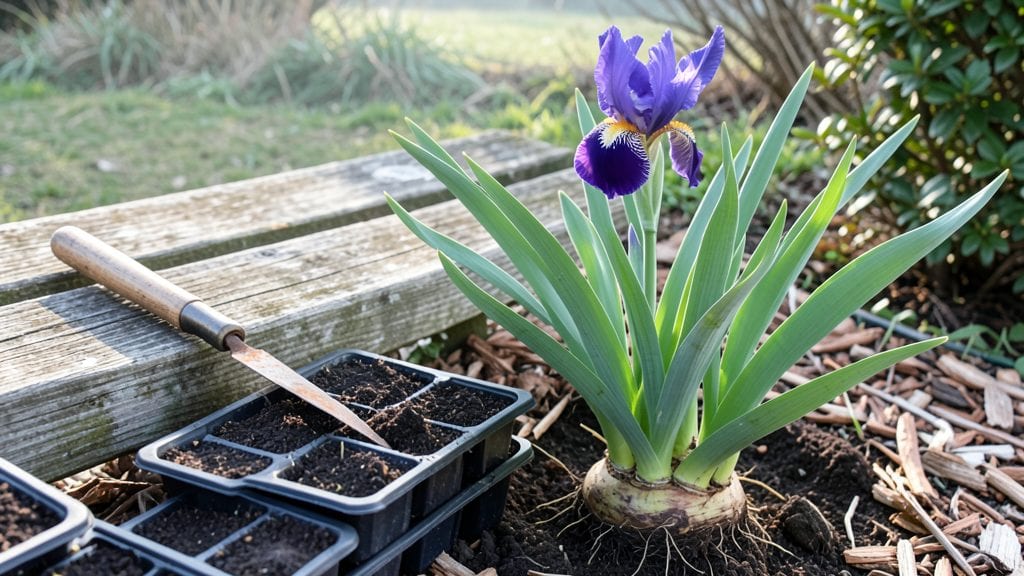
"Propagating iris plants from rhizomes is the easiest way to multiply your garden's color without buying new plants. 🌿 I learned this trick after my first iris clump doubled in size last spring—now I share it so you can do the same.
The key is timing, gentle handling, and knowing exactly where to cut.
You’ll need sharp pruners, a bucket of water, and a sunny spot in your garden or containers. The best time is right after blooming, when the foliage starts yellowing but hasn’t died back completely. Most gardeners overlook this window, but it’s when the rhizomes store energy for new growth.
By dividing just one mature clump, you’ll end up with 3-5 healthy offsets ready to plant. These will bloom next season with the same vibrant colors, and you’ll never need to buy iris plants again.
The process takes less than an hour and transforms a single plant into a whole garden feature.
Works for bearded, Siberian, and Japanese irises alike. Once you master this, you’ll be sharing plants with neighbors—or filling gaps in your own garden with minimal effort. Let’s get those rhizomes multiplying!
📚 In This Guide
- What you need
- Instructions
- Tips and common mistakes
- Wrapping up and next steps
What you need
- ● Healthy iris rhizomes: Choose mature, disease-free rhizomes with at least one fan of leaves and a visible growing point.
- ● Sharp garden knife or pruning shears: Sterilized to prevent infection (70% isopropyl alcohol works well).
- ● Well-draining soil mix: Combine 2 parts garden soil, 1 part perlite or coarse sand, and 1 part compost.
- ● Growing containers or trays: Shallow containers (6–8 inches deep) with drainage holes.
- ○ Peat moss or coconut coir: For rooting medium (optional but helpful for moisture retention).
- ○ Organic mulch (optional): Straw or shredded bark to retain moisture and suppress weeds.
- ● Gloves: Protect your hands from soil and sharp rhizome edges.
- ● Watering can or spray bottle: For gentle hydration (avoid soaking the rhizomes).
- ○ Fungicide (optional): Copper-based or sulfur-based to prevent rot if propagating in humid conditions.
- ● Labels & markers: To track varieties and planting dates.
- ● Sunlight or grow lights: Ensure 6+ hours of indirect light daily for new growth.
Step-by-Step guide to propagating iris plants through rhizome layering
Here’s how to multiply your iris collection using a foolproof method that yields healthy plants ready for next year’s blooms.
🌱 Step 1: Select and Prepare Healthy Rhizomes
Choose mature rhizomes that are at least 2-3 years old—you’ll recognize them by their thick, fleshy stems with visible fan-shaped leaves. Avoid any that look shriveled, mushy, or covered in mold. I like to work in early spring or right after blooming when new growth is just starting.
Gently dig around the rhizome with a trowel, lifting it carefully to avoid damaging the roots. Shake off excess soil and rinse the rhizome under lukewarm water to reveal any hidden damage. Healthy rhizomes should feel firm and slightly rubbery, not soft or hollow.
✂️ Step 2: Divide the Rhizome into Sections
Using a sterilized knife, cut the rhizome into sections, ensuring each piece has at least one fan of leaves and a 1-inch section of the thick stem. This ensures the new plant has enough energy to establish roots. I make sure the cuts are clean and angled slightly to prevent water from pooling.
If you’re working with a particularly large rhizome, you can divide it into 3-4 sections for this project. Label each section with a toothpick and marker if you’re propagating multiple varieties—after a few months, they can look identical until they bloom.
🪴 Step 3: Create Layering Troughs for Root Development
Fill a shallow tray or container with a mix of sandy soil and perlite (about 50/50) to promote drainage. This prevents the rhizomes from rotting while encouraging root growth. Arrange the divided sections in the tray so the leaf fans face upward and the cut ends sit on top of the soil mix. Don’t bury them—just let the cut edges touch the surface.
Water lightly with a spray bottle until the soil feels evenly moist but not soggy. Place the tray in a spot with bright, indirect light—direct sun can scorch the leaves before roots have a chance to form. A north-facing windowsill or under a grow light works perfectly.
💧 Step 4: Monitor Moisture and Encourage Root Growth
Check the soil every 2-3 days and water again when the top ½ inch feels dry. Overwatering is the biggest mistake here—rotting rhizomes won’t produce roots. I like to use a moisture meter for accuracy, but if you don’t have one, stick your finger in the soil: it should feel like a wrung-out sponge.
After 4-6 weeks, gently tug on the leaf fans. If you feel resistance, roots have formed! Once you see 1-2 inches of new roots, it’s time to transplant. This is the moment you’ve been waiting for—your new irises are ready to call their own home.
☀️ Step 5: Transplant and Establish New Plants
Dig holes in your garden bed that are shallow but wide—iris rhizomes need room to spread horizontally. Plant each section so the top of the rhizome is just above the soil line. Cover the roots lightly with soil, leaving the leaf fans exposed to sunlight.
Water deeply right after transplanting to help settle the soil, but avoid overwatering for the first 2 weeks. Your new irises will need time to adjust, so keep an eye out for wilting leaves—a sign they’re struggling. Once established, they’ll reward you with vibrant blooms next season.
Tips & tricks for perfect iris propagation
These little-known tricks will help you avoid common pitfalls and maximize your success with iris rhizome layering.
The Selection Factor: When selecting rhizomes in Step 1, look for ones with at least three healthy leaf fans—this gives your new plants the best chance of thriving. I've learned the hard way that smaller rhizomes with fewer leaves often fail to establish properly. Confession: I skipped this step for years and wondered why some divisions never rooted!
Cutting Technique: In Step 2, make your cuts just above a leaf fan's base rather than randomly along the stem. This ensures each section has the energy reserves needed to grow new roots. Use a sharp, sterilized knife to prevent tearing the rhizome—dull blades create jagged edges that heal poorly and invite rot.
Lighting Strategy: For Step 3, if you don't have a north-facing window, a simple LED grow light on a timer (12-14 hours daily) works wonders. I placed mine 6 inches above the tray and noticed roots forming twice as fast compared to dimmer conditions. The key is bright but indirect light—direct sun burns tender new growth before roots have a chance to develop.
Transplanting Timing: In Step 5, wait until you see at least 1-2 inches of white roots before transplanting—this means they're strong enough to handle the shock. I've transplanted too early and lost divisions that would have thrived with just a few more weeks of layering. The roots should feel firm when you gently tug them.
Pro Tips for Propagating Iris Plants
- These little-known tricks will help you avoid common pitfalls and maximize your success with iris rhizome layering.
- The Selection Factor: When selecting rhizomes in Step 1, look for ones with at least three healthy leaf fans—this giv...
- Cutting Technique: In Step 2, make your cuts just above a leaf fan's base rather than randomly along the stem. This e...
Frequently asked questions
Got questions about propagating iris plants?
You’re not alone—gardeners often wonder about timing, tools, and tricks to ensure success. Here are answers to the most common queries to help you grow those stunning blooms with confidence!
When is the best time to propagate iris plants?
The ideal time is late summer to early fall (August–September). This gives rhizomes time to establish roots before winter. Avoid spring propagation, as new growth may not harden off before cold weather. For tropical irises, propagate in spring when temperatures are mild.
Do I need to dig up the entire iris clump to propagate?
No! You can propagate without digging up the whole plant using the layering method. Simply bend a healthy rhizome section (with fan leaves) to the ground, cover the crown with soil, and secure it lightly. Roots will form in 4–6 weeks. Dig up the layered section in fall for transplanting.
Why aren’t my iris divisions rooting after planting?
Common culprits include overwatering (rhizomes rot in soggy soil), improper exposure (too much shade), or using diseased rhizomes. Ensure divisions have at least one fan of leaves and plant them with the top half exposed. Water lightly until roots establish (2–3 weeks).
Can I propagate iris from seed instead of rhizomes?
Yes, but it’s slower and less reliable for true-to-type blooms. Seeds take 3–5 years to flower, while rhizome division yields blooms in 1–2 years. If you’re patient, sow seeds in late fall in well-draining soil. For faster results, stick with divisions or layering!
How do I know if my iris rhizome is healthy enough to propagate?
A healthy rhizome should be firm, plump, and free of soft spots or mold. Look for multiple fans of leaves (3–5) and a thick, white root base. Avoid rhizomes with holes (from iris borers) or shriveled leaves, as they won’t survive propagation.
What’s the best soil mix for newly propagated iris?
Use a fast-draining blend like 50% garden soil + 50% coarse sand or perlite. Avoid heavy clay or peat-heavy mixes, which cause rot. Add a slow-release fertilizer (like 5-10-5) at planting for a nutrient boost. Mulch lightly with gravel (not organic mulch) to prevent moisture buildup.
Wrapping up and next steps
Propagating iris plants through rhizome layering is a rewarding way to multiply your blooms without breaking the bank—or your back! 🌱 By following these simple steps, you’ll soon have a thriving patch of irises ready to burst into color next season. Remember: patience and consistency are key, but the results are worth every bit of effort.
Now that you’re armed with the know-how, grab your tools and get growing! Start with just a few rhizomes, and before you know it, you’ll be sharing your newfound propagation skills—and maybe even cuttings—with fellow gardeners. Happy digging! 🌸