Container Gardens
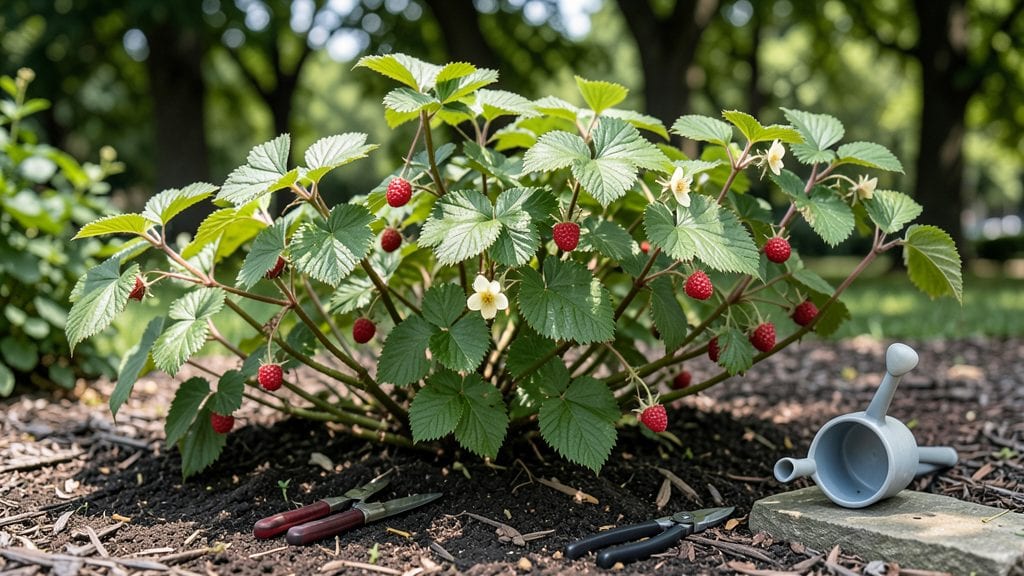
Those juicy berries you crave? Potted raspberry plants can deliver them right to your balcony or patio—no sprawling garden required! 🌱 I used to think raspberries needed a big garden, but my first container harvest proved me wrong—they thrive in the right setup.
The key is choosing compact varieties and containers that won’t overwhelm your patio or balcony.
You’ll need 5-gallon containers (or larger) with drainage holes, a well-draining soil mix rich in organic matter, and a spot that gets at least 6-8 hours of sun daily.
Summer-bearing varieties like ‘Heritage’ or ‘Boyne’ produce the most fruit in pots, while everbearing types like ‘Caroline’ give two harvests a year. Pruning in late winter keeps plants manageable and boosts next year’s yield.
With proper care, you’ll harvest sweet, plump berries starting in mid-summer and continuing until frost. The plants stay productive for years, and you avoid the pests and diseases that plague in-ground berries. Even in small spaces, you can grow enough for jam, snacks, or sharing with neighbors—no backyard required.
Winter care is simple: move pots to a sheltered spot or wrap them in burlap to protect roots from freezing. In spring, refresh the soil with compost and watch those canes burst with new growth. The first harvest will make you wonder why you waited so long to try this!
📚 In This Guide
- What you need
- Instructions
- Tips and common mistakes
- Wrapping up and next steps
What you need
- ● Potted raspberry plants: 1-3 bare-root or container-grown plants (choose hermoneferous varieties like 'Heritage' or 'Boyne' for easier pollination in pots).
- ● Containers: 1-2 large pots (15-20 gallons each) with drainage holes. Use fabric grow bags or plastic/ceramic pots with a saucer.
- ● Potting mix: 1 bag (2-3 cubic feet) of well-draining, organic mix (e.g., 60% compost, 30% coconut coir, 10% perlite or sand).
- ● Fertilizer: 1 cup balanced organic fertilizer (e.g., 5-5-5 or 10-10-10 NPK).
- ● 1 tbsp Epsom salt (for magnesium, critical for raspberries!).
- ● Mulch: 2-3 inches of straw, wood chips, or shredded leaves to retain moisture.
- ● Support system: 1-2 trellis stakes (6-8 feet tall) or a wire cage for climbing varieties.
- ● Twine or soft ties to secure canes.
- ● Watering supplies: A watering can or hose with a gentle nozzle.
- ○ 1-2 moisture meters (optional but helpful for potted plants).
- ● Pruners: 1 pair of sterilized, sharp pruners (for harvesting and pruning).
- ● Gloves: 1 pair of gardening gloves (raspberries can be thorny!).
- ● Soil tester kit: To check pH (ideal range: 5.5-6.5).
- ● Slow-release fertilizer: 1-2 tablets or spikes for long-term nutrition.
- ● Compost tea: 1 quart (boosts microbial activity in potting mix).
- ● Drip irrigation kit: For automated watering (great for busy gardeners!).
Step-by-step instructions for growing potted raspberry plants
Here's how to keep your raspberries thriving in containers for years of sweet harvests.
🪴 Step 1: Choose and Prepare the Right Containers
Raspberries need room to spread, so go big—aim for at least a 5-gallon container per plant, with 12-18 inches of depth for strong root development. I use fabric grow bags because they allow excess water to drain while keeping roots aerated. Make sure each pot has multiple drainage holes—raspberries rot quickly in soggy soil.
Line the bottom with 2-3 inches of gravel to improve drainage and prevent compaction. This layer keeps roots from sitting in water while still allowing them to access moisture. If you're using a decorative pot without drainage, place the grow bag inside and elevate it on pot feet to avoid waterlogging.
🌱 Step 2: Plant Raspberry Canes Correctly
Dig a hole in the center of the pot twice as wide as the root ball and just as deep. Gently loosen the roots of your bare-root raspberry cane before placing it in the hole—this encourages them to spread into the surrounding soil. Fill the hole with moistened potting mix, pressing lightly to eliminate air pockets but not compacting the soil.
Leave the crown (where stems meet roots) just 1 inch below the soil surface—burying it too deep causes rot, while leaving it exposed leads to weak growth. Water deeply right after planting to settle the soil and remove any air gaps. You'll know it's right when the soil feels firm but still slightly springy.
☀️ Step 3: Position for Sun and Support
Raspberries crave full sun (6-8 hours daily)—place your pots where they’ll get the most light, even if it means moving them seasonally. A south-facing spot works best, but if you only have partial sun, choose a primocane-bearing variety like 'Heritage' or 'Boyne,' which produce fruit even with less light.
Install a trellis or sturdy stakes immediately after planting to support canes as they grow. I use T-posts with wire trellising because they’re simple to install and last years. Train the main stems along the trellis as they grow—this prevents flopping and makes harvesting easier. You’ll see new canes emerge from the base in 4-6 weeks, and these will need support too.
💧 Step 4: Water and Fertilize for Maximum Fruit
Keep the soil consistently moist but never soggy—raspberries need 1-1.5 inches of water weekly, more in hot weather. Water at the base of the plant in the morning to reduce evaporation and fungal risks. You’ll know it’s time to water when the top 2 inches of soil feel dry to the touch.
Feed your plants every 4-6 weeks with a balanced fertilizer (10-10-10) during the growing season. I mix in 1 tablespoon per pot at each feeding to avoid overloading roots. Stop fertilizing in late summer to encourage dormancy and prepare for winter. Mulch with 2-3 inches of straw to retain moisture and regulate soil temperature.
✂️ Step 5: Prune and Winterize for Next Year
Prune floricanes (last year’s canes that bore fruit) to the ground in early spring—they won’t produce again. Cut back primocanes (this year’s canes) to 3-4 buds from the base to encourage bushier growth. Remove any weak, diseased, or crossing canes to improve airflow and reduce pests.
Before winter, move pots to a protected location (like a garage or against a north-facing wall) if temperatures drop below 10°F. Wrap the container in burlap or frost cloth to shield roots from freezing. In milder climates, simply add 4-6 inches of mulch and reduce watering to let the plant enter dormancy naturally. You’ll see fresh growth return in early spring, signaling it’s time to resume care.
Tips & tricks for perfect potted raspberry plants
Growing raspberries in containers takes a little extra care—but these tricks will help you avoid common pitfalls and keep your plants thriving for years.
Container Size Matters: That 5-gallon minimum isn't just a suggestion—raspberry roots spread aggressively, and cramped containers lead to stunted growth. I've seen plants in 3-gallon pots struggle to produce fruit after just two seasons. If you're growing multiple canes, consider using a larger container or separate pots for each plant. The extra space gives roots room to establish, which translates to bigger harvests. Remember, those 12-18 inches of depth are crucial for root development!
Drainage is Non-Negotiable: I can't stress this enough—the 2-3 inches of gravel at the bottom isn't just about drainage, it's about preventing root rot. If your decorative pot doesn't have drainage holes, create a false bottom using a plastic tray with holes drilled in it. This gives you the aesthetic you want while still allowing water to escape. And always check for water pooling after watering—if it sits for more than 15 minutes, your drainage system needs improvement.
Sunlight Strategy: Those 6-8 hours of daily sun are essential, but don't assume your balcony gets enough light just because it faces south. Use a light meter app to check actual sunlight hours—you might be surprised. If you're short on sun, opt for primocane varieties like 'Heritage' that produce fruit even with partial shade. And remember, containers heat up faster than ground soil, so afternoon shade can actually help prevent sunburn on leaves.
Winter Protection Payoff: When temperatures drop below 10°F, your winter prep makes all the difference. I've seen plants survive winters with just mulch in milder zones, but in colder climates, that burlap wrap can mean the difference between a dead plant and one that comes back stronger than ever. For extra insurance, move pots closer to the house or garage walls where they'll benefit from reflected warmth. The effort pays off when you see fresh growth in early spring!
Pro Tips for Potted Raspberry Plants
- Growing raspberries in containers takes a little extra care—but these tricks will help you avoid common pitfalls and ...
- Container Size Matters: That 5-gallon minimum isn't just a suggestion—raspberry roots spread aggressively, and crampe...
- Drainage is Non-Negotiable: I can't stress this enough—the 2-3 inches of gravel at the bottom isn't just about draina...
Frequently asked questions
Got questions about growing potted raspberry plants? You’re not alone! Whether you’re a beginner or a seasoned container gardener, these answers will help you navigate the quirks of raspberries in pots. Let’s dive in:
Can potted raspberry plants produce fruit every year?
Yes! With proper care, potted raspberries can fruit reliably for years. Summer-bearing varieties (like ‘Heritage’ or ‘Boyne’) produce once per season, while everbearing types (like ‘Caroline’) may yield two harvests. Key factors: sunlight (6+ hours/day), consistent watering, and winter protection (move pots to a sheltered spot or use frost cloths).
When is the best time to plant raspberries in pots?
Plant bare-root raspberries in early spring (as soon as soil is workable) or container-grown plants in late spring/early summer to avoid transplant shock. If starting from seeds, sow indoors 8–12 weeks before your last frost date. Pro tip: Use well-draining soil mix (60% potting soil, 30% compost, 10% perlite) to prevent root rot.
How do I keep my potted raspberries from getting too large?
Raspberries thrive in 5-gallon+ pots, but they will grow vigorously. Prune canes in early spring (remove dead/weak canes) and after harvest (cut back fruited canes to the ground for summer-bearing types). For everbearing varieties, trim lightly to encourage bushiness. Rotate pots occasionally to prevent lopsided growth.
What pests or diseases should I watch for in potted raspberries?
Common issues include:
- Spider mites: Tiny red pests causing yellowing leaves. Solution: Spray with water or neem oil weekly.
- Cane blight: Gray mold on canes. Prevent with good airflow and fungicide (copper-based) if needed.
- Root rot: Overwatering = mushy roots. Fix: Ensure pots have drainage holes and water only when topsoil is dry.
Do potted raspberries need winter care?
Raspberry canes are hardy but vulnerable to cold. In zones 6–9, move pots to an unheated garage or wrap in burlap. For zones 4–5, bury pots in soil (leave rim exposed) or use straw mulch (12+ inches thick). Pro tip: Water pots before winter to prevent drying—even in cold months!
Wrapping up and next steps
Growing potted raspberry plants is a rewarding way to enjoy fresh, sweet berries—even in limited spaces! With the right container, soil, and care, you’ll harvest vibrant fruit year-round. Whether you’re a beginner or a seasoned gardener, this method proves that big flavors don’t need big yards.
Ready to dive in? Pick your spot, grab your supplies, and start planting! Your future raspberry treats are just a few steps away. 🌱✨