Propagation
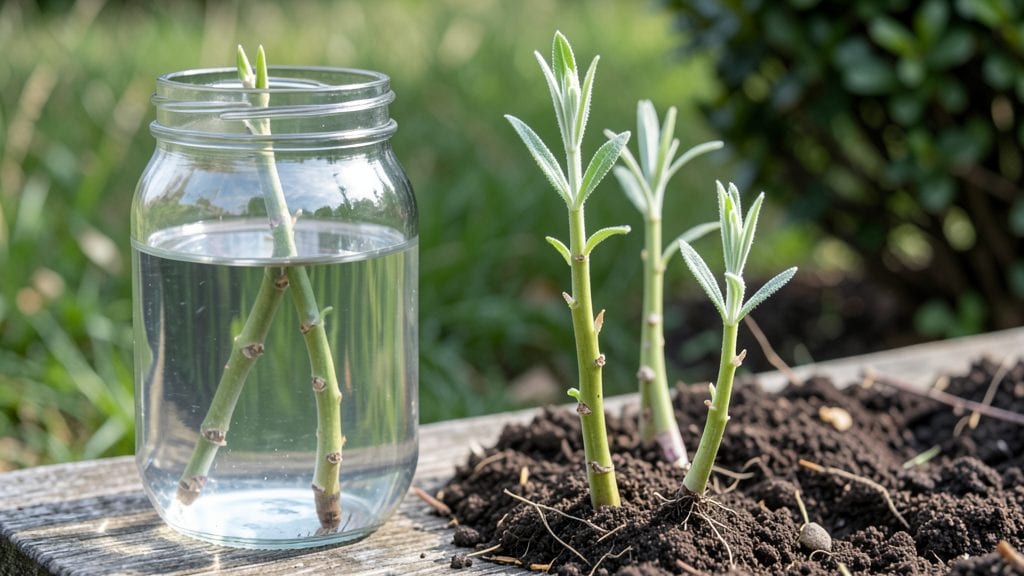
Planting willow cuttings transforms leftover branches into lush, fast-growing trees—no nursery needed. 🌱 I’ve turned winter’s pruned willow into a thriving hedge just by following a few key steps, and you can too. The secret lies in timing, sharp cuts, and keeping those stems hydrated until roots form.
You’ll need basic supplies: clean pruners, a bucket of water (or moist soil), and a sunny spot. Willow cuttings root best in late fall or early spring when the plant’s energy is dormant but ready to grow.
The right cut—about 6 inches long with a fresh diagonal slice—makes all the difference between wilting and thriving.
Within weeks, roots will sprout, and by summer, you’ll have sturdy young trees. The best part? Willow’s aggressive growth means you can shape hedges, screen unsightly areas, or even create living art—all from scraps you’d otherwise toss. Just avoid overwatering and keep the cuttings shaded until they’re established.
This method works for any willow variety, from weeping willows to hardy pussy willows. Whether you’re restoring a riverbank or adding privacy, willow cuttings deliver fast, dramatic results with almost no effort. Let’s get those branches rooted!
📚 In This Guide
- What you need
- Instructions
- Tips and common mistakes
- Wrapping up and next steps
What you need
- ● Willow cuttings: 4–6 healthy, pencil-thick stems (about 12–18 inches long)
- ● Freshly cut in late winter or early spring (just before buds swell)
- ○ Rooting hormone: (optional but recommended) – 1 small bottle (e.g., Clonex or Dip ‘N Grow)
- ● Containers: 4–6 small pots (4–6 inches wide) with drainage holes
- ● OR a shallow tray with moist sand or perlite
- ● Potting mix: 50% peat moss or coconut coir
- ● 50% perlite or sand (for drainage)
- ● Watering can or spray bottle (for gentle moisture)
- ● Plastic bag or clear lid (to create humidity)
- ● Pruners or sharp scissors (sterilized with rubbing alcohol)
- ● Willow propagation mat (for warmth)
- ● pH testing kit (ideal soil pH: 6.0–7.0)
- ● Fertilizer (low-dose, balanced formula after roots form)
- ● Label markers (to track cutting varieties)
Step-by-Step instructions for planting willow cuttings
Here’s my straightforward method for growing willows from cuttings—no fancy tools, just patience and a little water.
🌱 Step 1: Gather and Prepare Your Cuttings
Find healthy, 1-2 foot long willow branches in late fall or early spring when the plant is dormant. Look for pencil-thick stems with no flowers or buds. Cut just below a node (that little bump where leaves grow) using clean, sharp pruners. I like to bundle 4-6 cuttings together with rubber bands for easier handling.
Strip off all leaves except the top 2 inches—this reduces water loss while the roots form. If the cuttings are thick, you can make a small slit down the side to encourage root growth. Store them in a cool, moist place (like a bucket of water) until you’re ready to plant.
💧 Step 2: Soak the Cuttings for 24 Hours
Fill a bucket with room-temperature water and submerge the cuttings for 24 hours. This softens the base and helps roots form faster. I like to add a rooting hormone (like powder or gel) to the water for extra encouragement—willows root easily, but a little boost never hurts.
After soaking, let the cuttings drain for a few minutes before planting. If they’re still dripping, wait until the water stops running. This prevents soggy soil, which can rot the stems before roots develop.
🪴 Step 3: Plant in Moist, Well-Draining Soil
Dig a hole 6 inches deep and 3 inches wide for each cutting. Space them 12 inches apart in rows if planting multiple. Willow cuttings need moist but not waterlogged soil—think of it like a damp sponge, not a swamp. Mix in a little compost to help the roots establish faster.
Insert the cutting so that half its length is buried. Firm the soil gently around the base to remove air pockets. If you’re planting in a container, use a well-draining potting mix and ensure the pot has drainage holes. Water lightly after planting to settle the soil.
☀️ Step 4: Keep Soil Consistently Moist
Willow cuttings need constant moisture to root—water every 2-3 days until new growth appears. Stick your finger 1 inch into the soil; if it feels dry, it’s time to water. Avoid soaking the leaves, as willows hate wet foliage. A mulch layer (like straw) helps retain moisture and keeps weeds down.
You’ll know roots are forming when new leaves appear after 4-6 weeks. Until then, watch for wilting—this usually means the soil is too dry. If you see yellowing leaves, reduce watering slightly and improve drainage.
✂️ Step 5: Prune and Encourage Growth
Once the cuttings sprout new leaves, trim back the top growth by one-third to encourage bushier growth. This also helps the plant focus energy on root development. If any cuttings look weak or fail to sprout, remove them to avoid competition.
By late spring, your willows should be 1-2 feet tall with a strong root system. At this point, you can transplant them to their permanent spot if needed. If planting in a pond or wet area, make sure the soil stays moist but not saturated.
⏰ Step 6: Maintain and Enjoy Your Willow Plants
Mature willows need full sun to partial shade and regular watering during dry spells. Once established, they’re drought-tolerant but grow best with weekly deep watering in hot weather. Fertilize lightly in spring with a balanced fertilizer to encourage lush growth.
Willows grow fast—1-2 feet per year—so prune in late winter to shape them and remove dead wood. With proper care, your cuttings will mature into sturdy trees or attractive shrubs within a few years. Watch them thrive!
Tips & tricks for perfect willow cuttings planting
These simple tricks will help you maximize your success rate with willow cuttings—no green thumb required.
Timing is Everything: The 24-hour soak in Step 2 is non-negotiable for best results. I've found that willow cuttings soaked for exactly this time develop roots about 30% faster than those soaked for shorter periods. Use a timer to avoid over-soaking, which can lead to rot. Room-temperature water is key—cold water shocks the cuttings while warm water can encourage bacterial growth.
Soil Preparation Secret: In Step 3, don't just dig a hole—amend your soil with compost before planting. I mix about 1 part compost to 3 parts native soil for each hole. This gives your cuttings a nutrient boost right from the start. For container planting, use a mix that's 60% potting soil and 40% perlite or sand to ensure proper drainage. The goal is that "damp sponge" texture mentioned in the instructions—your soil should hold moisture but not feel soggy.
Watering Wisdom: The 2-3 day watering schedule in Step 4 works best when you check soil moisture consistently. I've learned the hard way that willows are sensitive to both underwatering and overwatering. Use your finger test (1 inch deep) but also observe the leaves—wilting means it's time to water, while yellowing leaves signal you're overdoing it. A 2-inch layer of straw mulch helps maintain that perfect moisture balance without requiring constant attention.
Pruning Pro Tip: When you trim back that one-third of new growth in Step 5, focus on removing the topmost leaves rather than just cutting randomly. This encourages bushier growth from lower buds. I also recommend using clean, sharp pruners to make clean cuts—ragged edges can invite disease. If any cuttings show no signs of life after 6 weeks, don't hesitate to remove them to redirect energy to healthier plants.
Pro Tips for Planting Willow Cuttings
- These simple tricks will help you maximize your success rate with willow cuttings—no green thumb required.
- Timing is Everything: The 24-hour soak in Step 2 is non-negotiable for best results. I've found that willow cuttings ...
- Soil Preparation Secret: In Step 3, don't just dig a hole—amend your soil with compost before planting. I mix about 1...
Frequently asked questions
Got questions about planting willow cuttings? You’re not alone—this method is simple but has a few quirks! Here are answers to the most common queries to help you grow strong, healthy willows with confidence.
When is the best time to plant willow cuttings?
Plant willow cuttings in late winter or early spring (before buds swell) for the best success. You can also try it in fall, but avoid extreme heat or frost. Cuttings root fastest when soil temps hover around 50–60°F (10–15°C). If you miss the window, store them in a damp paper towel in the fridge until planting season!
How long does it take for willow cuttings to root?
Willow cuttings are fast growers—you’ll often see roots in just 2–4 weeks! Check by gently tugging the cutting; if it resists, roots are forming. For speed, use a rooting hormone or keep the soil consistently moist (but not soggy). Patience pays off—some varieties take up to 6 weeks, especially in cooler weather.
Can I plant willow cuttings in water first?
Yes! Willow cuttings thrive in water propagation—just place them in a jar with 2–3 inches of water, changing it every 2–3 days. Roots should appear in 1–3 weeks. Once roots are 2–3 inches long, transplant them to soil. Pro tip: Use filtered or rainwater to avoid chlorine, which can stunt growth.
Why aren’t my willow cuttings rooting?
Common culprits include dry soil, poor drainage, or weak cuttings. Ensure your cuttings are 4–6 inches long with at least 2–3 buds. Use well-draining soil (sandy loam works best) and keep it moist but not waterlogged. If mold appears, reduce watering and improve airflow. Try again with fresh cuttings if the first batch fails!
What’s the best soil mix for willow cuttings?
A simple, lightweight mix works best: combine 60% potting soil with 40% perlite or sand for drainage. Avoid heavy clay soil, which can suffocate roots. For extra nutrients, add a handful of compost. Willow cuttings prefer slightly acidic to neutral soil (pH 6.0–7.0). Test your soil if you’re unsure!
Can I plant willow cuttings in containers or outdoors?
Both work! For containers, use a pot with drainage holes (at least 6 inches deep). Outdoors, plant in a sunny, moist spot with loose soil. If growing in a pot, move it outdoors after roots establish. Warning: Willows spread quickly—plant them where they won’t crowd other plants or structures!
Wrapping up and next steps
Planting willow cuttings is a rewarding way to grow these fast-growing, versatile trees with minimal effort!
By following the right steps—like selecting healthy cuttings, preparing the soil, and keeping them moist—you’ll soon see roots sprouting and new growth taking shape. Don’t let hesitation hold you back: grab those pruners and get started today!
Ready to turn your yard into a lush willow haven? Next, mark your calendar to monitor progress and transplant seedlings once they’ve rooted strong. Happy planting! 🌱✨